> ## Documentation Index
> Fetch the complete documentation index at: https://docs.peaka.com/llms.txt
> Use this file to discover all available pages before exploring further.
# How to create Peaka REST API catalog with authentication
> Learn how you can create Peaka REST API catalog with authentication
This article explains how you can create Peaka REST API catalog with authentication.
## Creating Peaka REST API catalog with authentication
Follow these simple steps to create Peaka REST API catalog with authentication:
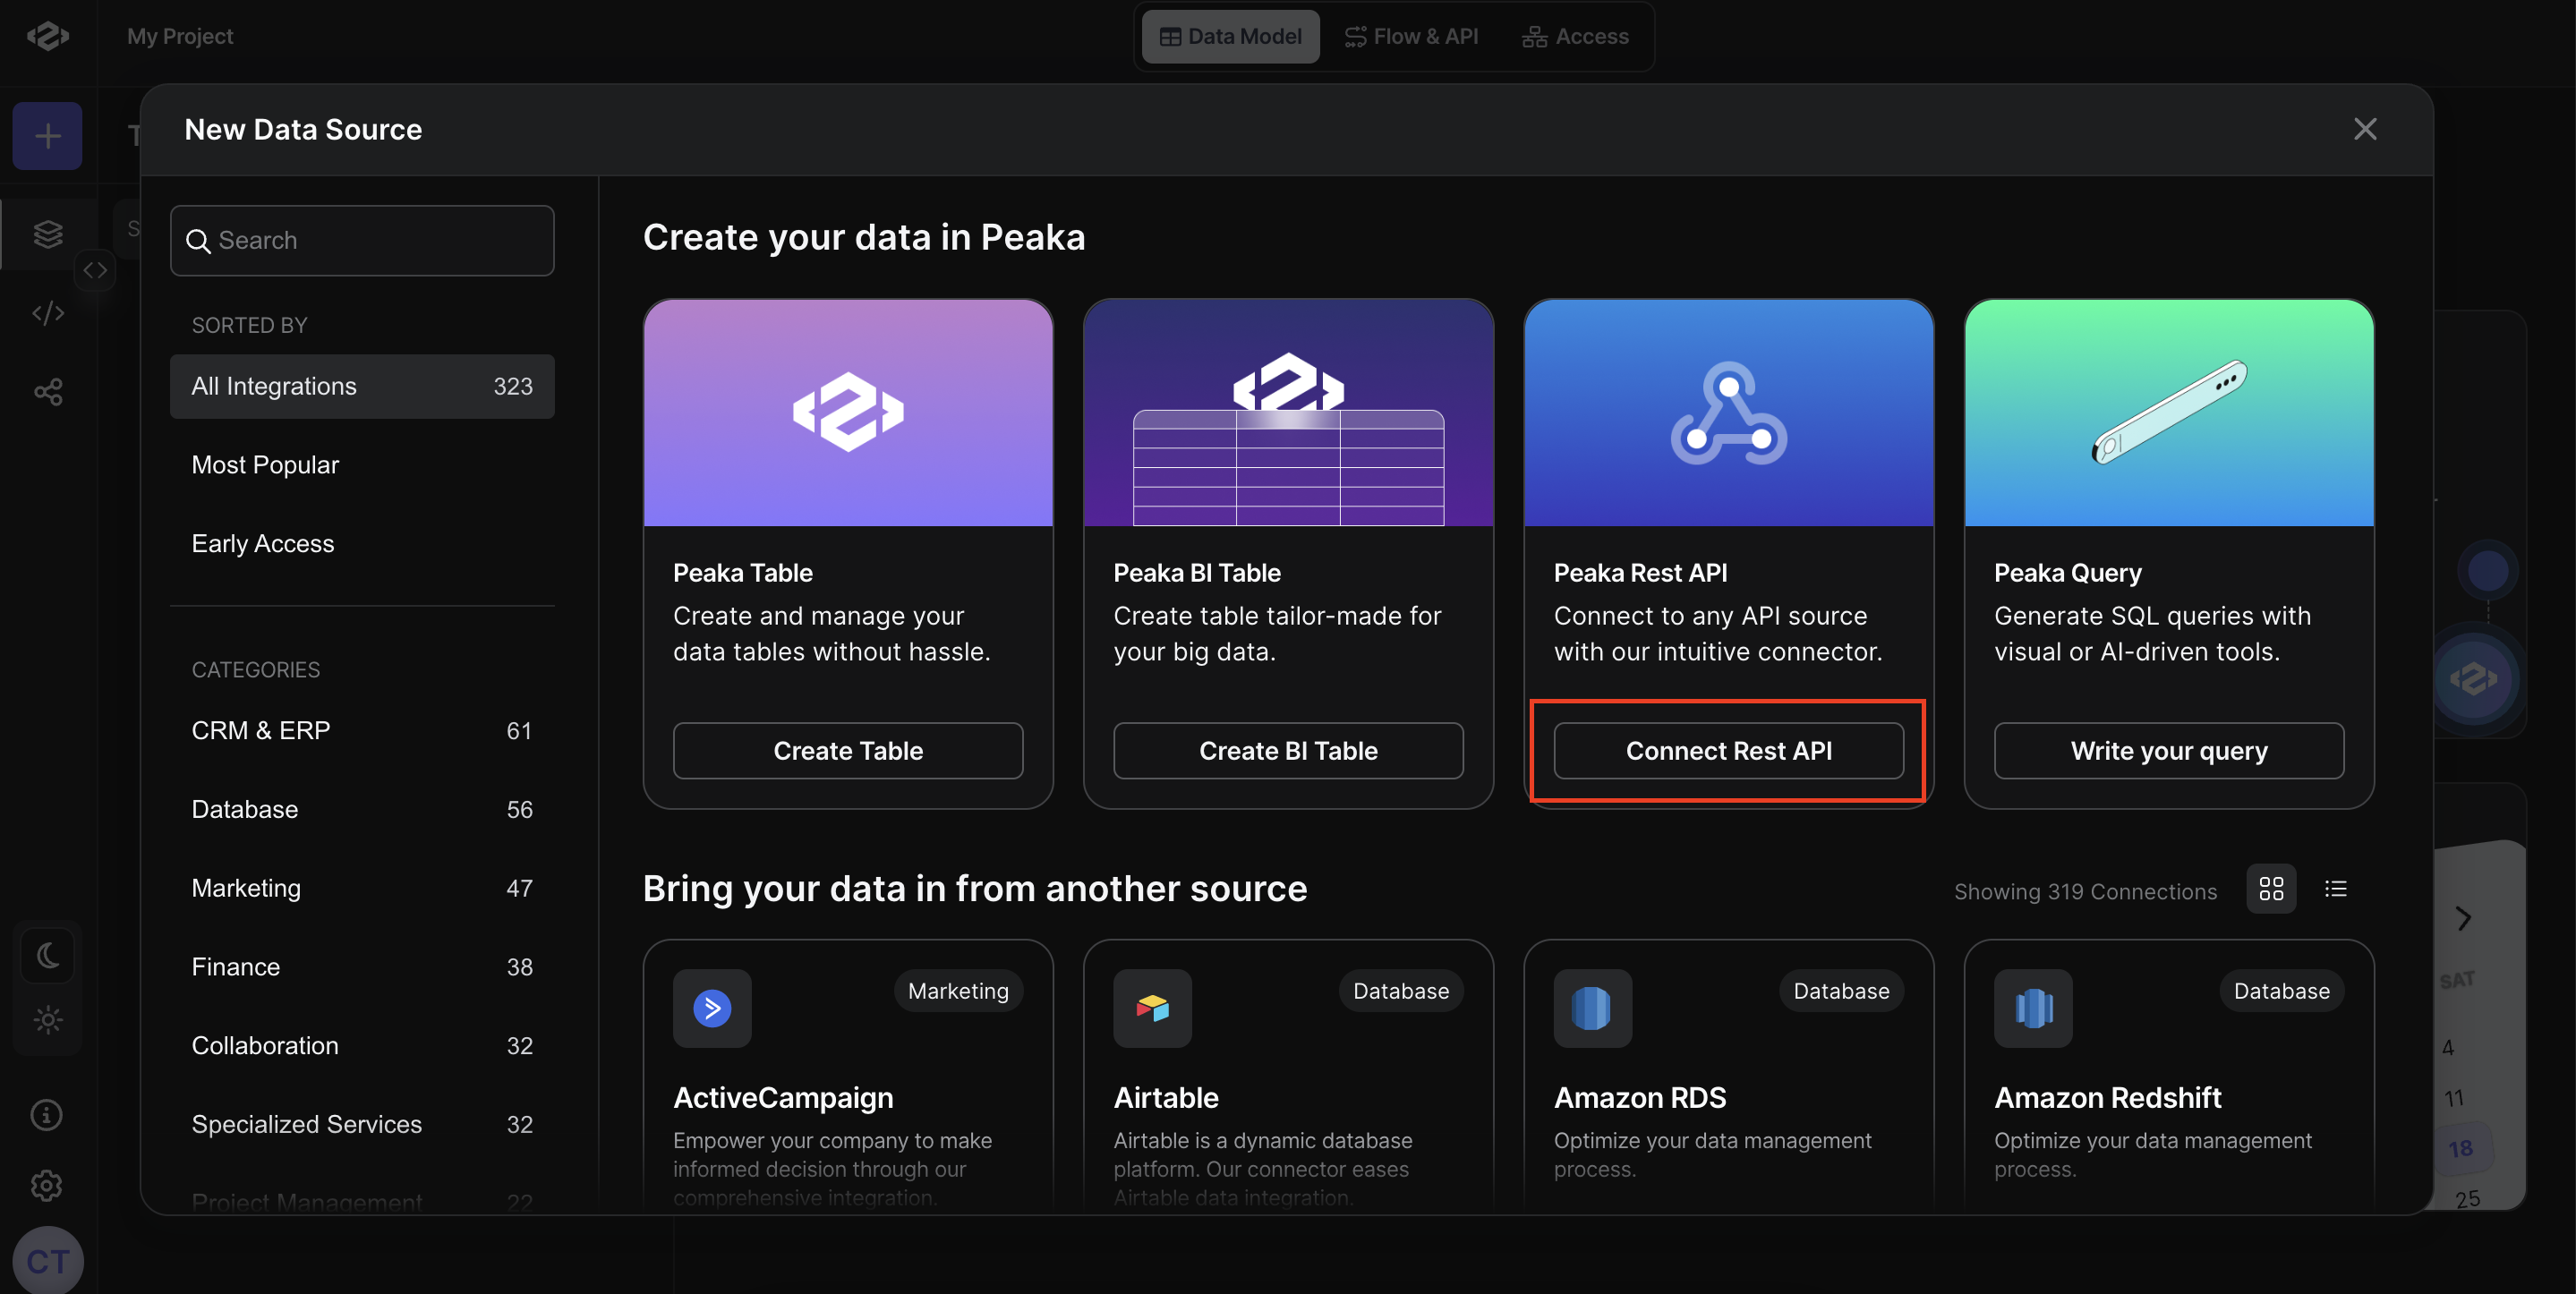
1. **Open New Data Source Modal:**
Click on the "New Data Source" button in the left sidebar and click on "Connect Rest API" button. It will open a modal to create a new Peaka REST API catalog.
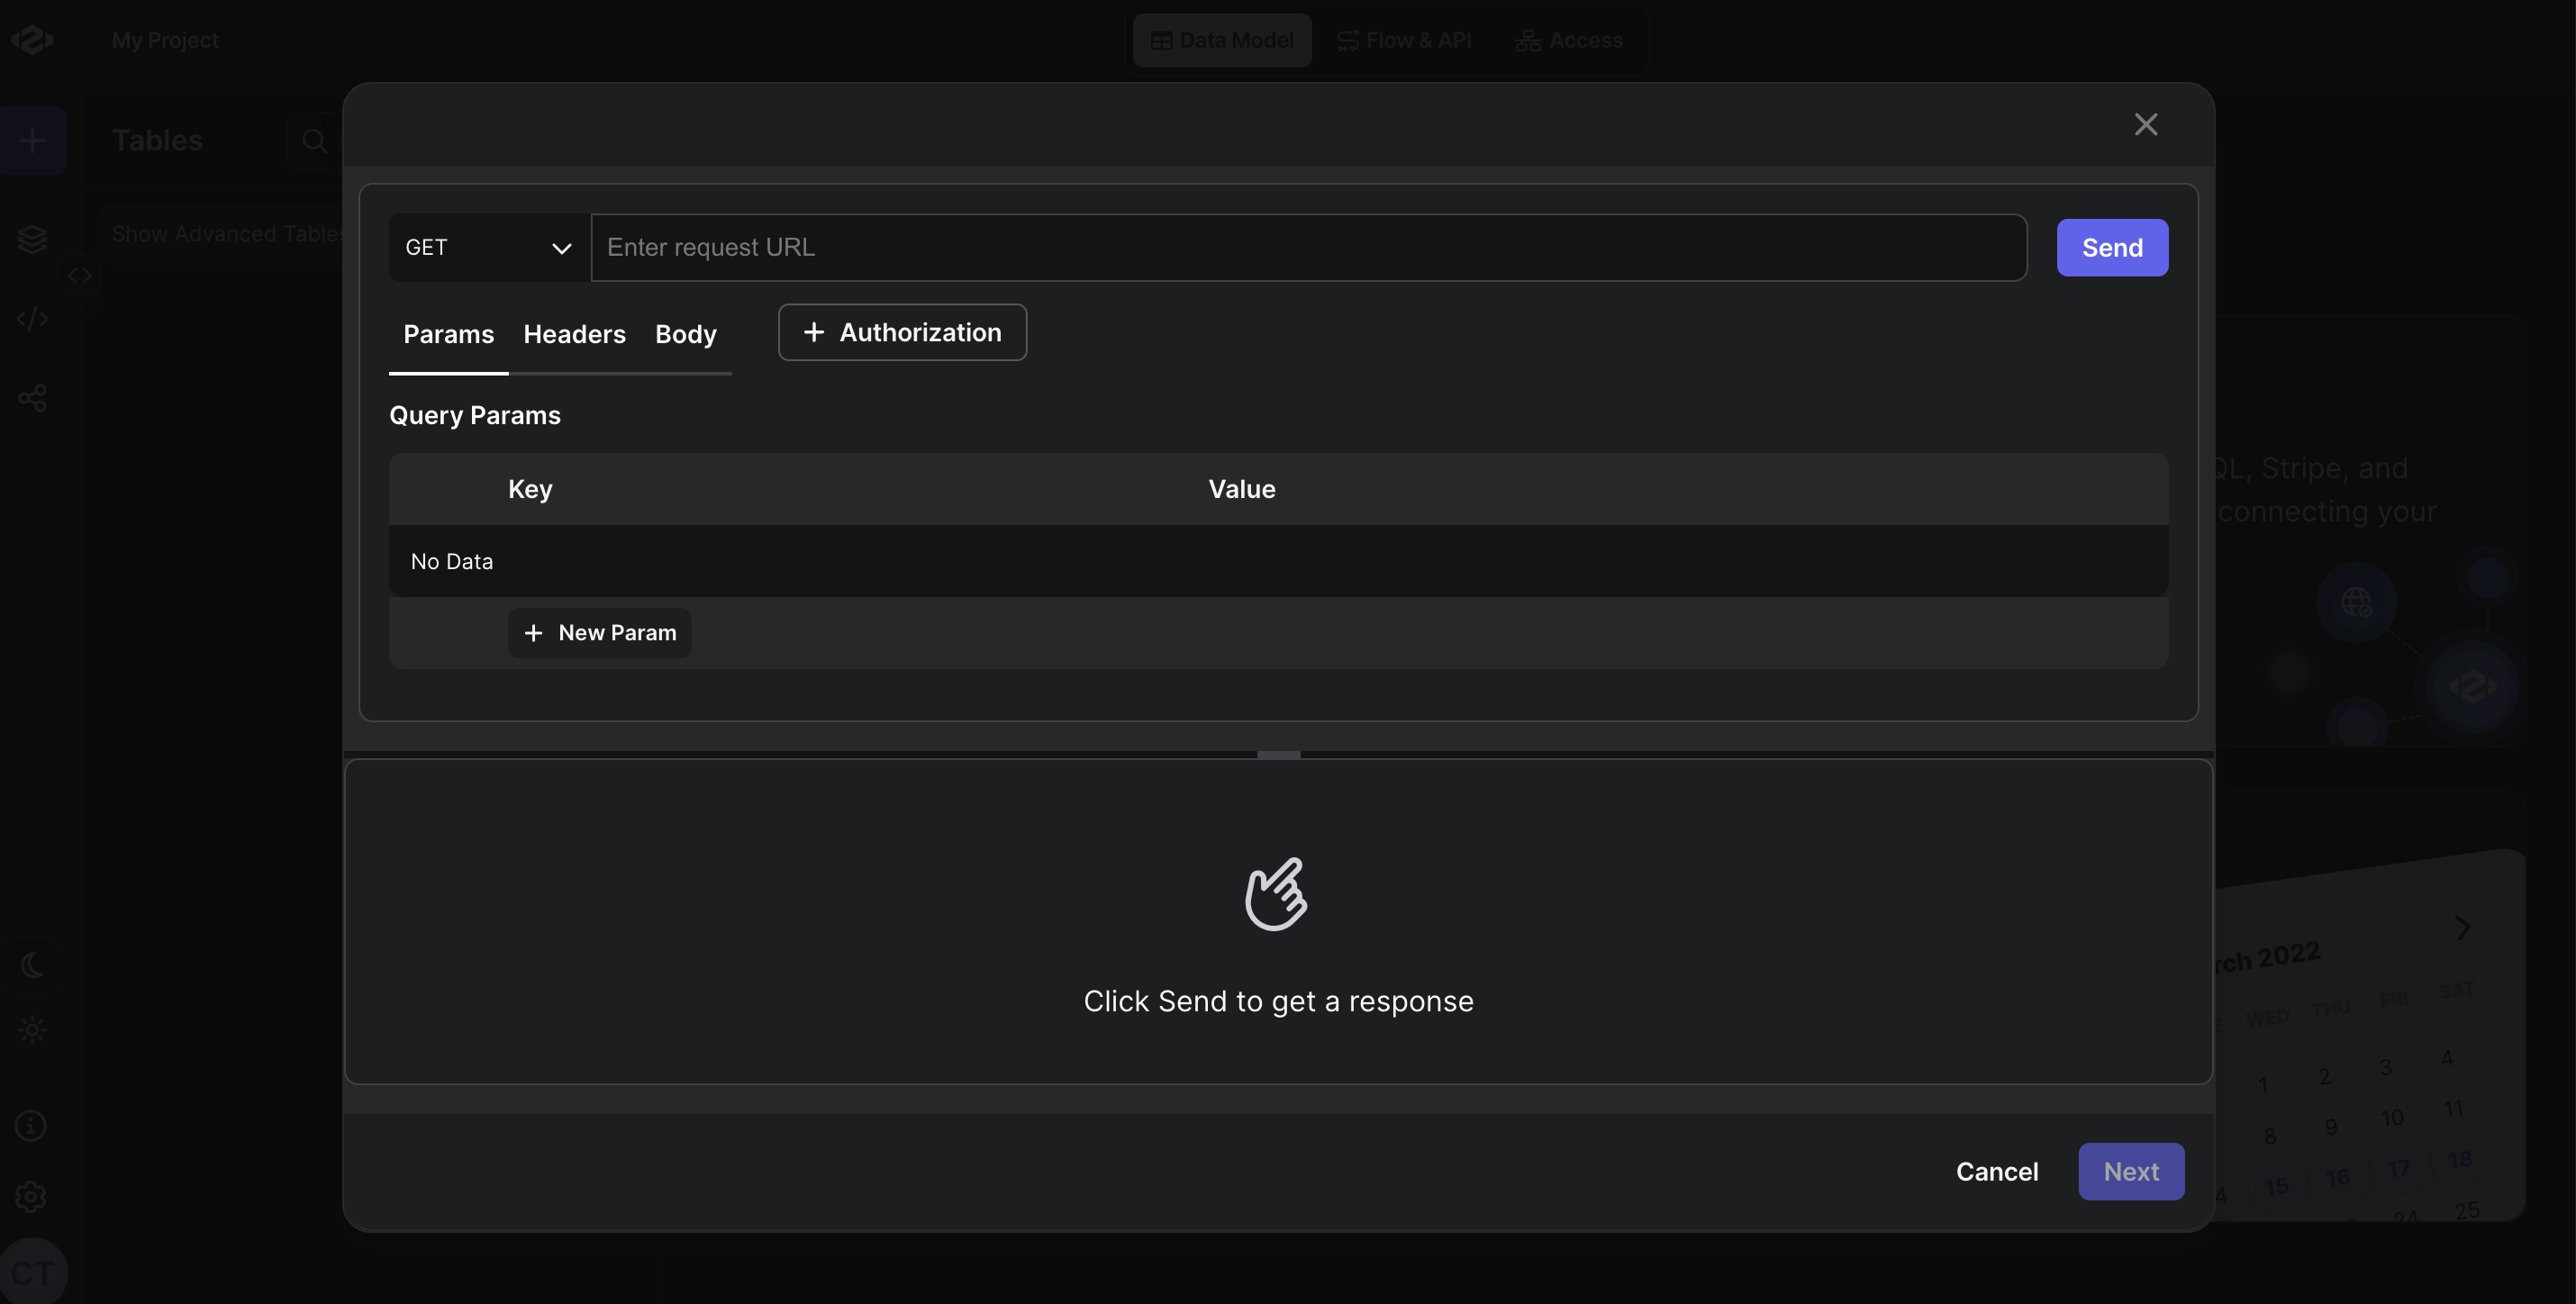
 2. **Enter the API Details:**
Enter the API details such as URL, parameters, headers, body, etc.
2. **Enter the API Details:**
Enter the API details such as URL, parameters, headers, body, etc.
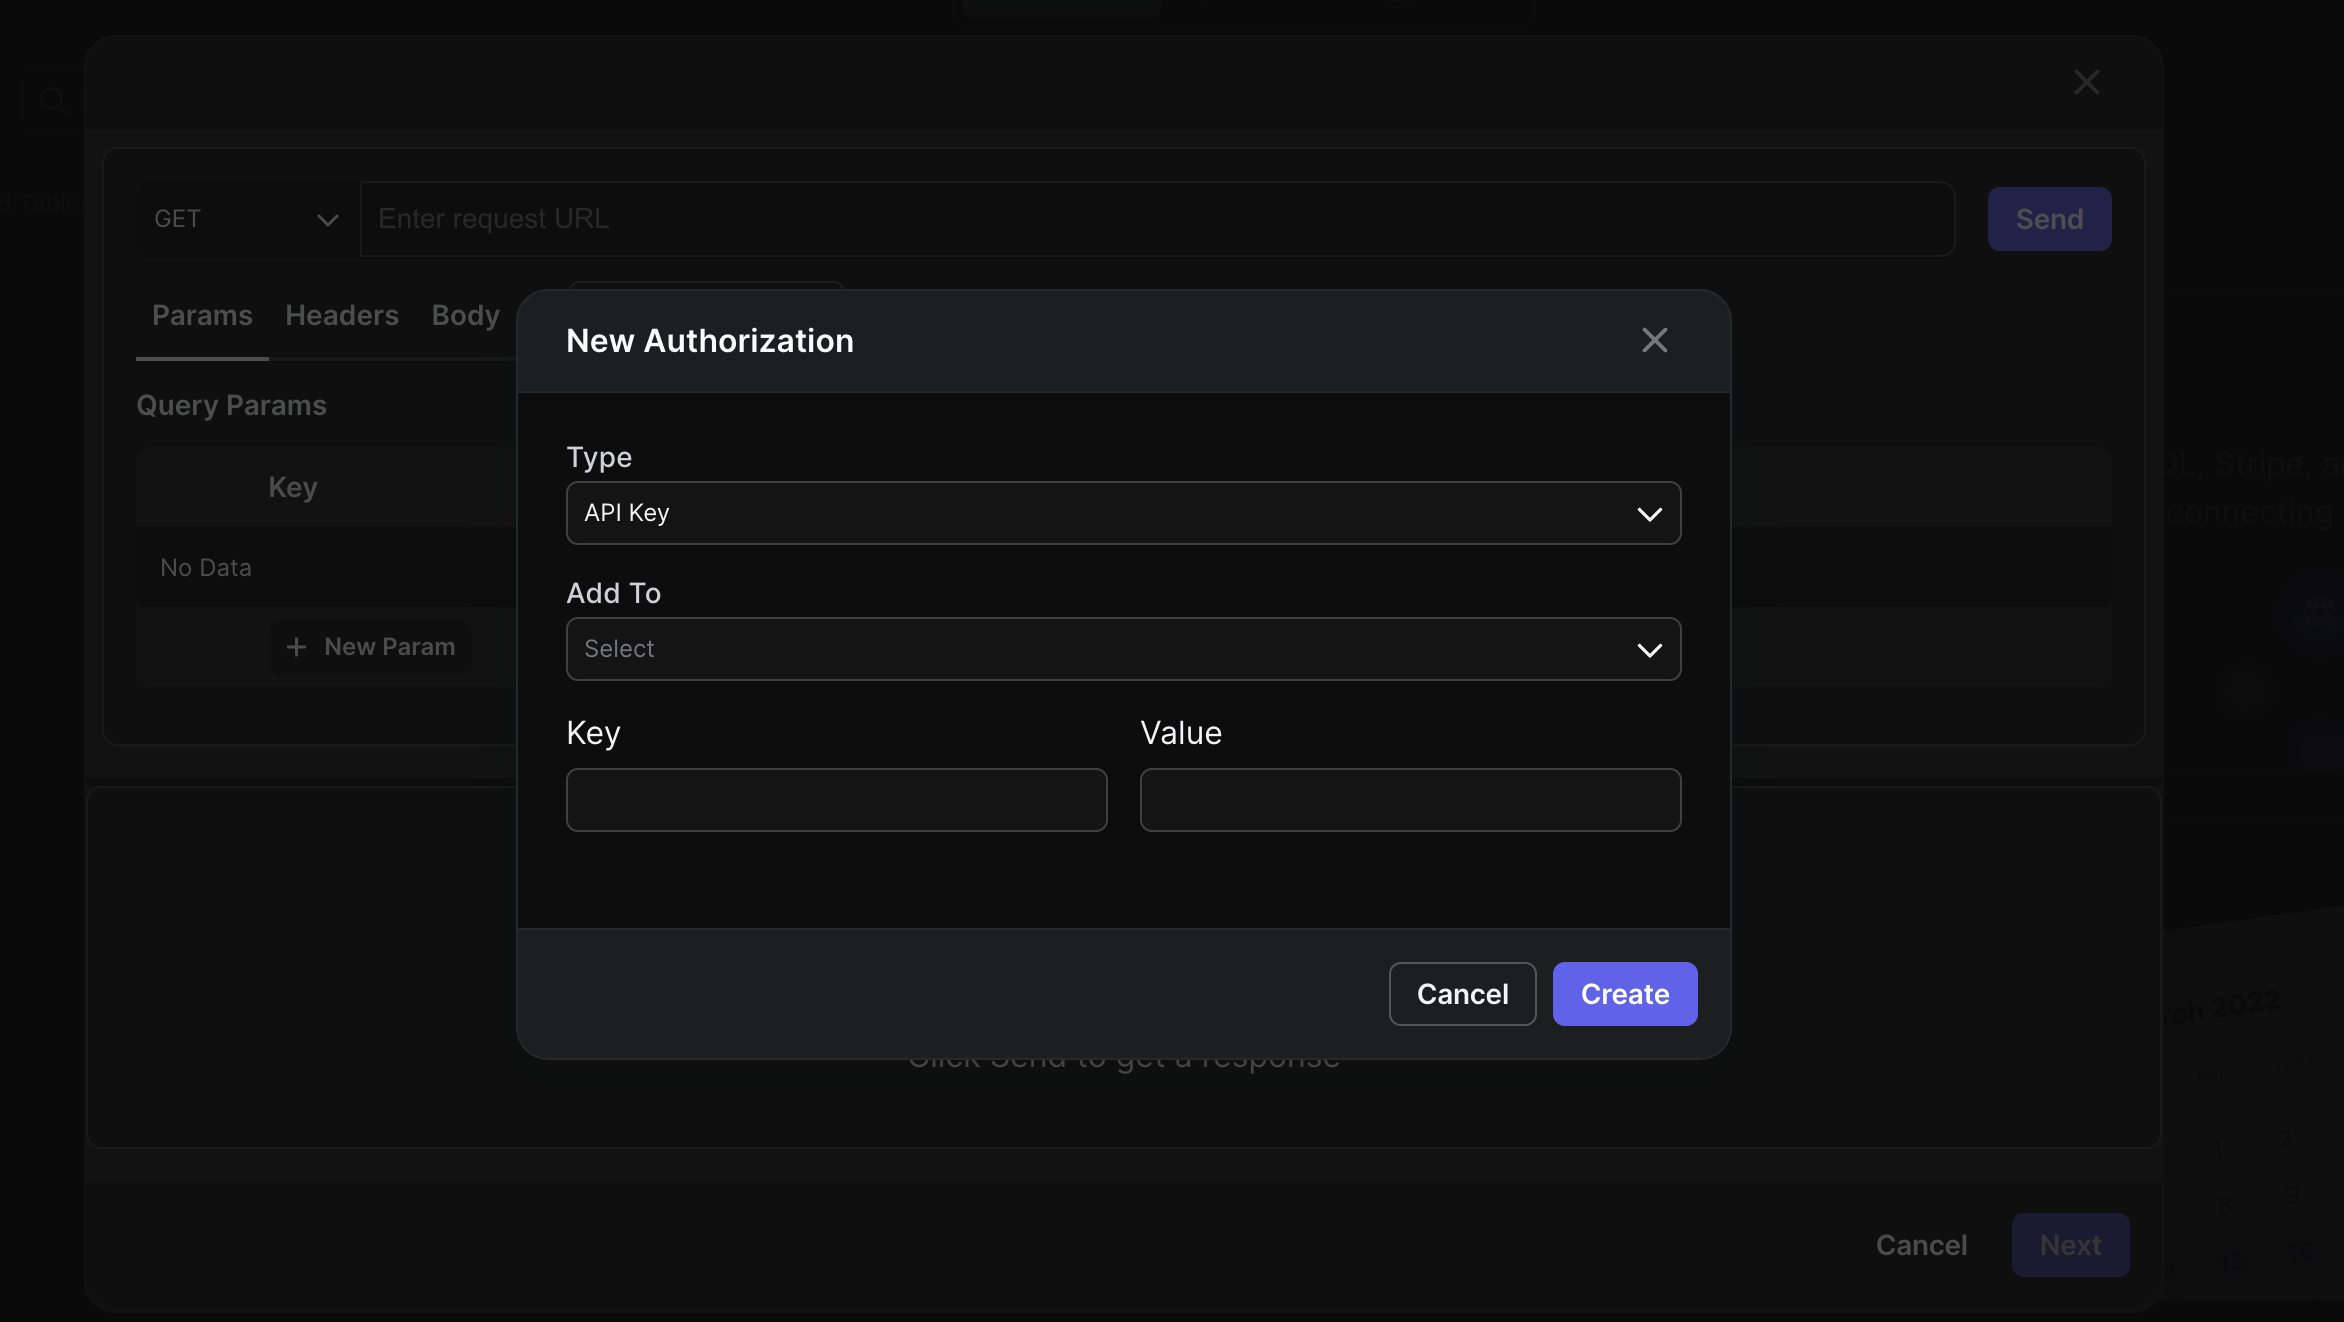
 3. **Add Authentication:**
* To add authentication, click on the "Authentication" and it will open a modal to add authentication.
* Select the authentication type from the dropdown.
* Enter the authentication details such as username, password, token, etc.
* Click on the "Create" button to create the authentication.
3. **Add Authentication:**
* To add authentication, click on the "Authentication" and it will open a modal to add authentication.
* Select the authentication type from the dropdown.
* Enter the authentication details such as username, password, token, etc.
* Click on the "Create" button to create the authentication.
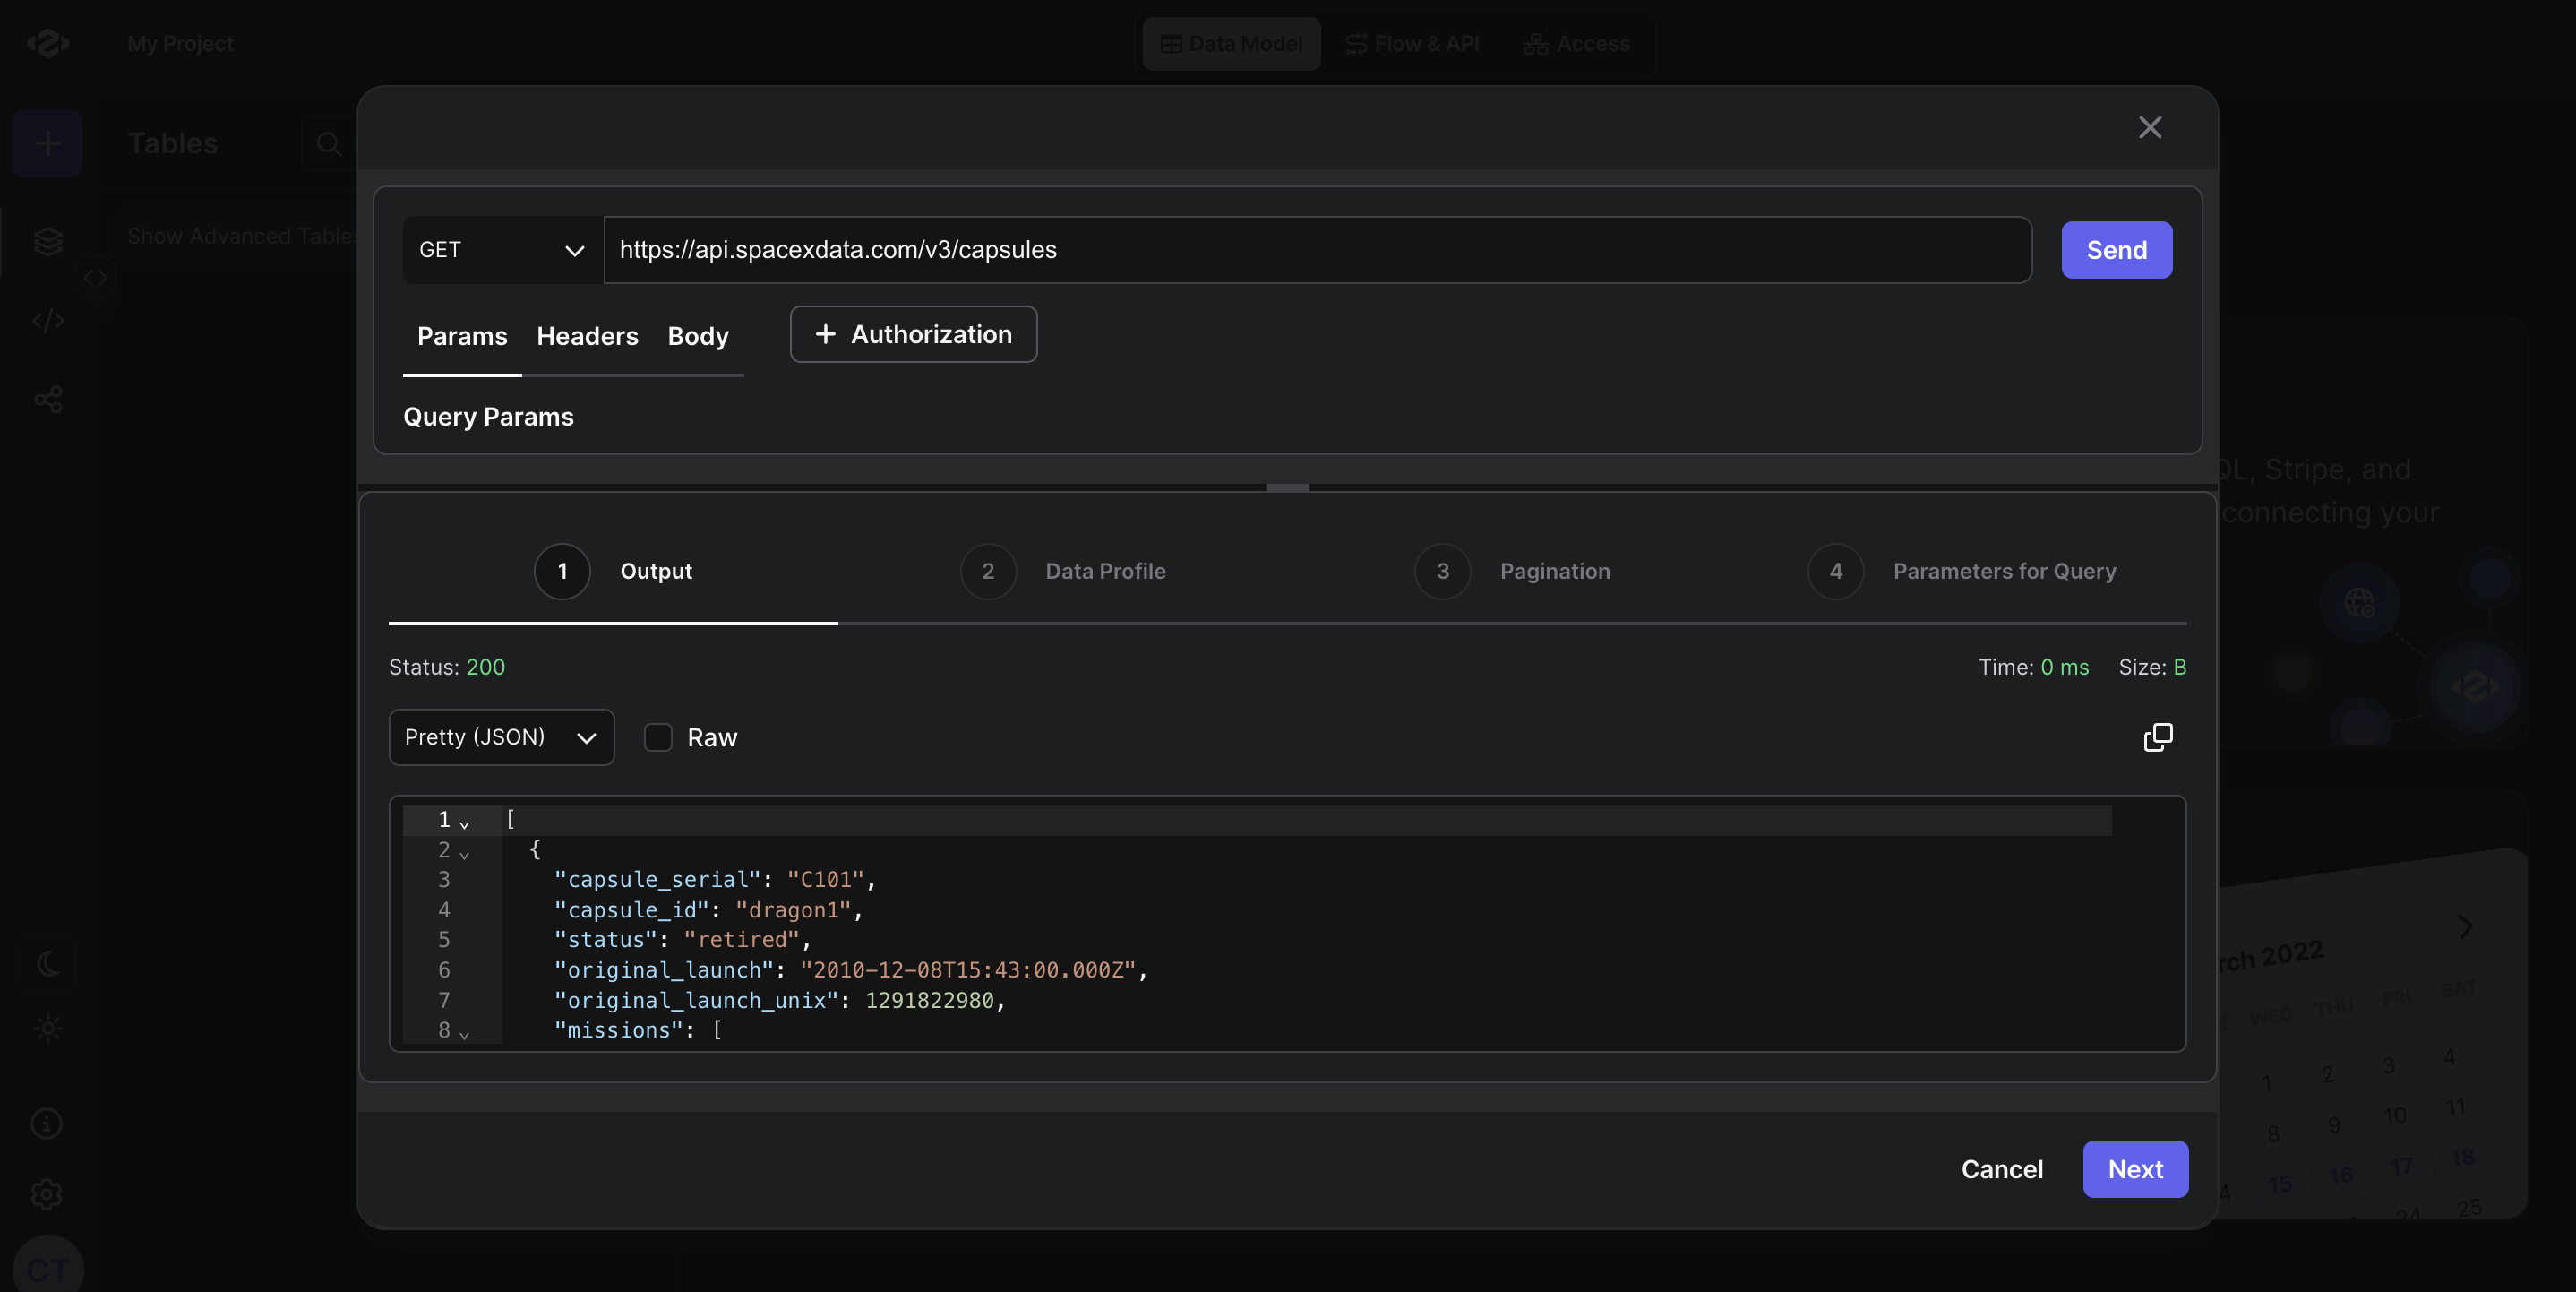
 4. **Run your API:**
Click on the "Send" button to run your API.
5. **View the API Response:**
Check your API response under the "Output" tab.
4. **Run your API:**
Click on the "Send" button to run your API.
5. **View the API Response:**
Check your API response under the "Output" tab.
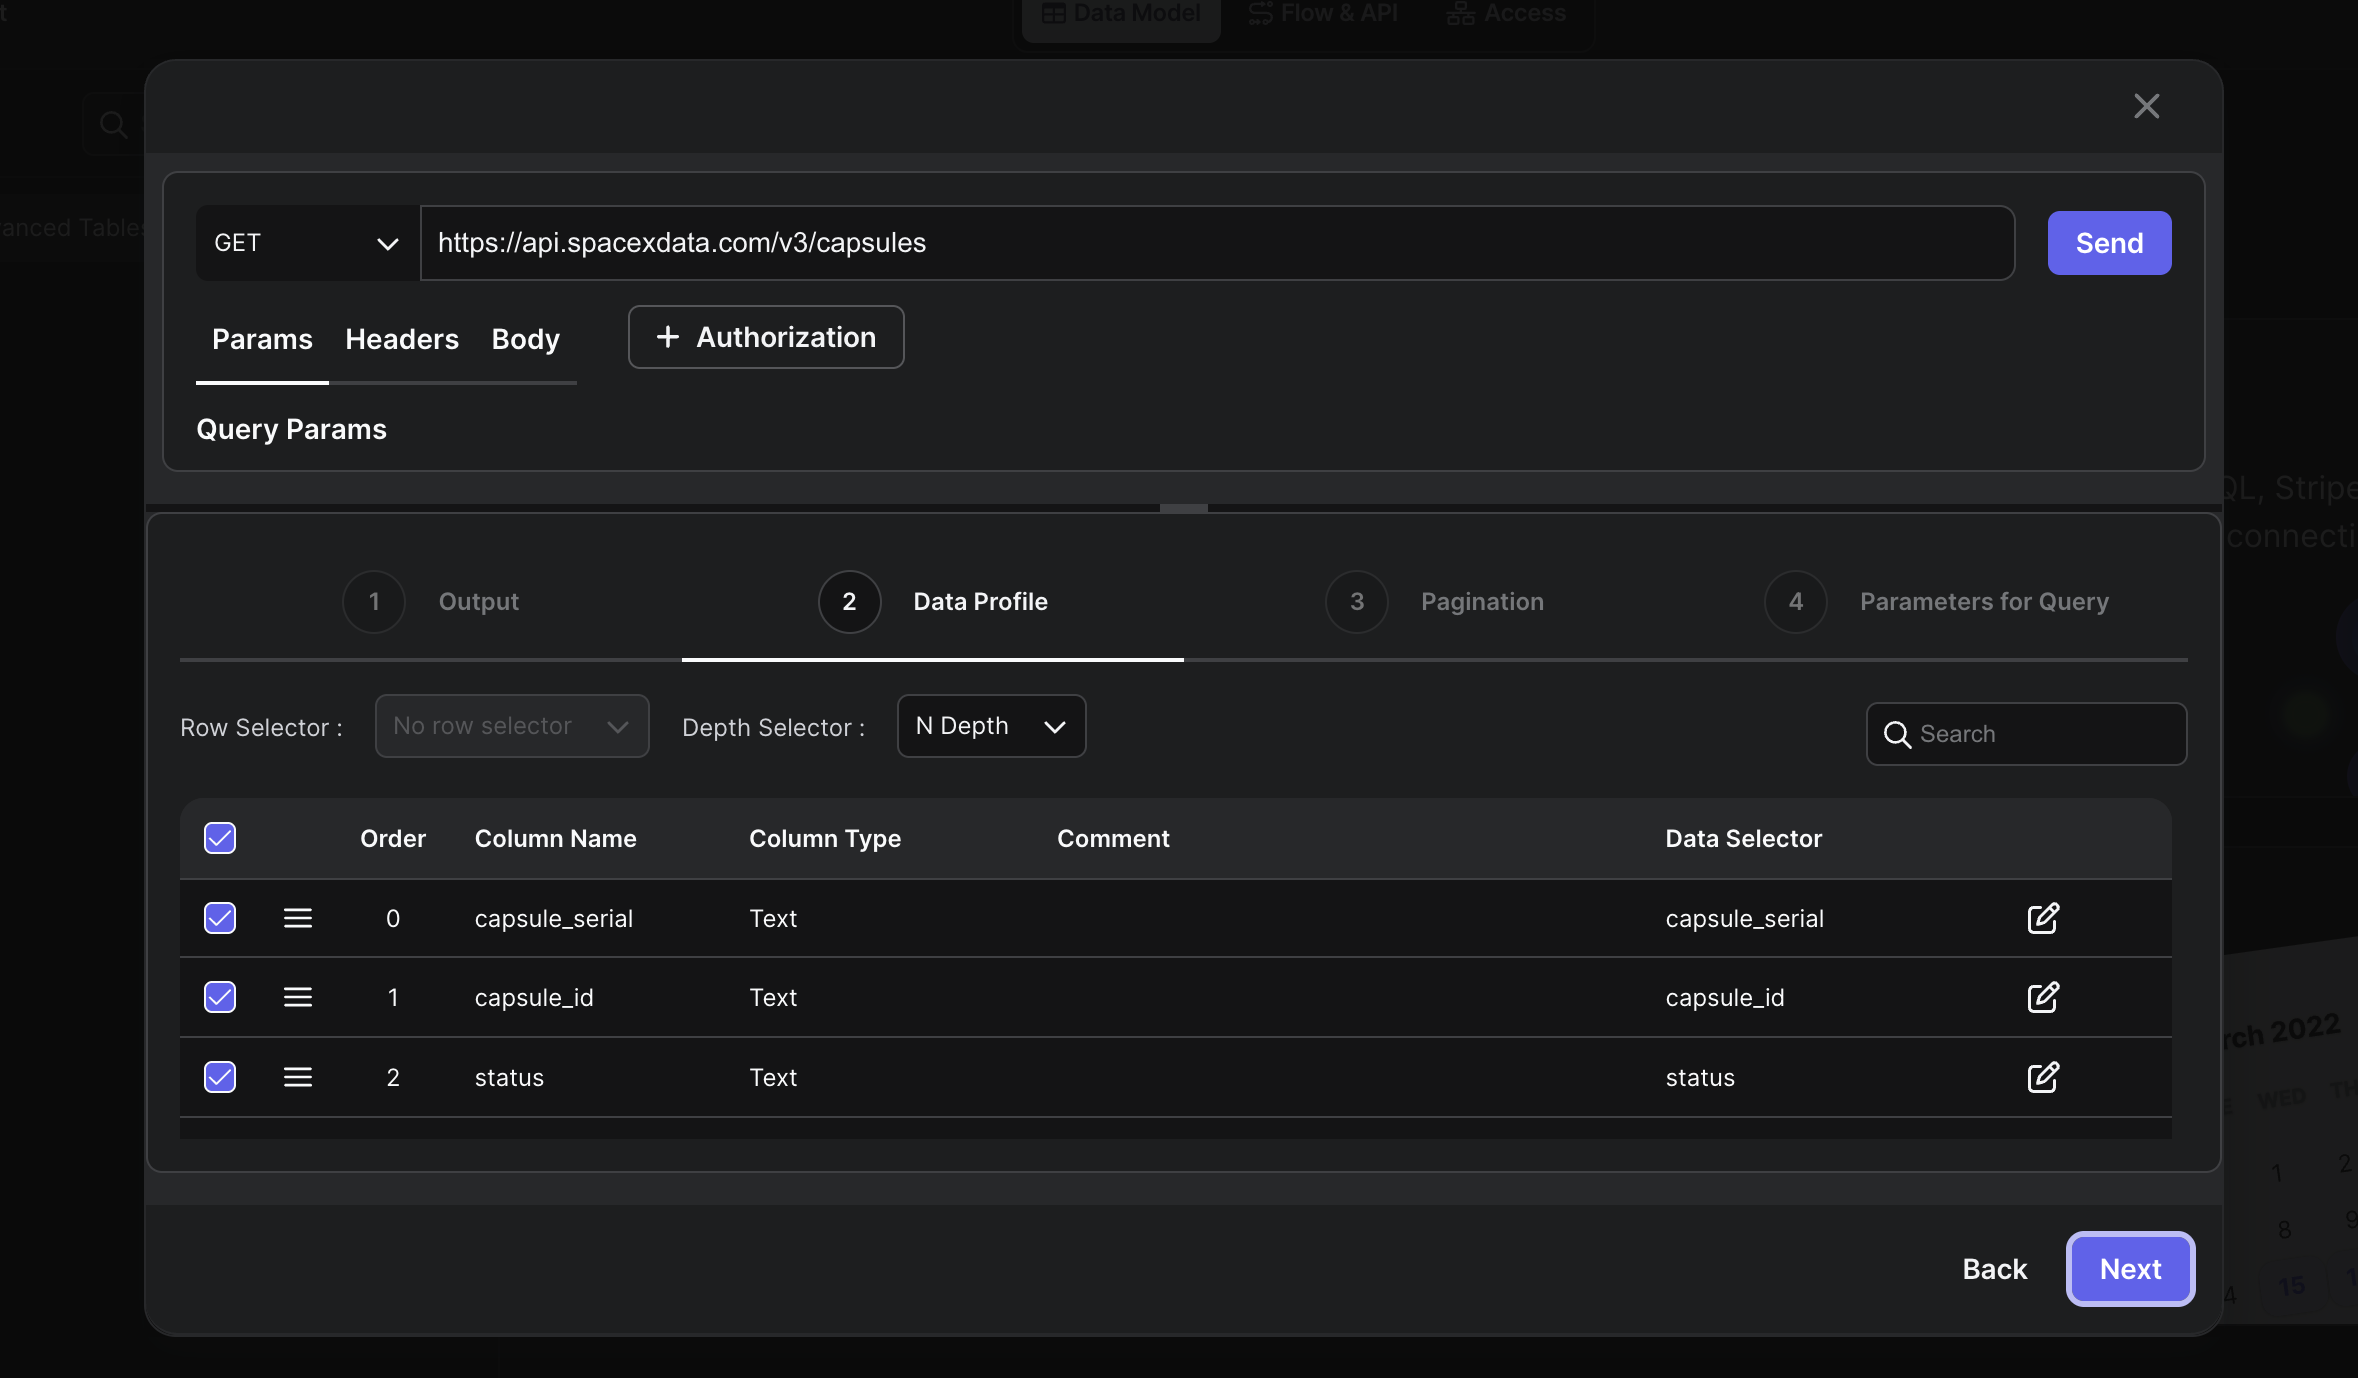
 6. **Update Data Profile:**
* Click on the "Next" button, it will show the data profile of the API response.
* You can update your column names, types, comments, etc.
6. **Update Data Profile:**
* Click on the "Next" button, it will show the data profile of the API response.
* You can update your column names, types, comments, etc.
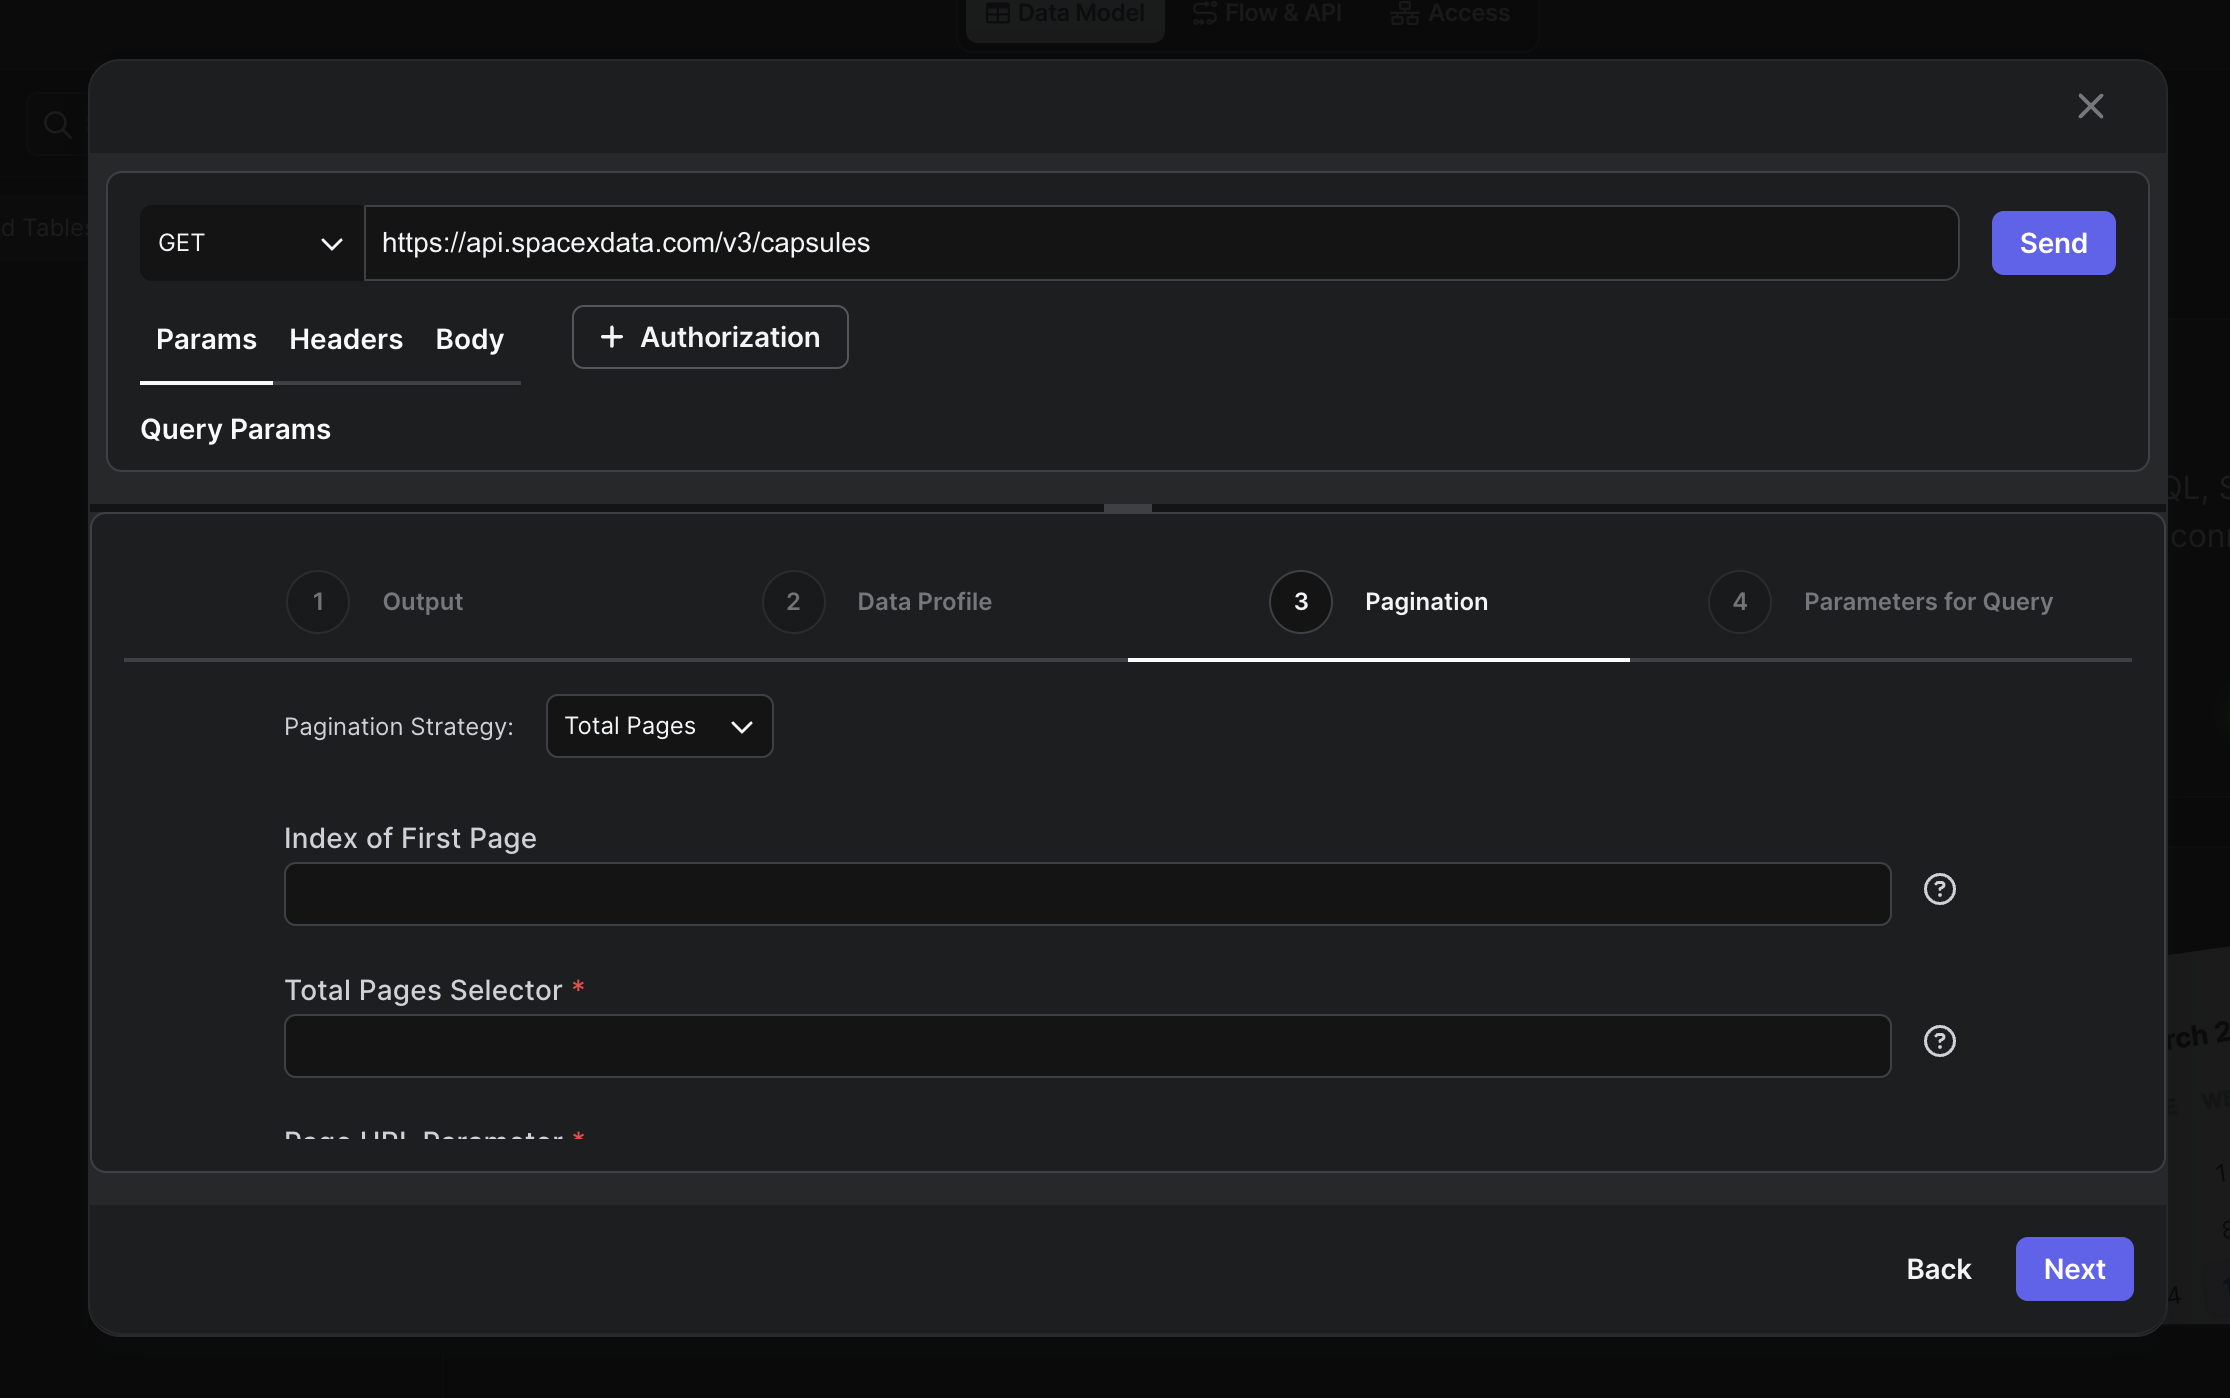
 7. **Update Pagination Strategy:**
* Click on the "Next" button, it will show the pagination strategy of the API response.
* Select your pagination strategy from the dropdown by your API design.
7. **Update Pagination Strategy:**
* Click on the "Next" button, it will show the pagination strategy of the API response.
* Select your pagination strategy from the dropdown by your API design.
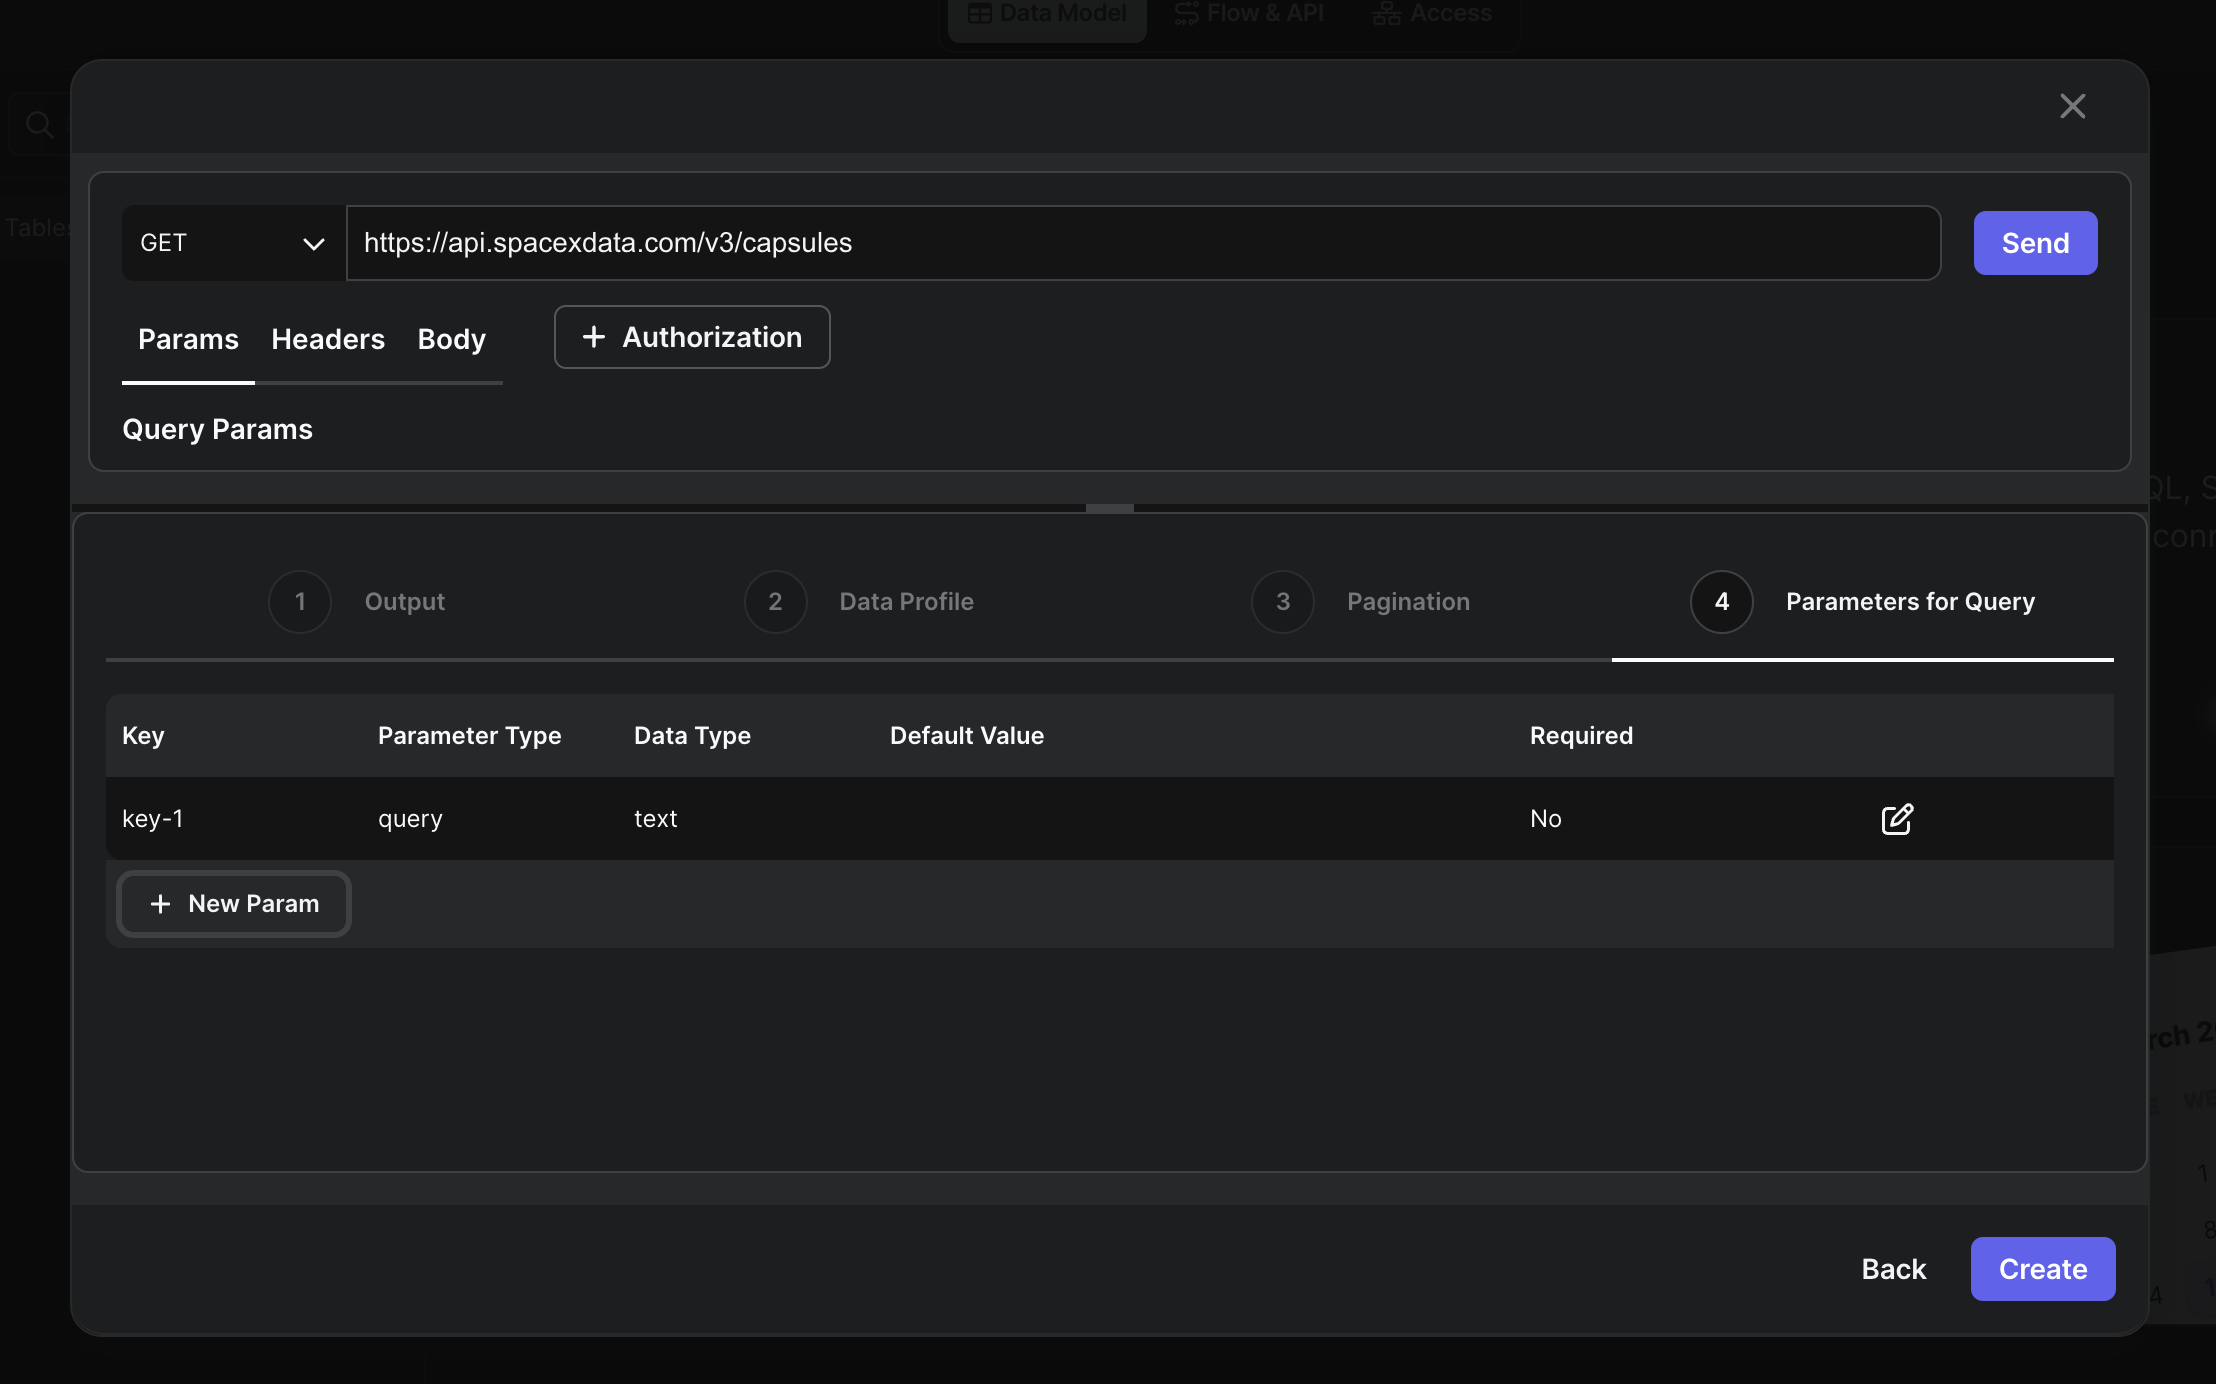
 8. **Update Parameters for Query:**
* Click on the "Next" button, it will show the parameters for query of the API response.
* You can add new parameters by clicking on the "New Parameter" button.
* You can update the parameter key, parameter type, data type, default value etc.
8. **Update Parameters for Query:**
* Click on the "Next" button, it will show the parameters for query of the API response.
* You can add new parameters by clicking on the "New Parameter" button.
* You can update the parameter key, parameter type, data type, default value etc.
 9. **Create Catalog:**
* Click on the "Create" button to create the catalog.
* Enter the fields such as catalog name, schema name, table name, etc.
* Click on the "Create" button to create the catalog.
9. **Create Catalog:**
* Click on the "Create" button to create the catalog.
* Enter the fields such as catalog name, schema name, table name, etc.
* Click on the "Create" button to create the catalog.
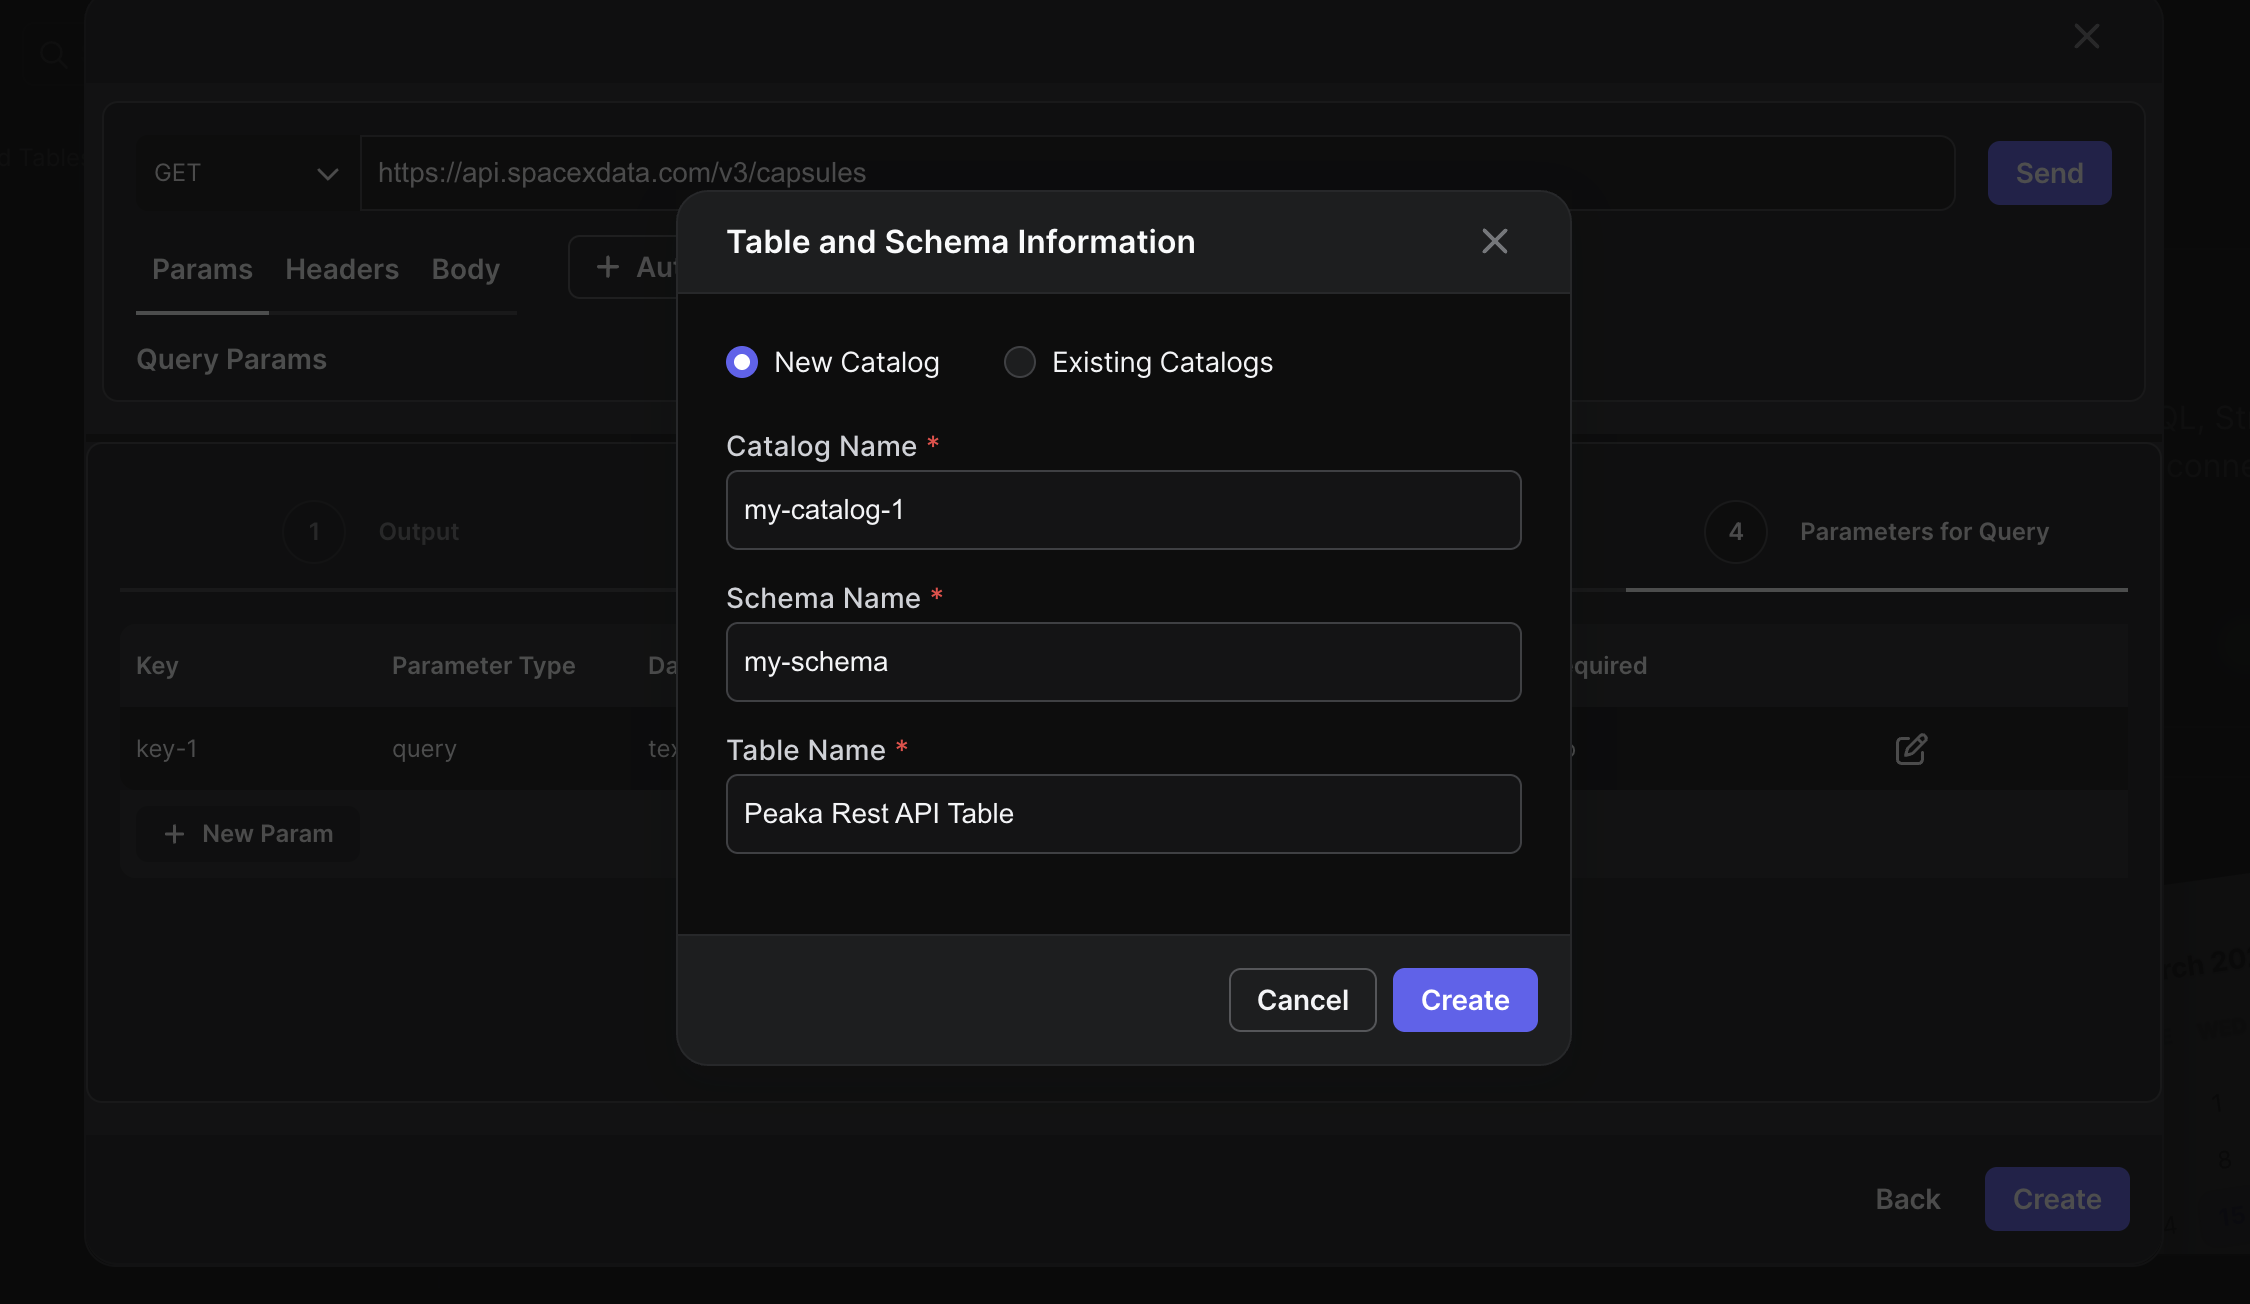 That's it! You have created a Peaka REST API catalog with authentication.