> ## Documentation Index
> Fetch the complete documentation index at: https://docs.peaka.com/llms.txt
> Use this file to discover all available pages before exploring further.
# Salesforce
> Discover a seamless integration process! Learn how to connect Salesforce to Peaka effortlessly for streamlined transactions.
This article guides you through the process of connecting Salesforce to Peaka, allowing you to seamlessly access your Salesforce data within the Peaka platform.
## Prerequisites
Before you start, you will need the following information from Salesforce.
* User Name
* Password
* Security Token
Follow the steps below to obtain it:
1. To obtain the User Name and Password, go to the [article](https://support.omaticsoftware.com/s/article/Locating-your-Salesforce-Username-and-Password).
2. To obtain the Security Token, log in to your Salesforce account.
3. Click the profile avatar and choose Settings.
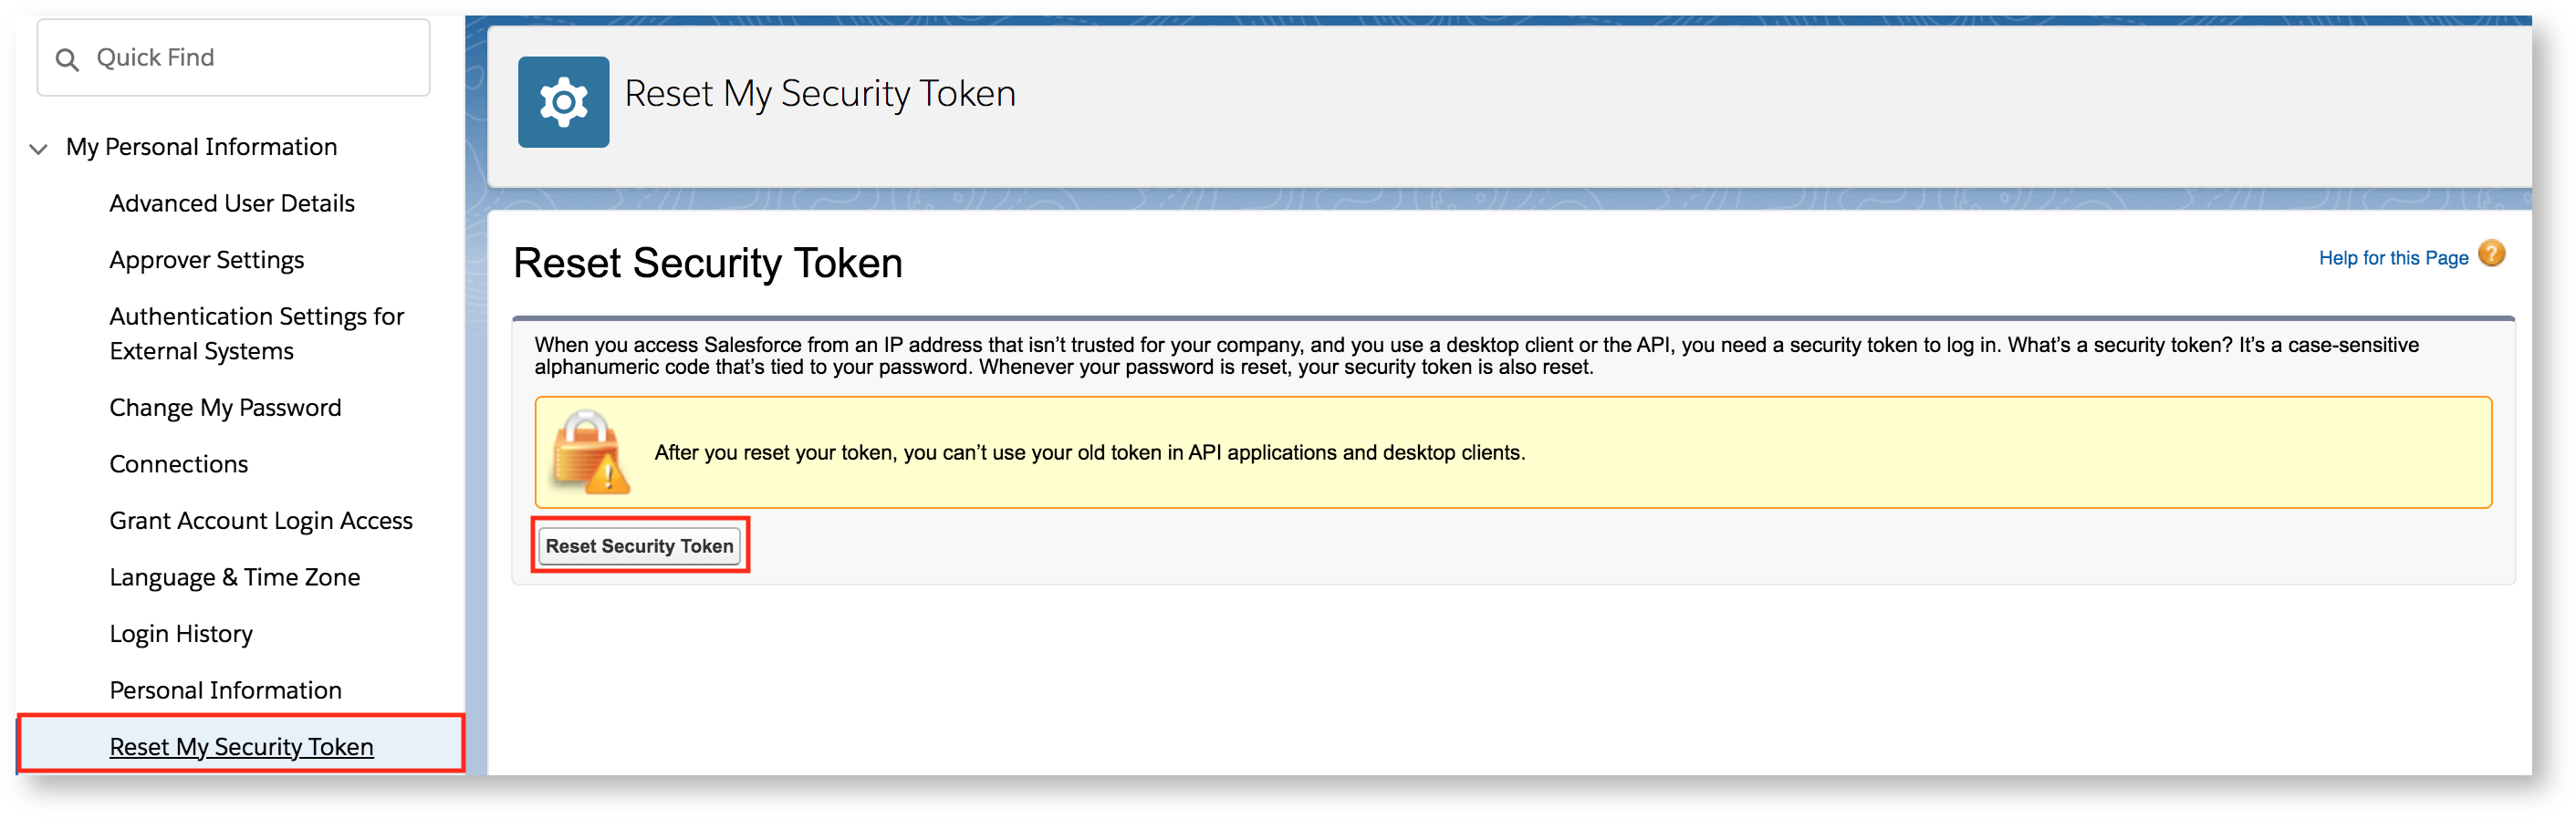
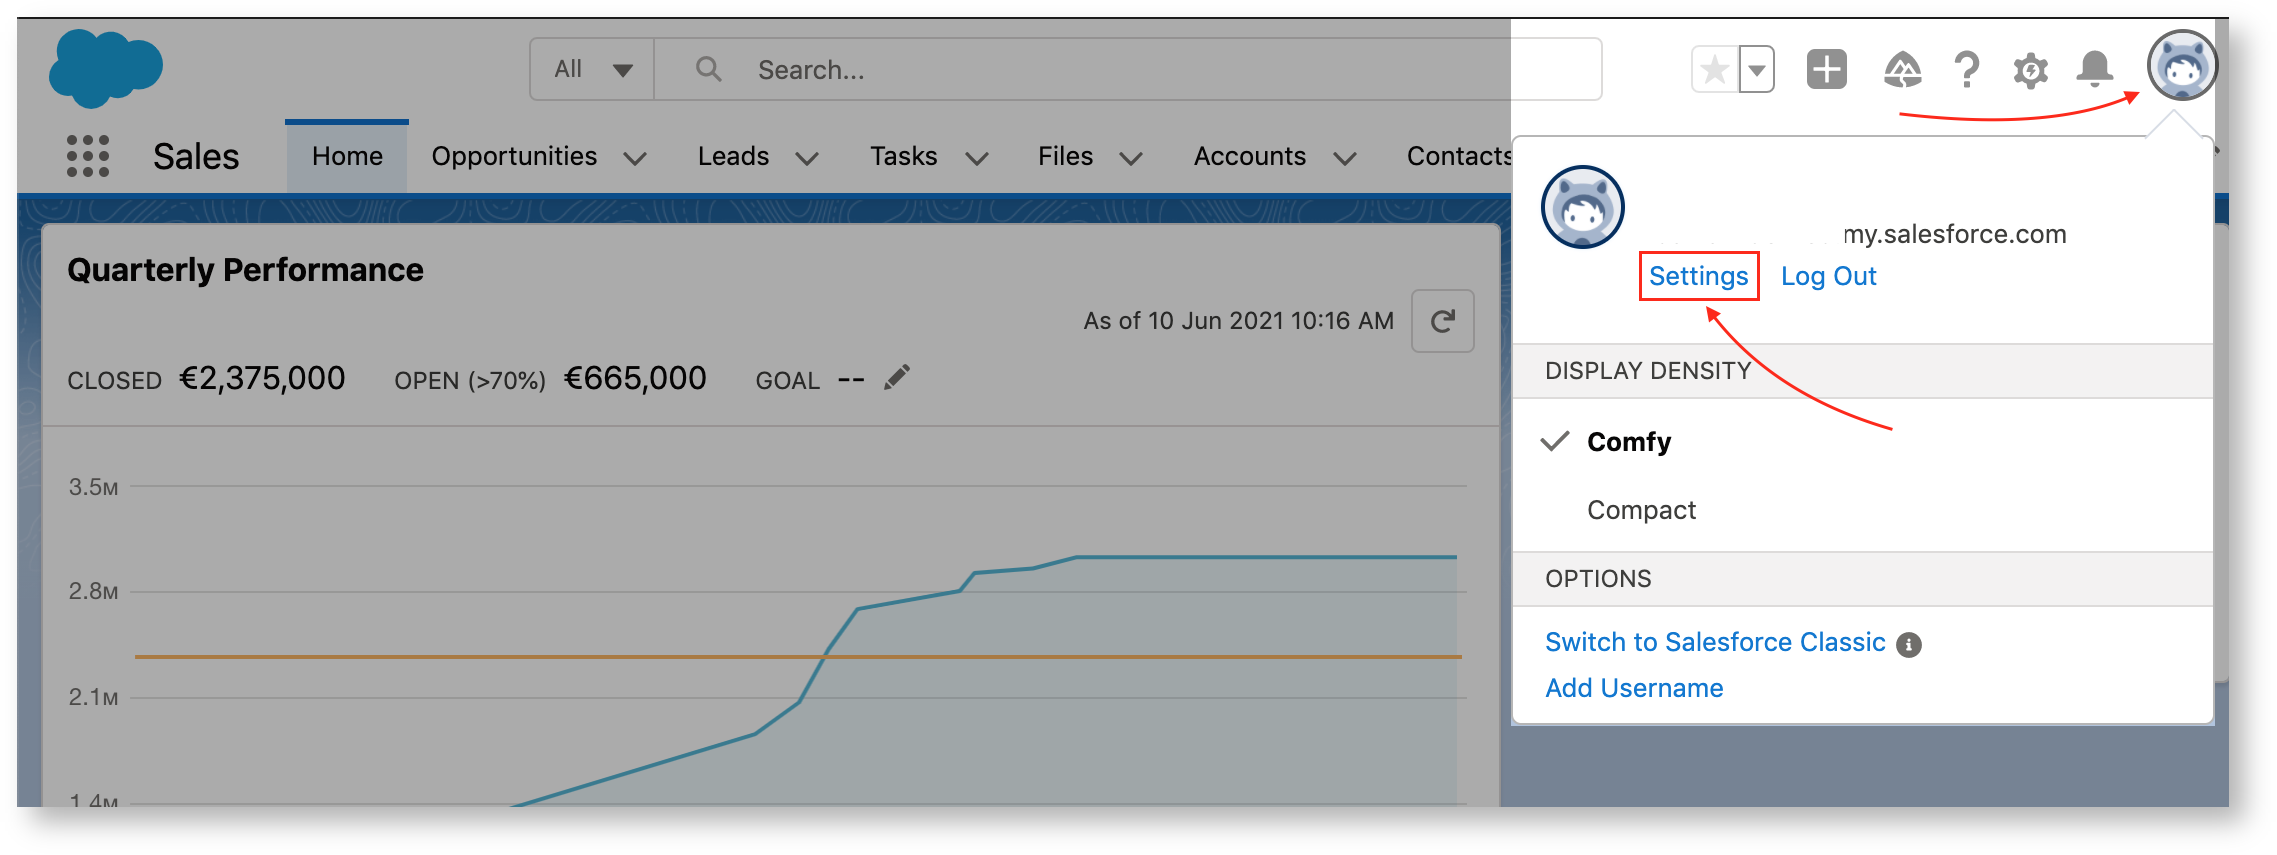 4. Select My Personal Information → Reset My Security Token.
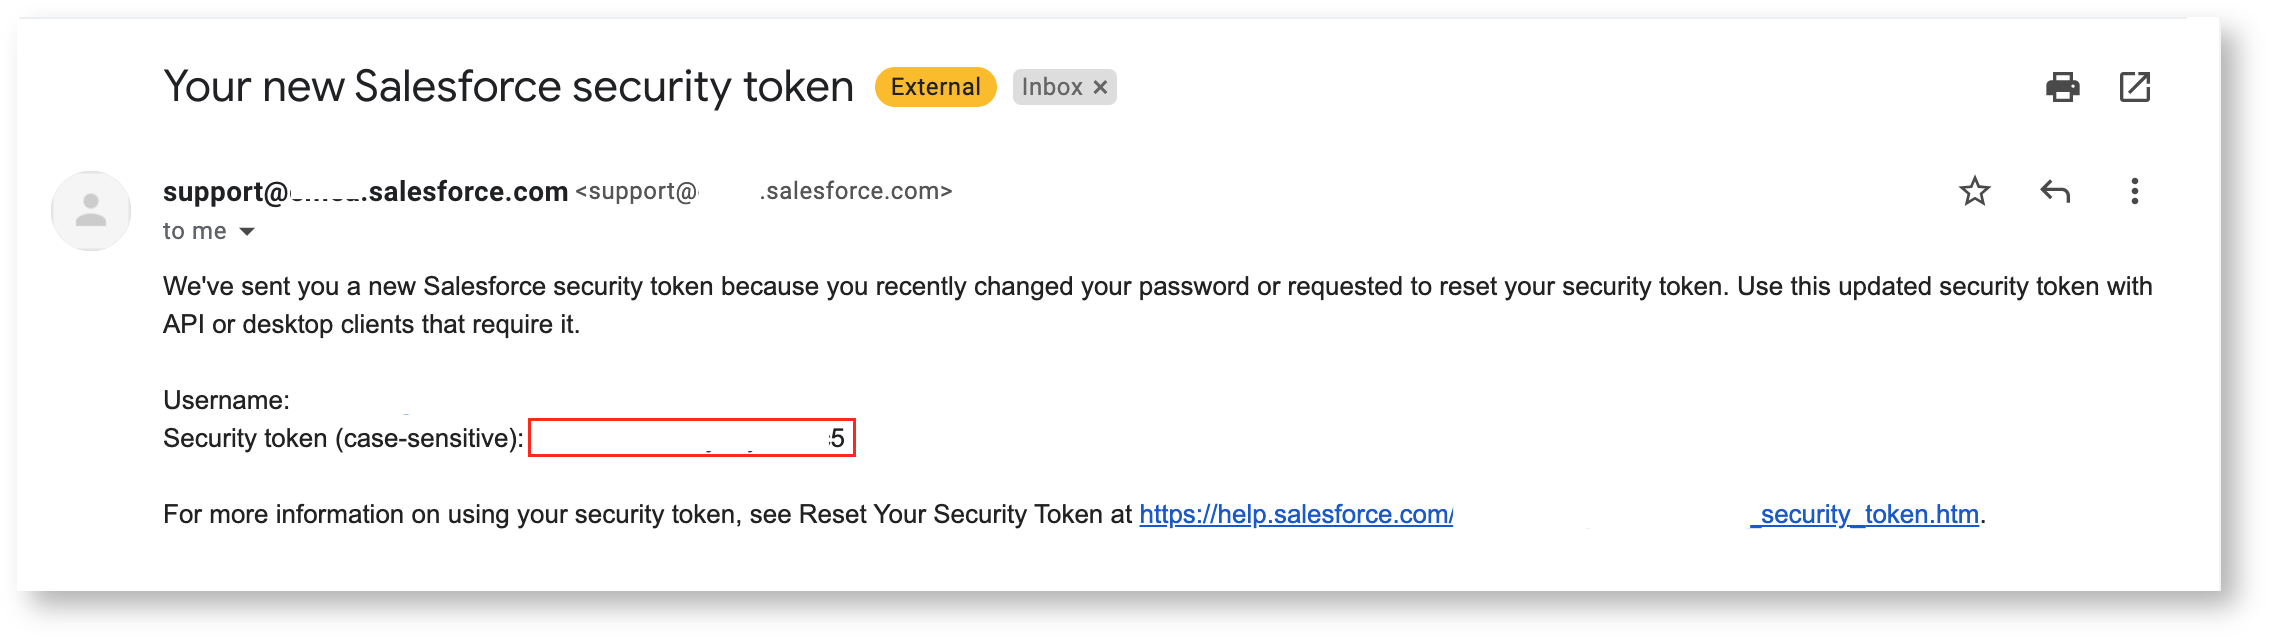
 5. Check your email for the security token.
 ## Connecting Salesforce to Peaka
1. Navigate to the data model page in Peaka.
2. In the side menu bar, click the "New Data Source" button to initiate the connection process.
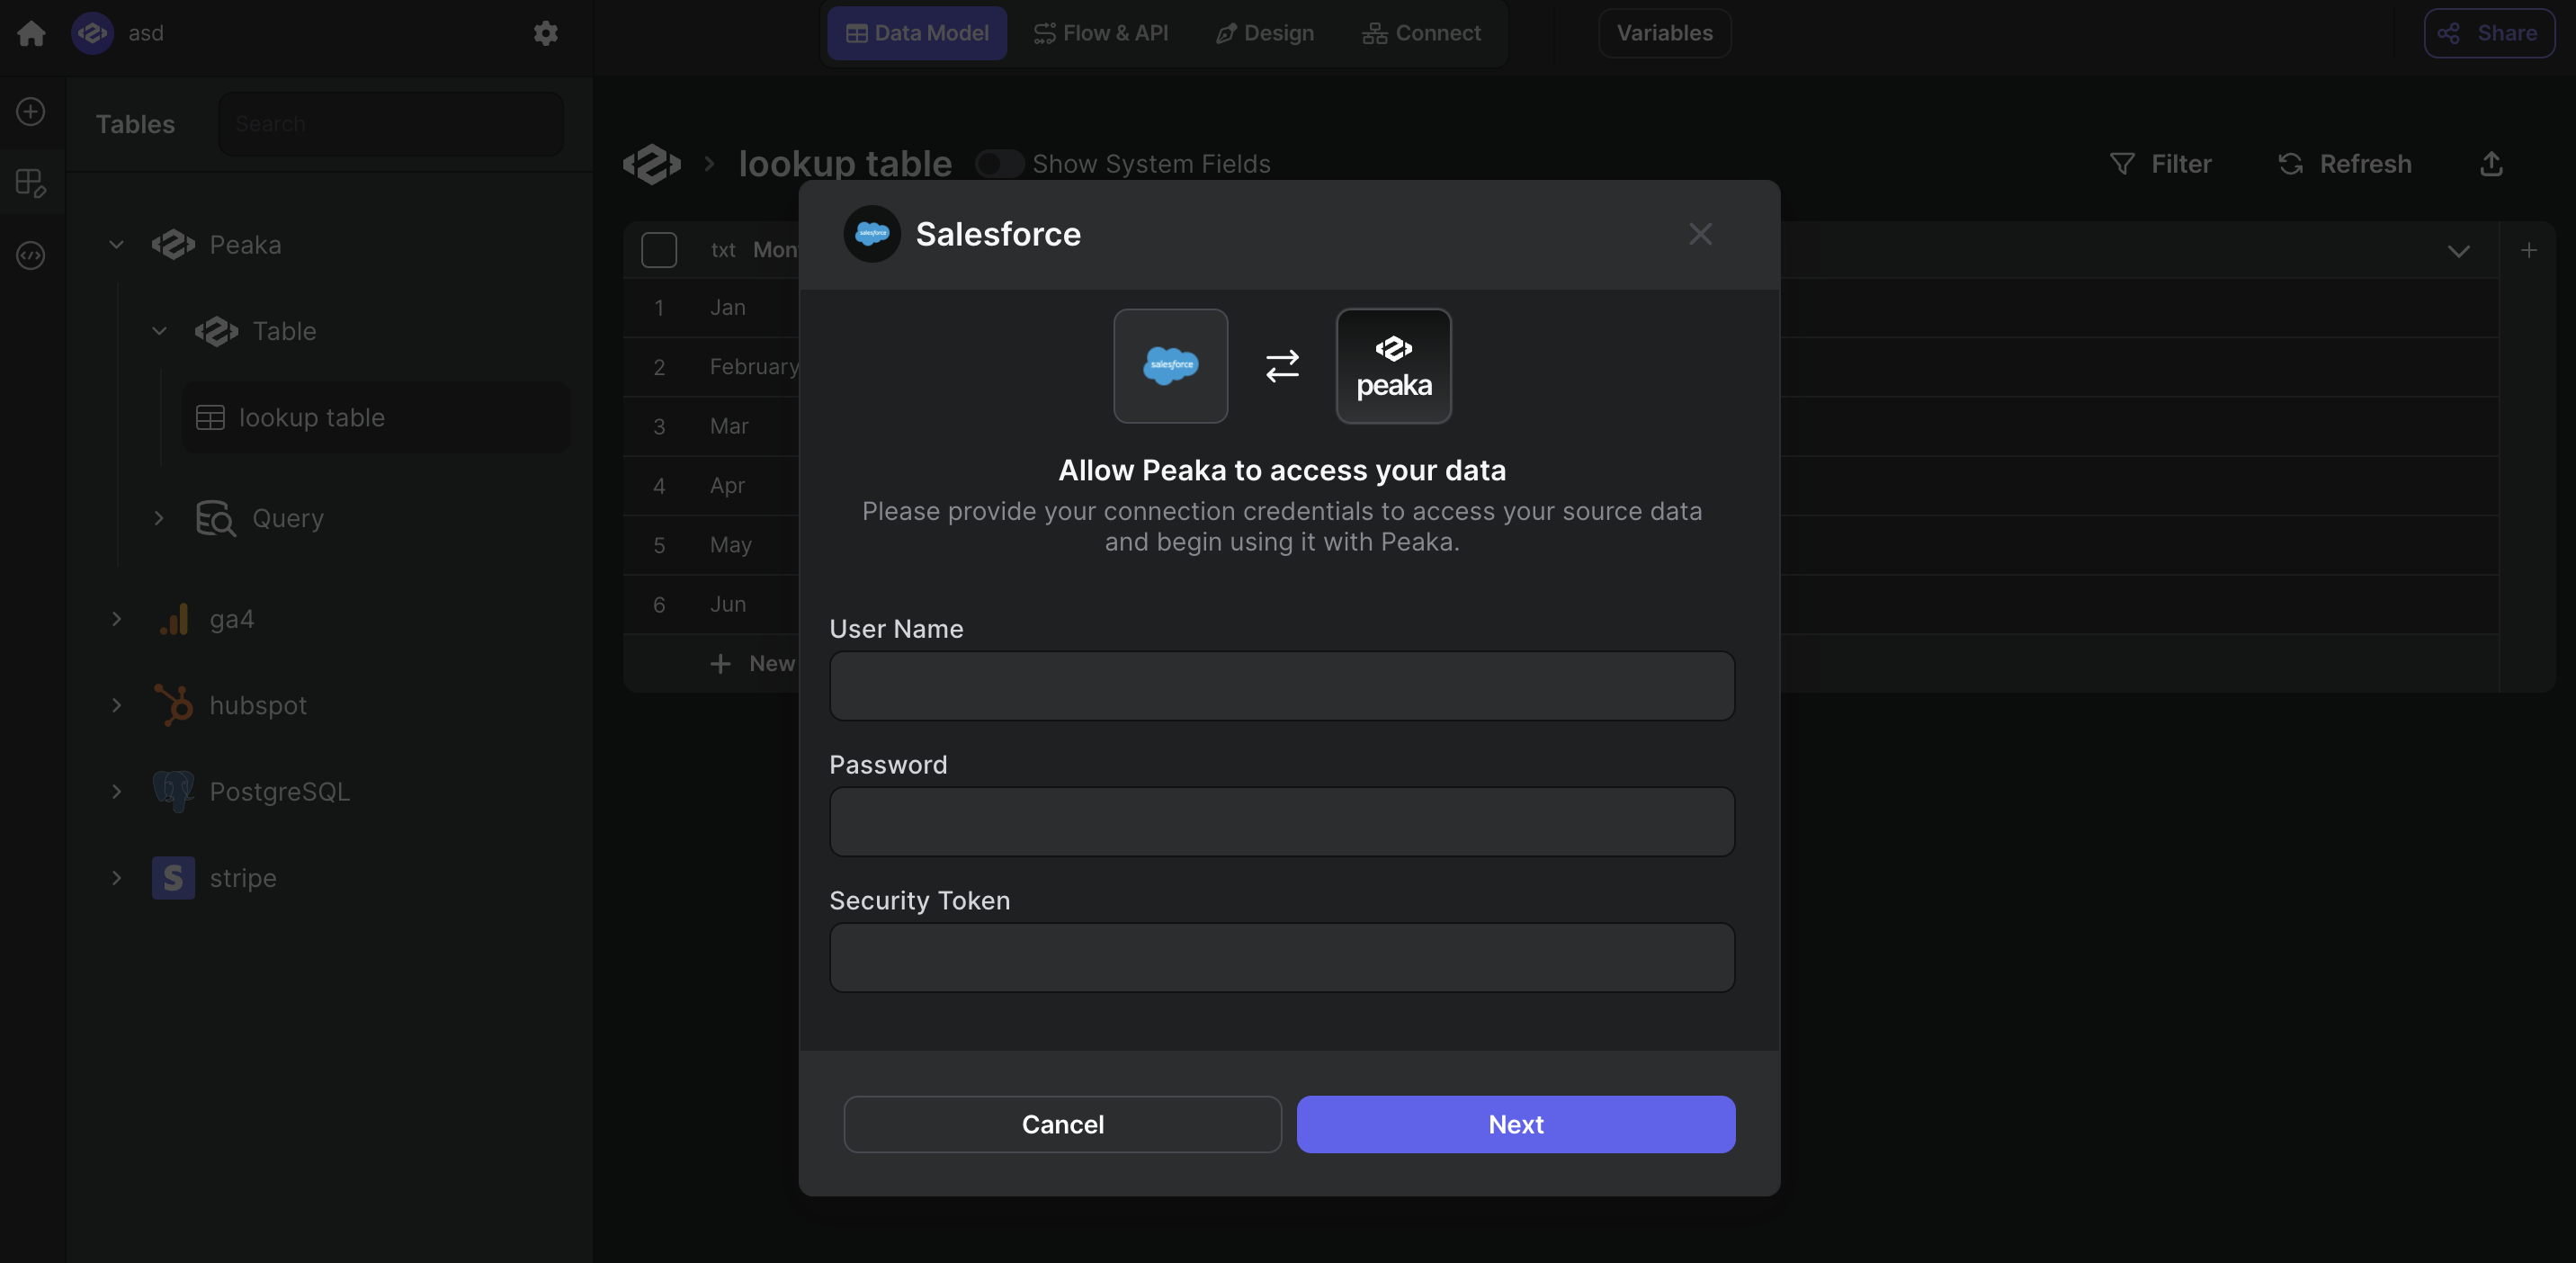
3. In the modal that appears, select "Salesforce" as your data source.
4. Enter a name for your data source and input credentials you obtained in the previous step.
5. Click "Next" to create your Salesforce data source.
## Connecting Salesforce to Peaka
1. Navigate to the data model page in Peaka.
2. In the side menu bar, click the "New Data Source" button to initiate the connection process.
3. In the modal that appears, select "Salesforce" as your data source.
4. Enter a name for your data source and input credentials you obtained in the previous step.
5. Click "Next" to create your Salesforce data source.
 Congratulations! You've successfully connected Salesforce to Peaka. You can now access and manage your Salesforce data seamlessly within the Peaka platform.