Metabase Cloud Setup
You need 2 steps to complete Metabase Cloud setup:- Generate Peaka API Key
- Setup Peaka Integration with Starburst Connector
Generate Peaka API Key
After you create your project, setup connections and create your catalogs in Peaka, you need to generate a Peaka API Key to use it with Metabase Connector. Check out Peaka Documentation on how to create API Keys for detailed instructions.Setup Peaka Integration with Startburst Connector
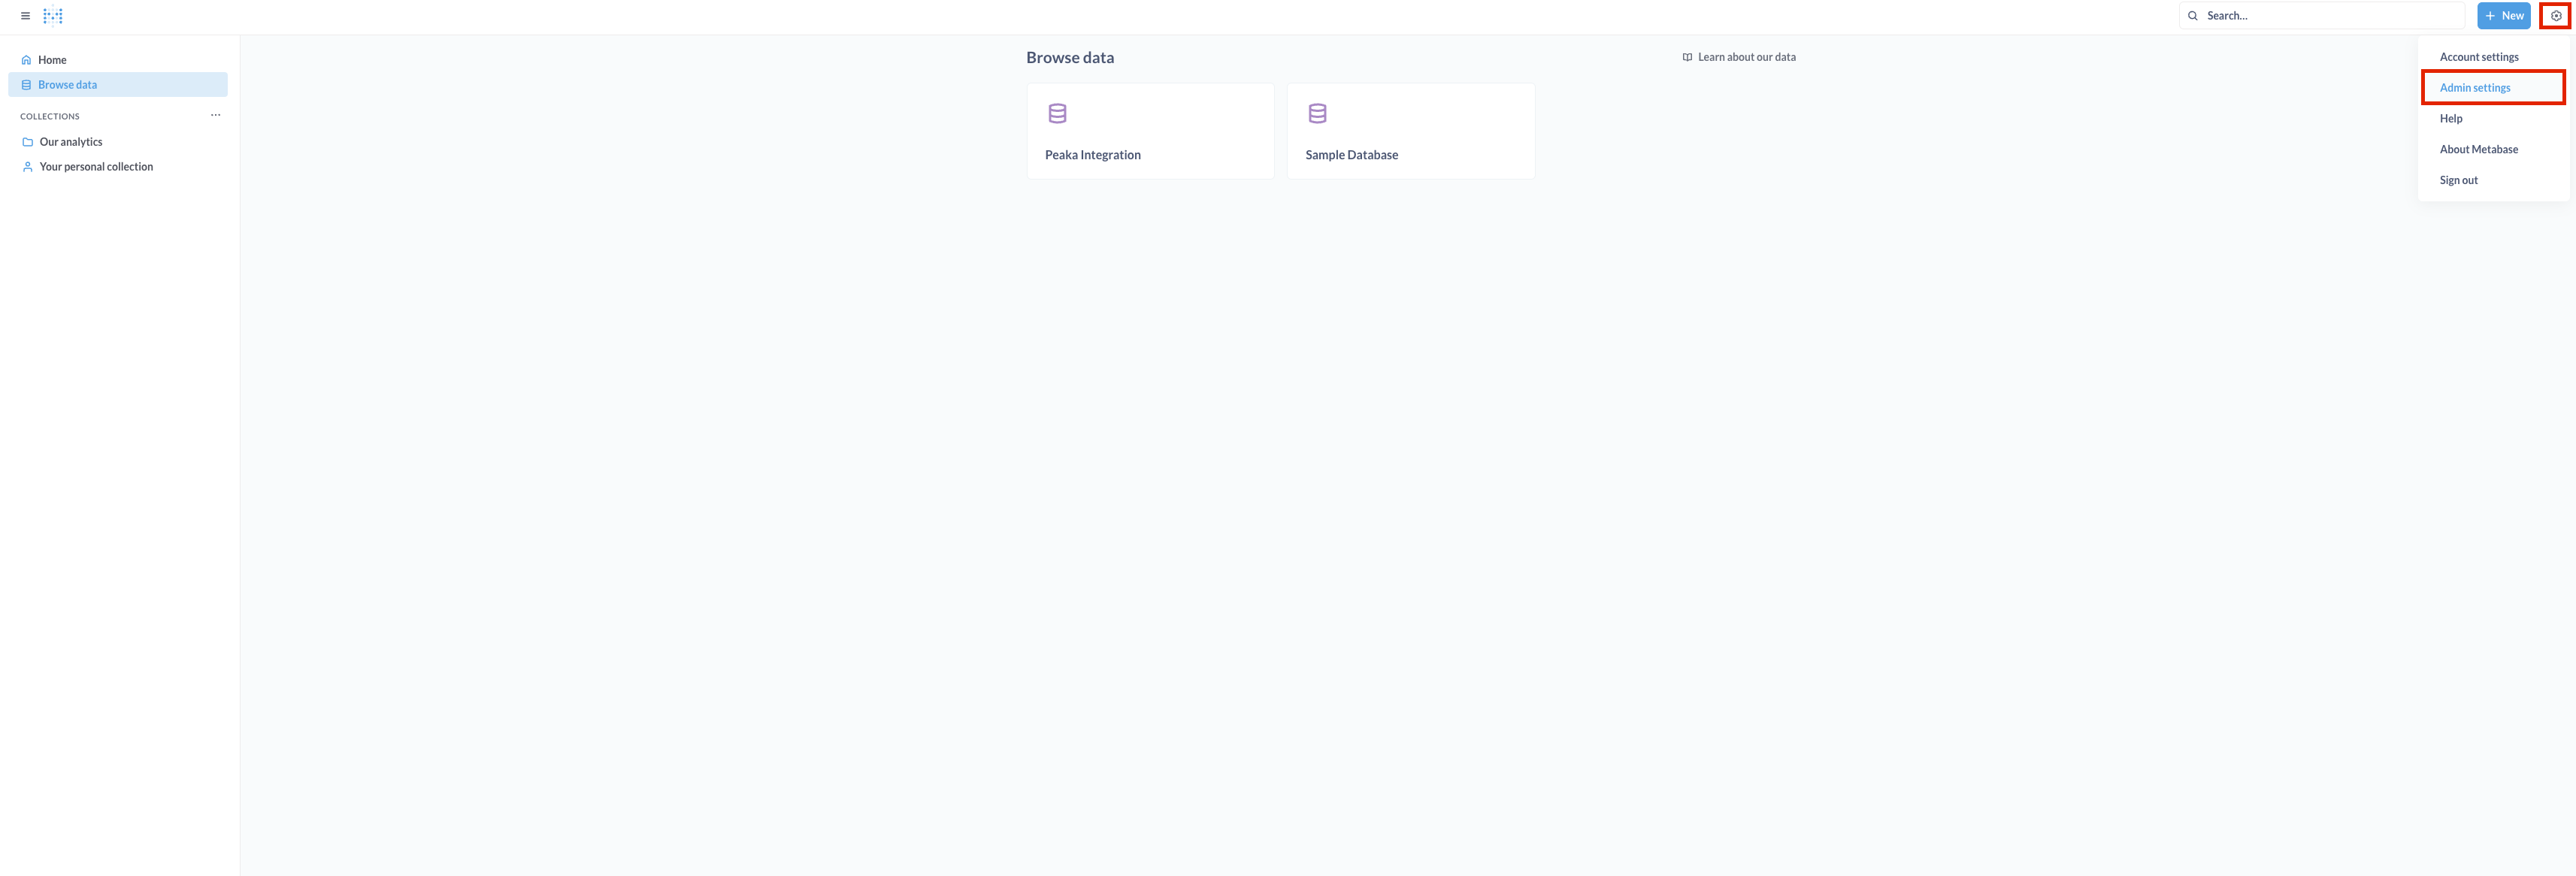
The Peaka Metabase integration uses the Starburst Connector right now. Startburst Connector is offical partner driver which is provided in Metabase Cloud offering.- In order to add Peaka as data source, go to your Metabase Home page. Click settings icon on the top right corner of the screen and click Admin Settings button as shown in the screenshot below.
- On the next screen click Databases from the top toolbar.
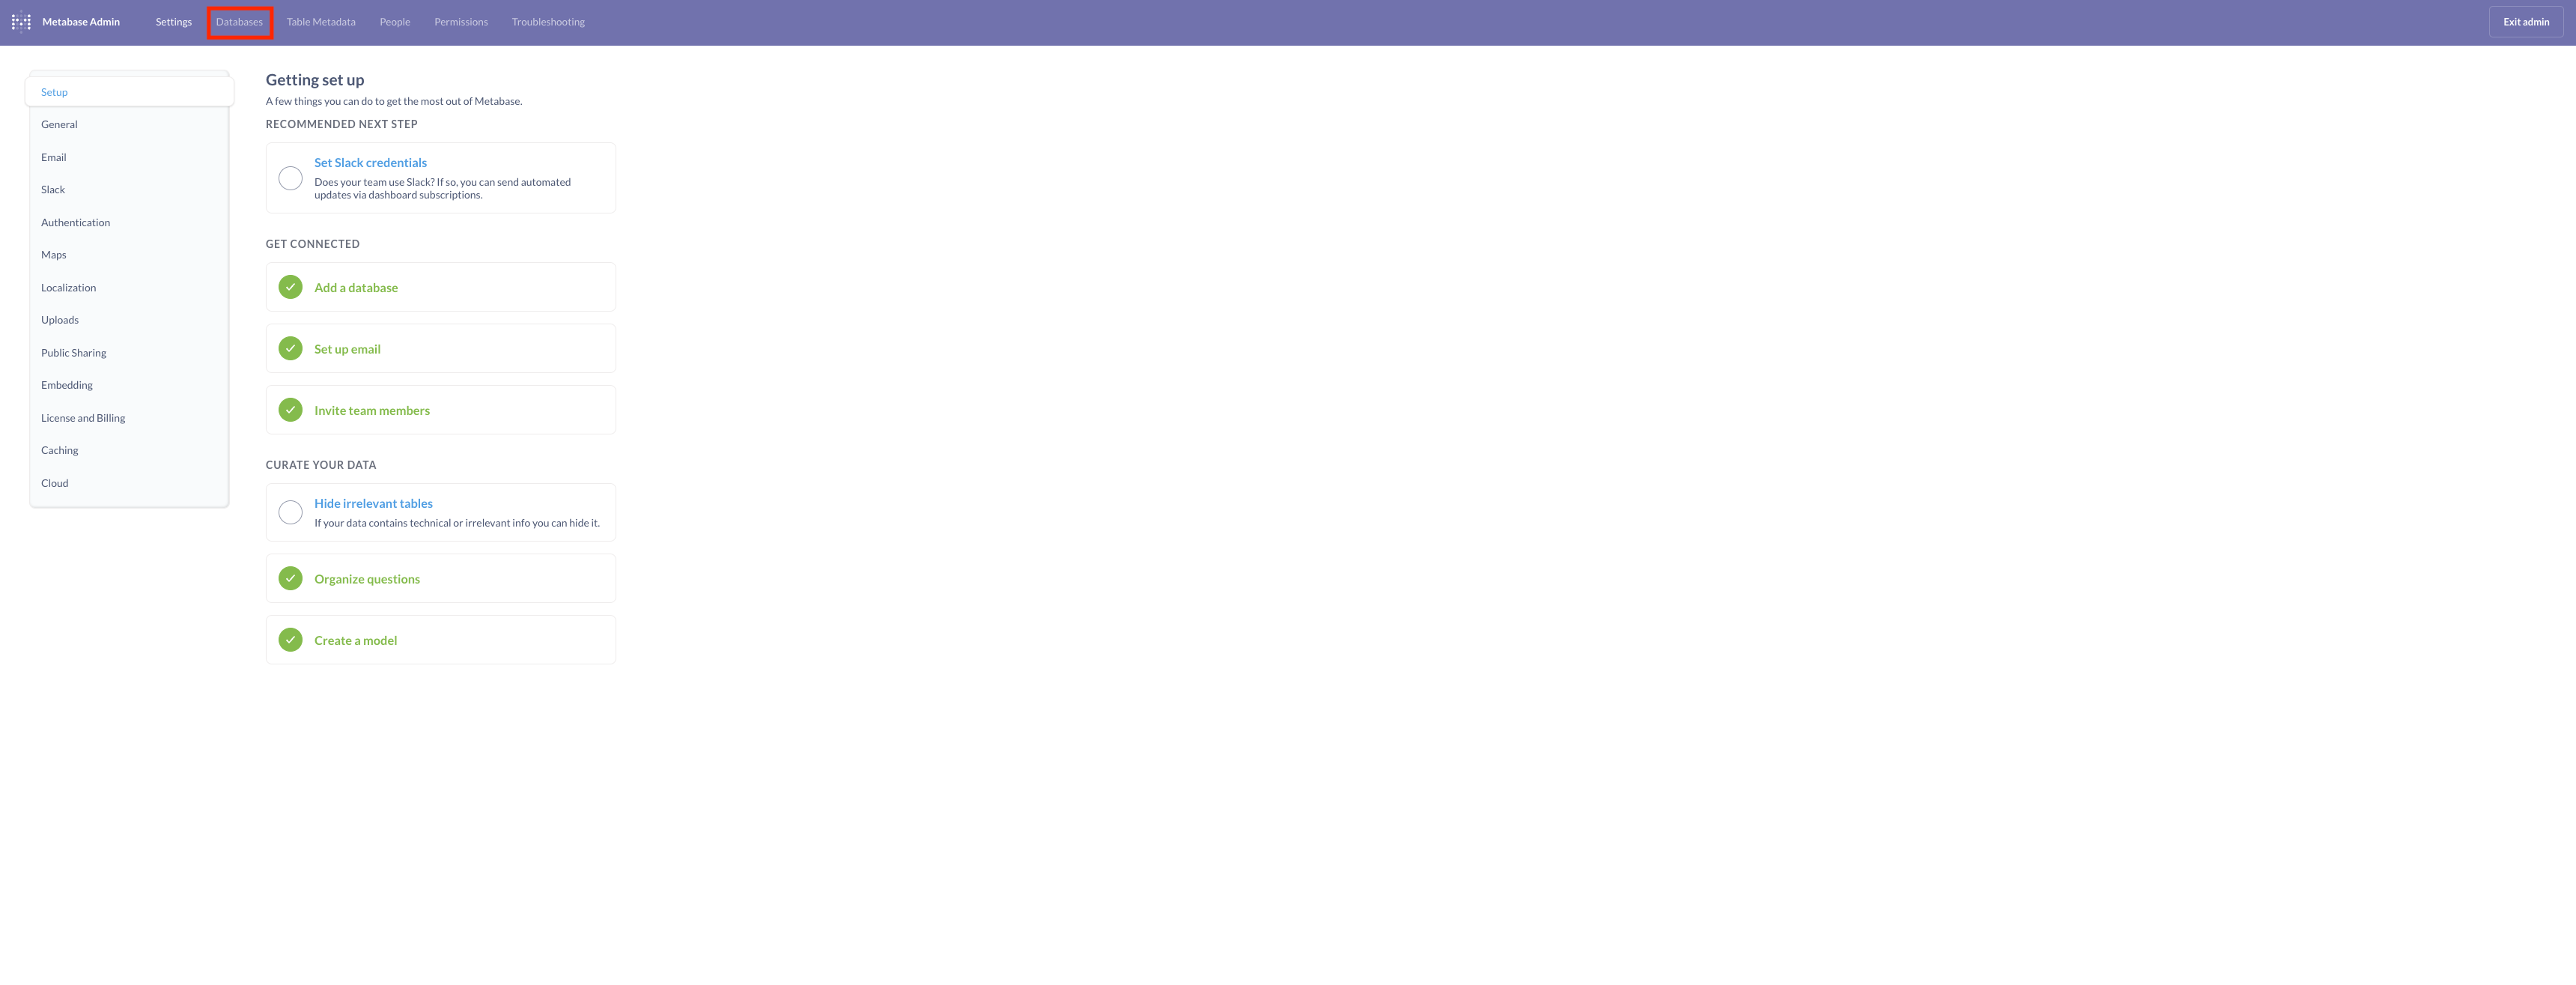
- On the next screen click Add database button.

-
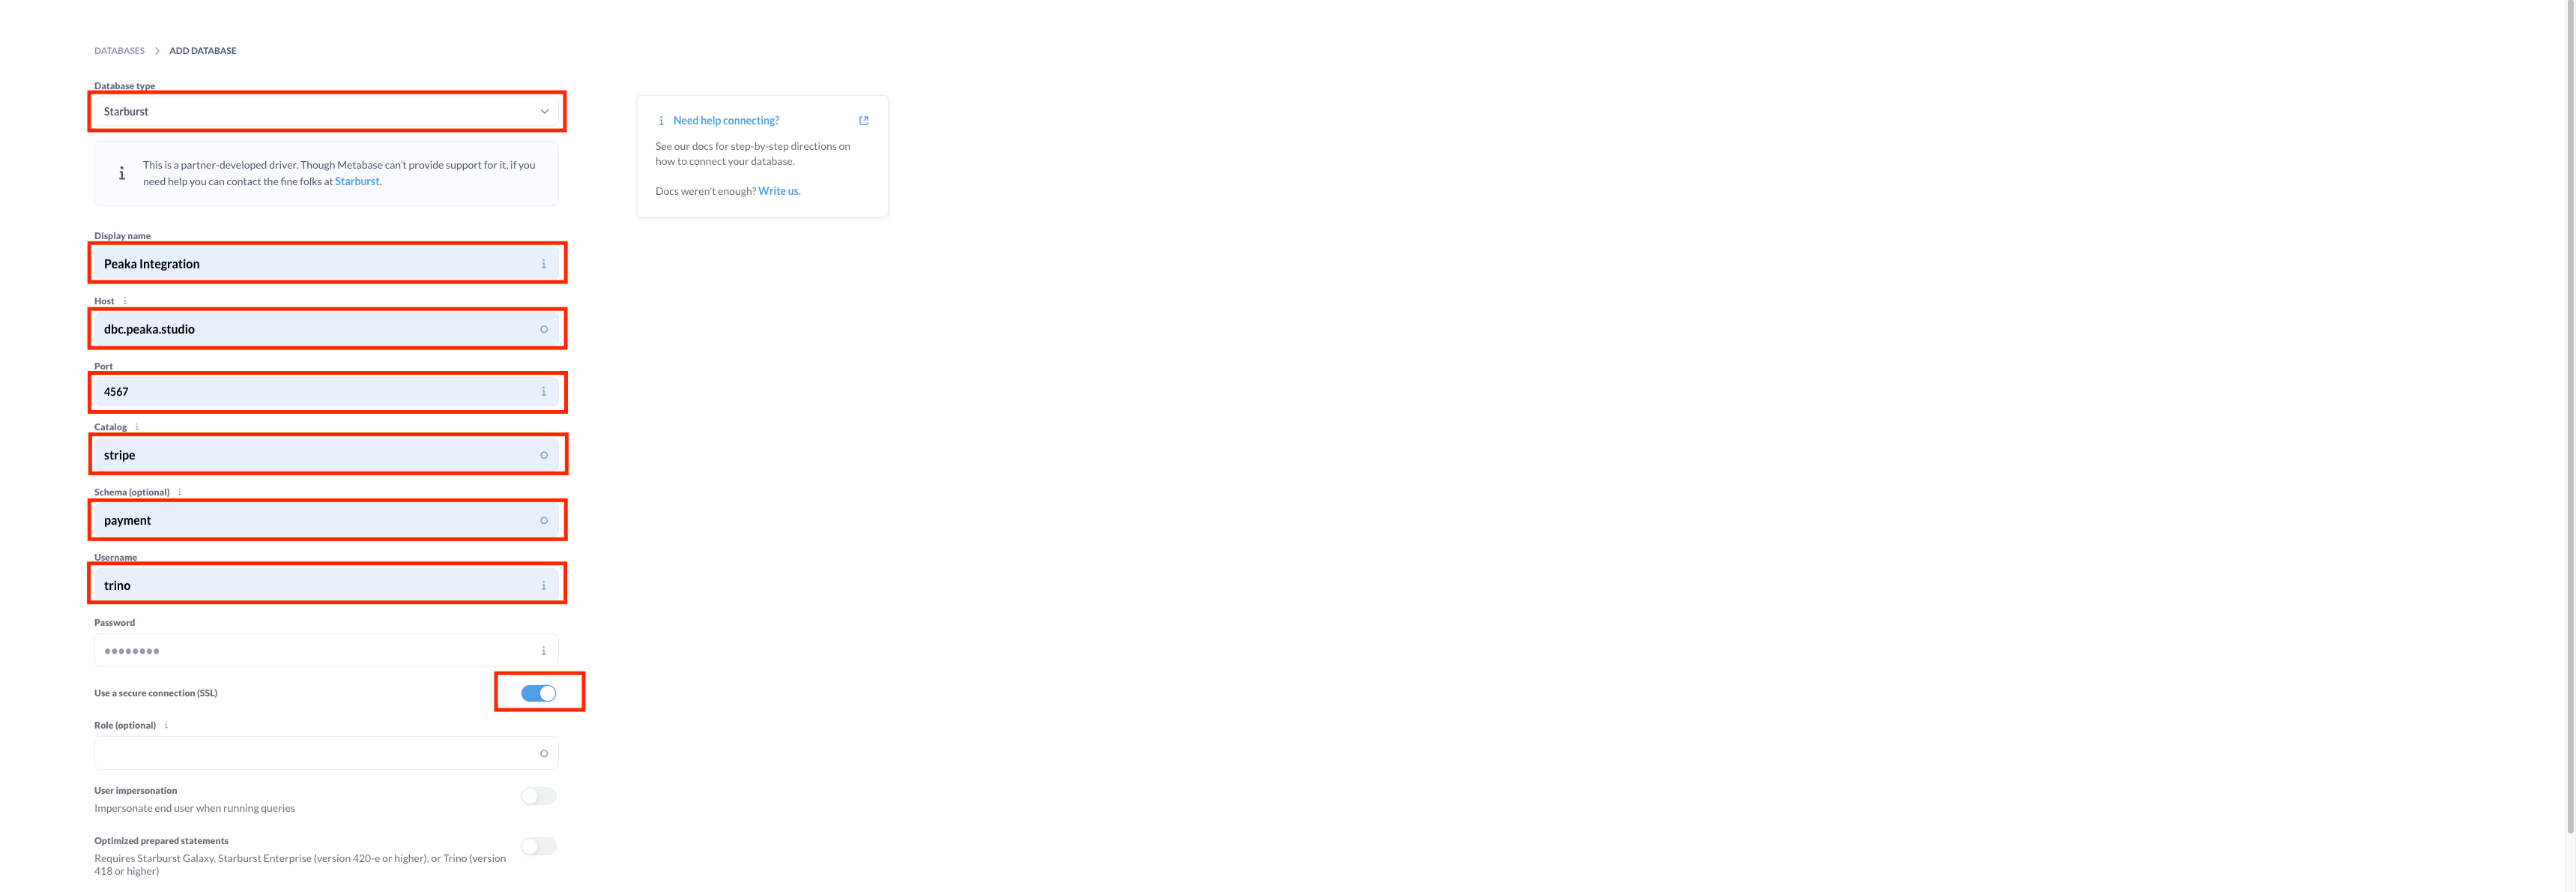
Add database form will open and you need to add your connection details on this screen. Select Starbust for Database Type.
Then give a name to your database connection. For the host name enter
dbc.peaka.studio. For the port enter4567. As for the Catalog Name and Schema Name enter the catalog name and schema name of your Peaka Catalog. Then enter trino to the User name field and select Use Secure Connection checkbox. Your form should look like the screenshot below after you enter correct values: Note: If you are using Peaka in EU, you need to usedbc.eu.peaka.studioinstead ofdbc.peaka.studiofor the host name.
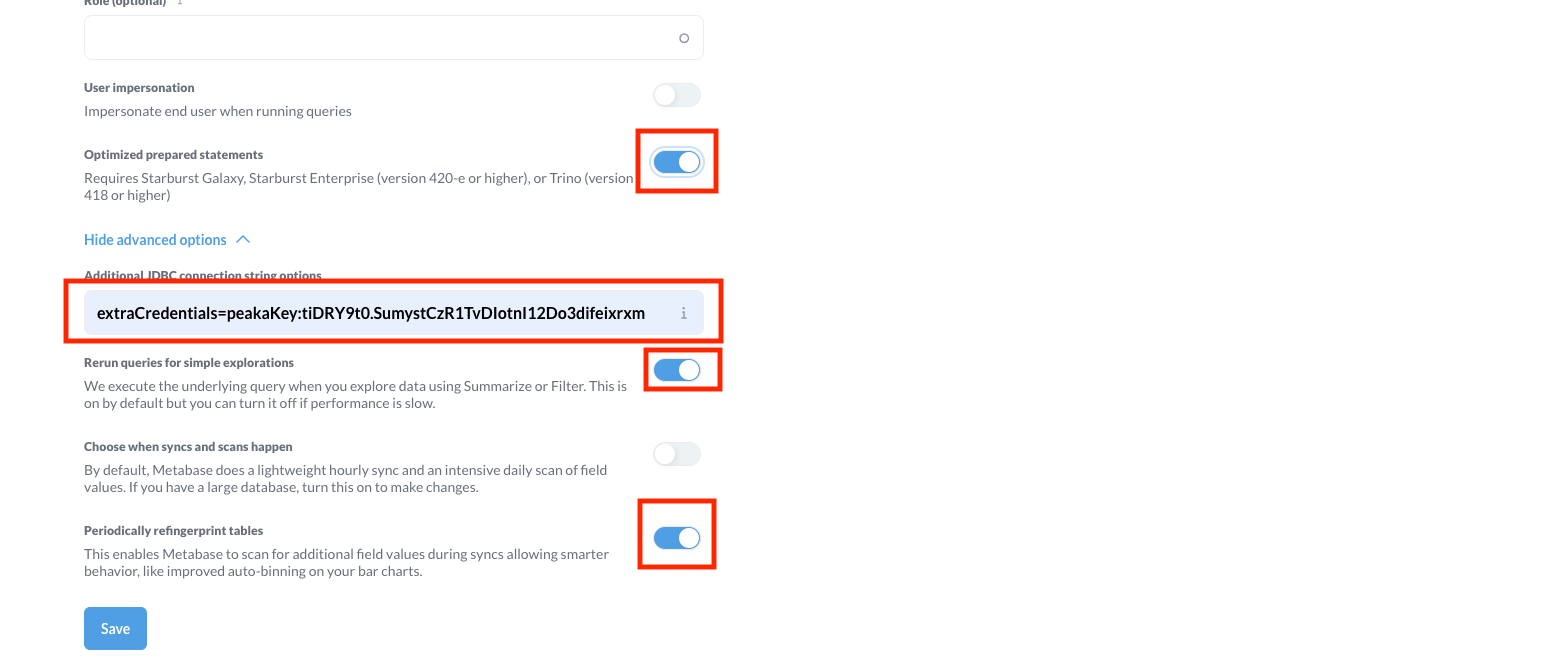
- Scroll down to bottom and click Show advanced options button. Check Optimize prepared statements checkbox.
Enter your Peaka API Key to Additional JDBC connection string options in the following format extraCredentials=peakaKey:
<Your Key>. After that check Rerun queries for simple explorations and Periodically refingerprint tables check boxes. Your form should look like the screenshot below after you enter correct values:
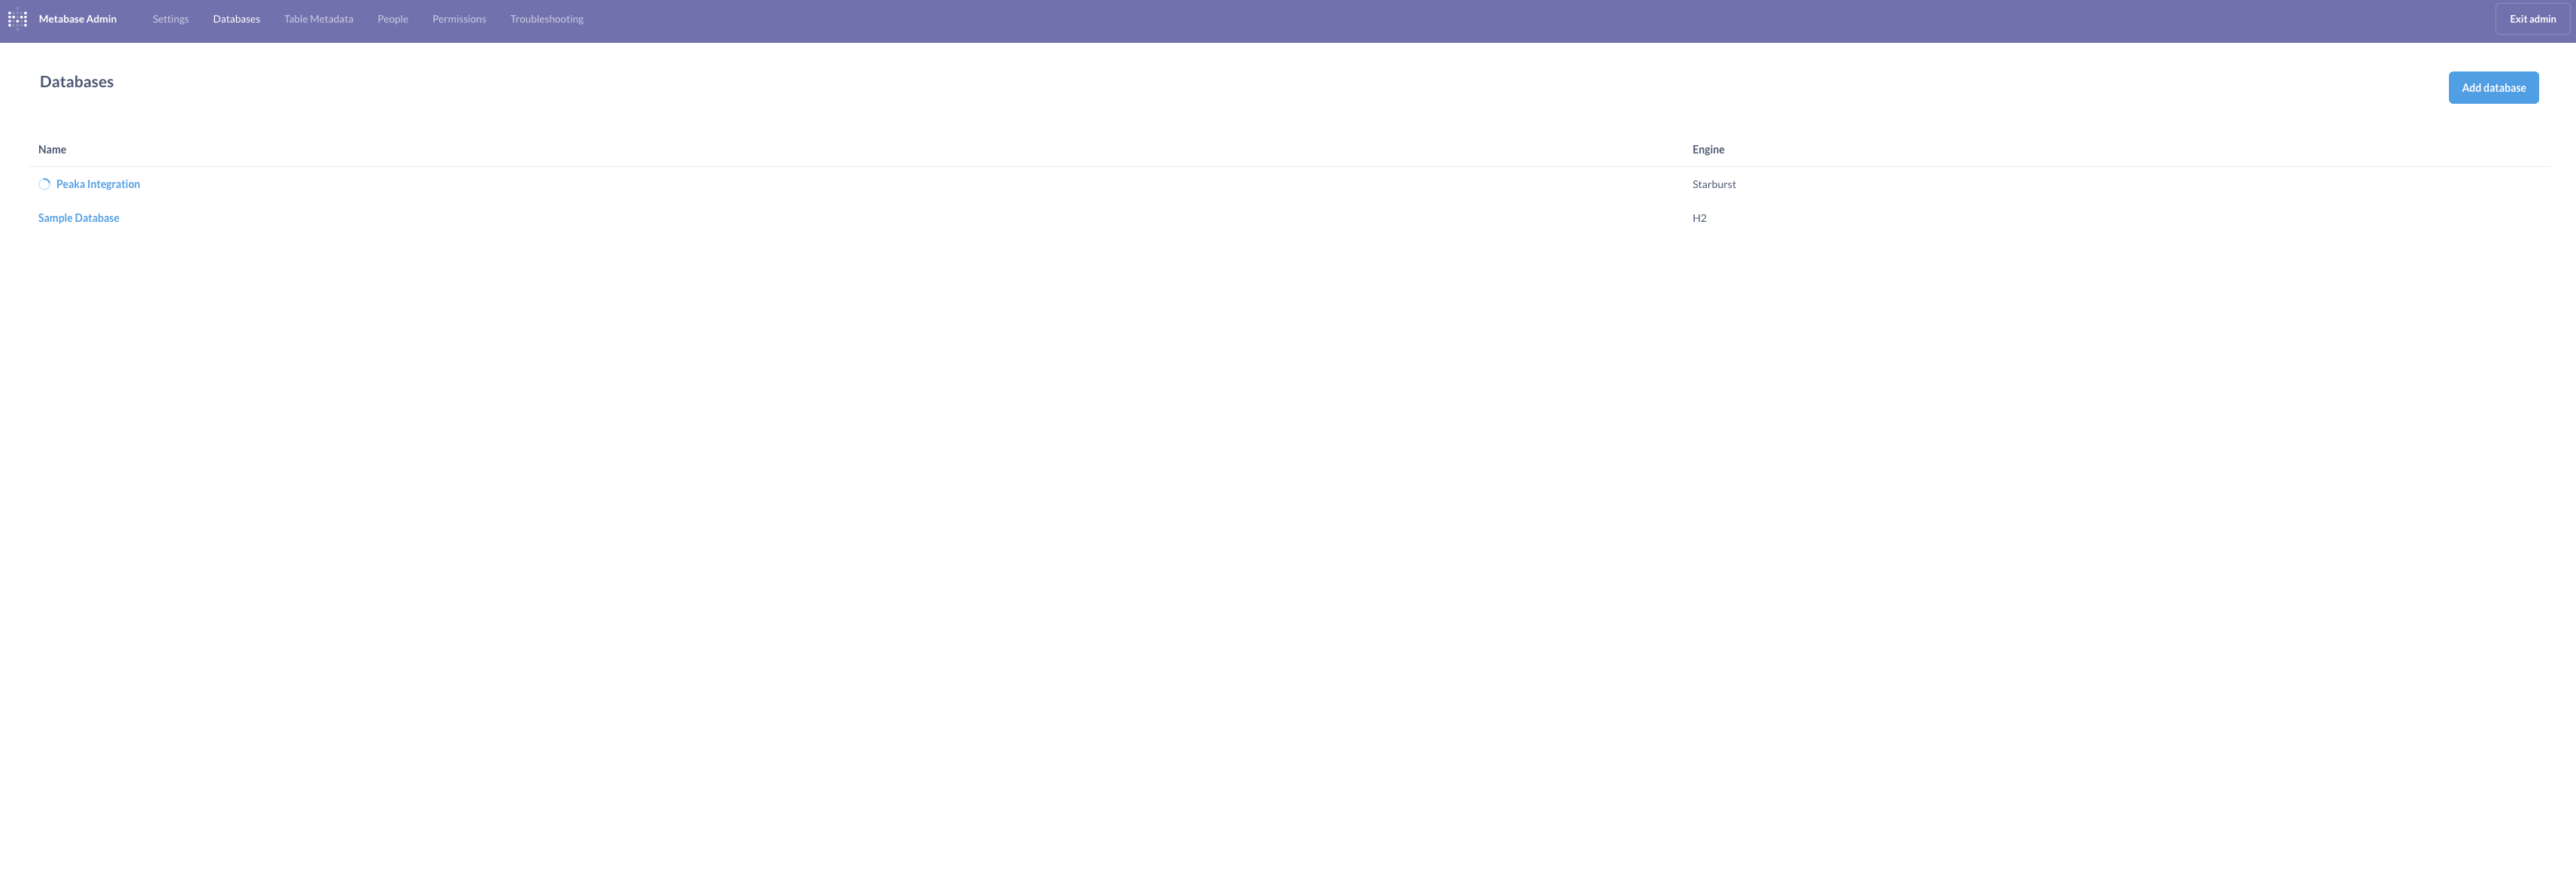
- If everything is entered correctly you should be able to see Peaka under databases list like the screenshot below.
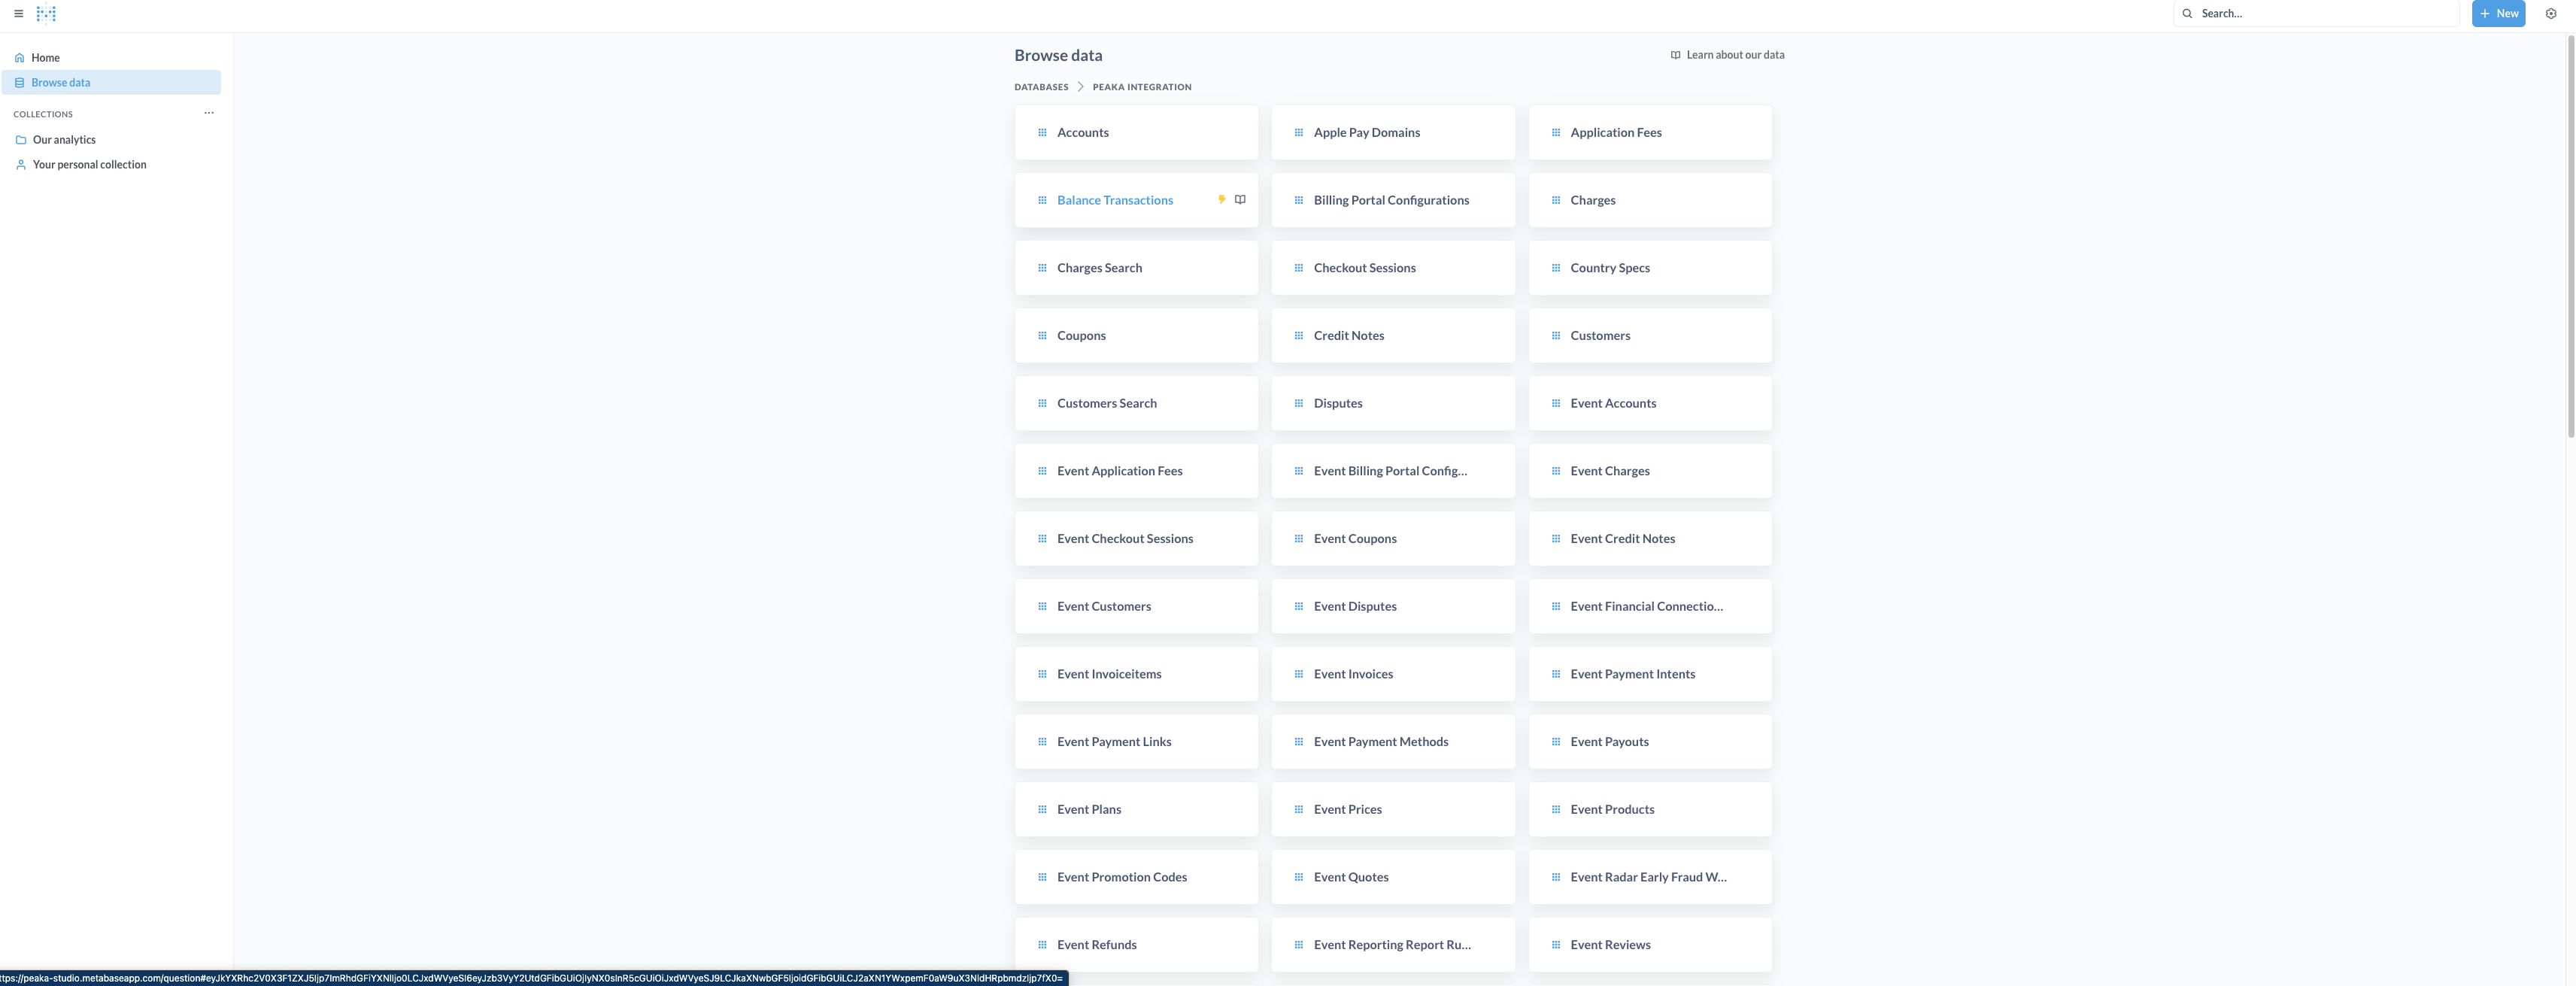
- Go to Metabase Home page and click Browse Data button from the toolbar from the left and select your Peaka connection. You should be able to see your tables here. In our case we are seeing tables under catalog stripe and schema name payment.
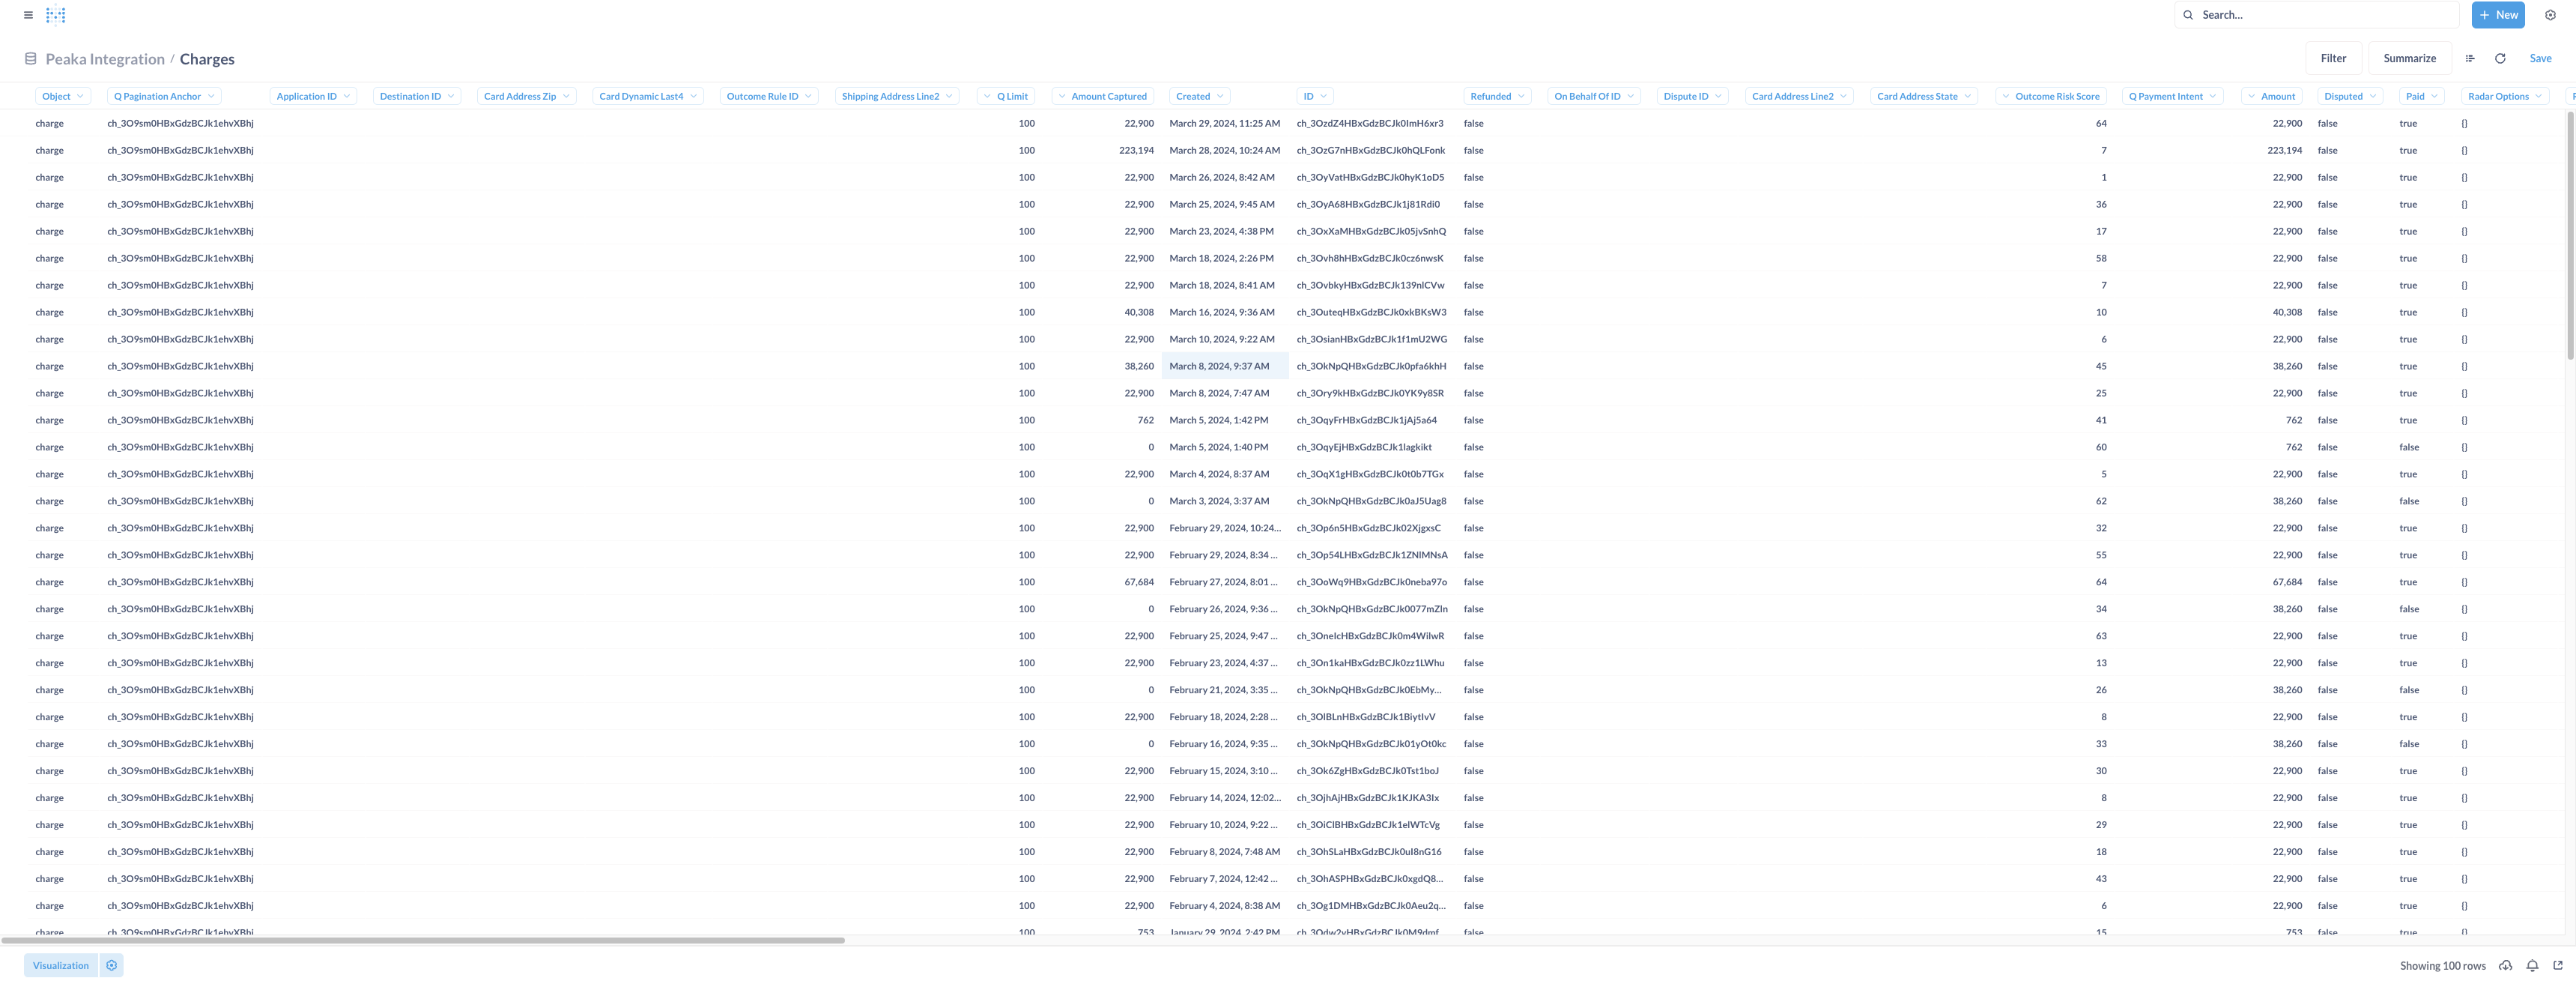
 Click the table you want to see data and if you can see the data successfully like the screenshot below, you have successfully completed Peaka connection to your Metabase cloud account.
Metabase On-Premise Setup
If you are using Metabase On-Prem or Open Source Edition, follow these steps to install the Starburst driver:- Download the latest release of the Peaka Driver .jar file.
- Copy the JAR file into the
/plugins/directory of your Metabase installation. If you aren’t sure where to find the plugins directory, review the Metabase driver installation guide - Restart Metabase.
- After here follow the same steps as explained in the Metabase Cloud Setup part of this documentation. Only change is Peaka Connector requires different connection parameters than the Startburst. When you enter the Add Database form you will need to. Select Peaka for Database Type. Then give a name to your database connection. For the host name enter
_dbc.peaka.studio._For the port enter_4567._As for the Catalog Name and Schema Name enter the catalog name and schema name of your Peaka Catalog. Your form should look like the screenshot below after you enter correct values:
_dbc.eu.peaka.studio._ instead of _dbc.peaka.studio._ for the host name.
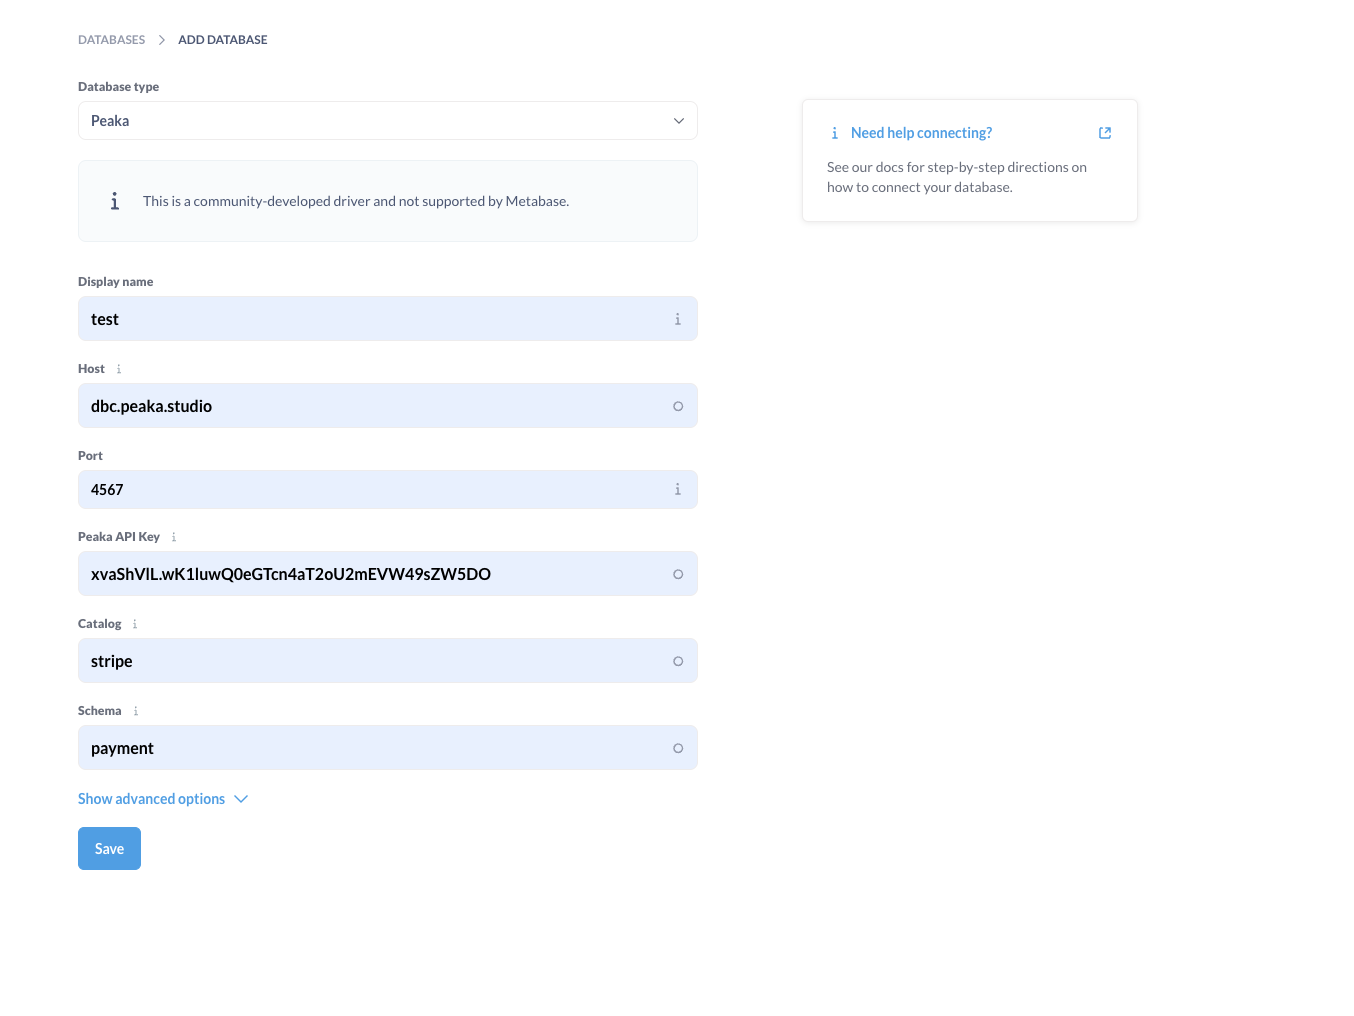 Then click Save button and follow the same steps as explained in Metabase Cloud Setup Documentation.
Testing Metabase Integration Locally Using Docker Compose
If you wish to test our Metabase integration from your local environment, we’ve created a Docker compose file for your convenience. Follow these steps:- Download the latest zip file from the provided link:
- Unzip the file.
- Run the ‘docker compose up’ command.