

Key Features
- Project Management: Effortlessly create and manage projects, catalogs, and caching through the intuitive Peaka UI
- Query Execution: Execute queries and retrieve data seamlessly using the powerful Peaka API
- Advanced Caching: Implement advanced caching strategies for optimized performance
- Complex Query Handling: Execute complex queries with ease
- Seamless Integration: Achieve seamless integration with existing systems
- Efficient Data Operations: Perform efficient data operations to enhance productivity
Step-by-Step Implementation
1. Create a Peaka Project
- Before you start, you need to login to your Peaka account. If you don’t have an account, you can sign up for a free trial here.
- After you login, click on the “Create New Project” button.

- Enter the project name and click on the “Create Project” button.
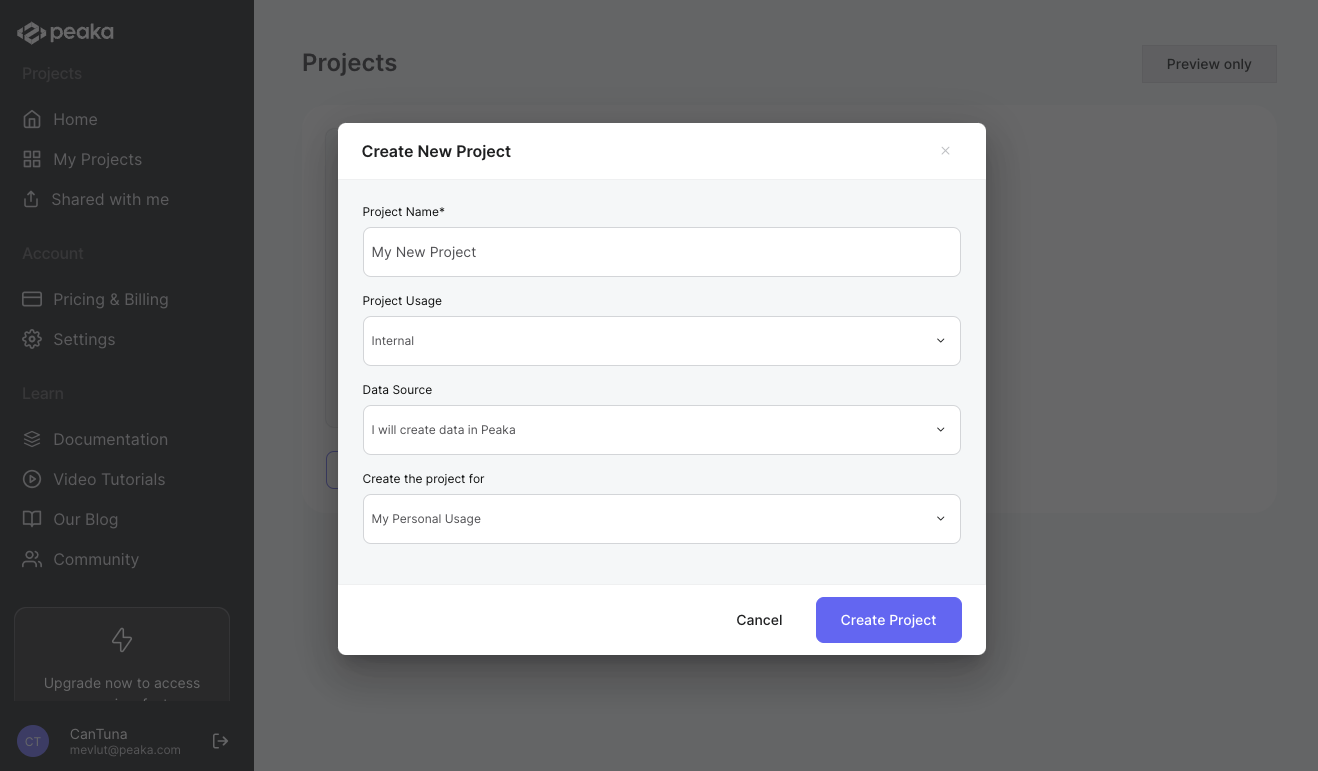
- Your project will be created and you will be redirected to the project page.
2. Create a Catalog
Once you are redirected to the project page, locate and click the plus button on the right side panel to initiate the catalog creation process.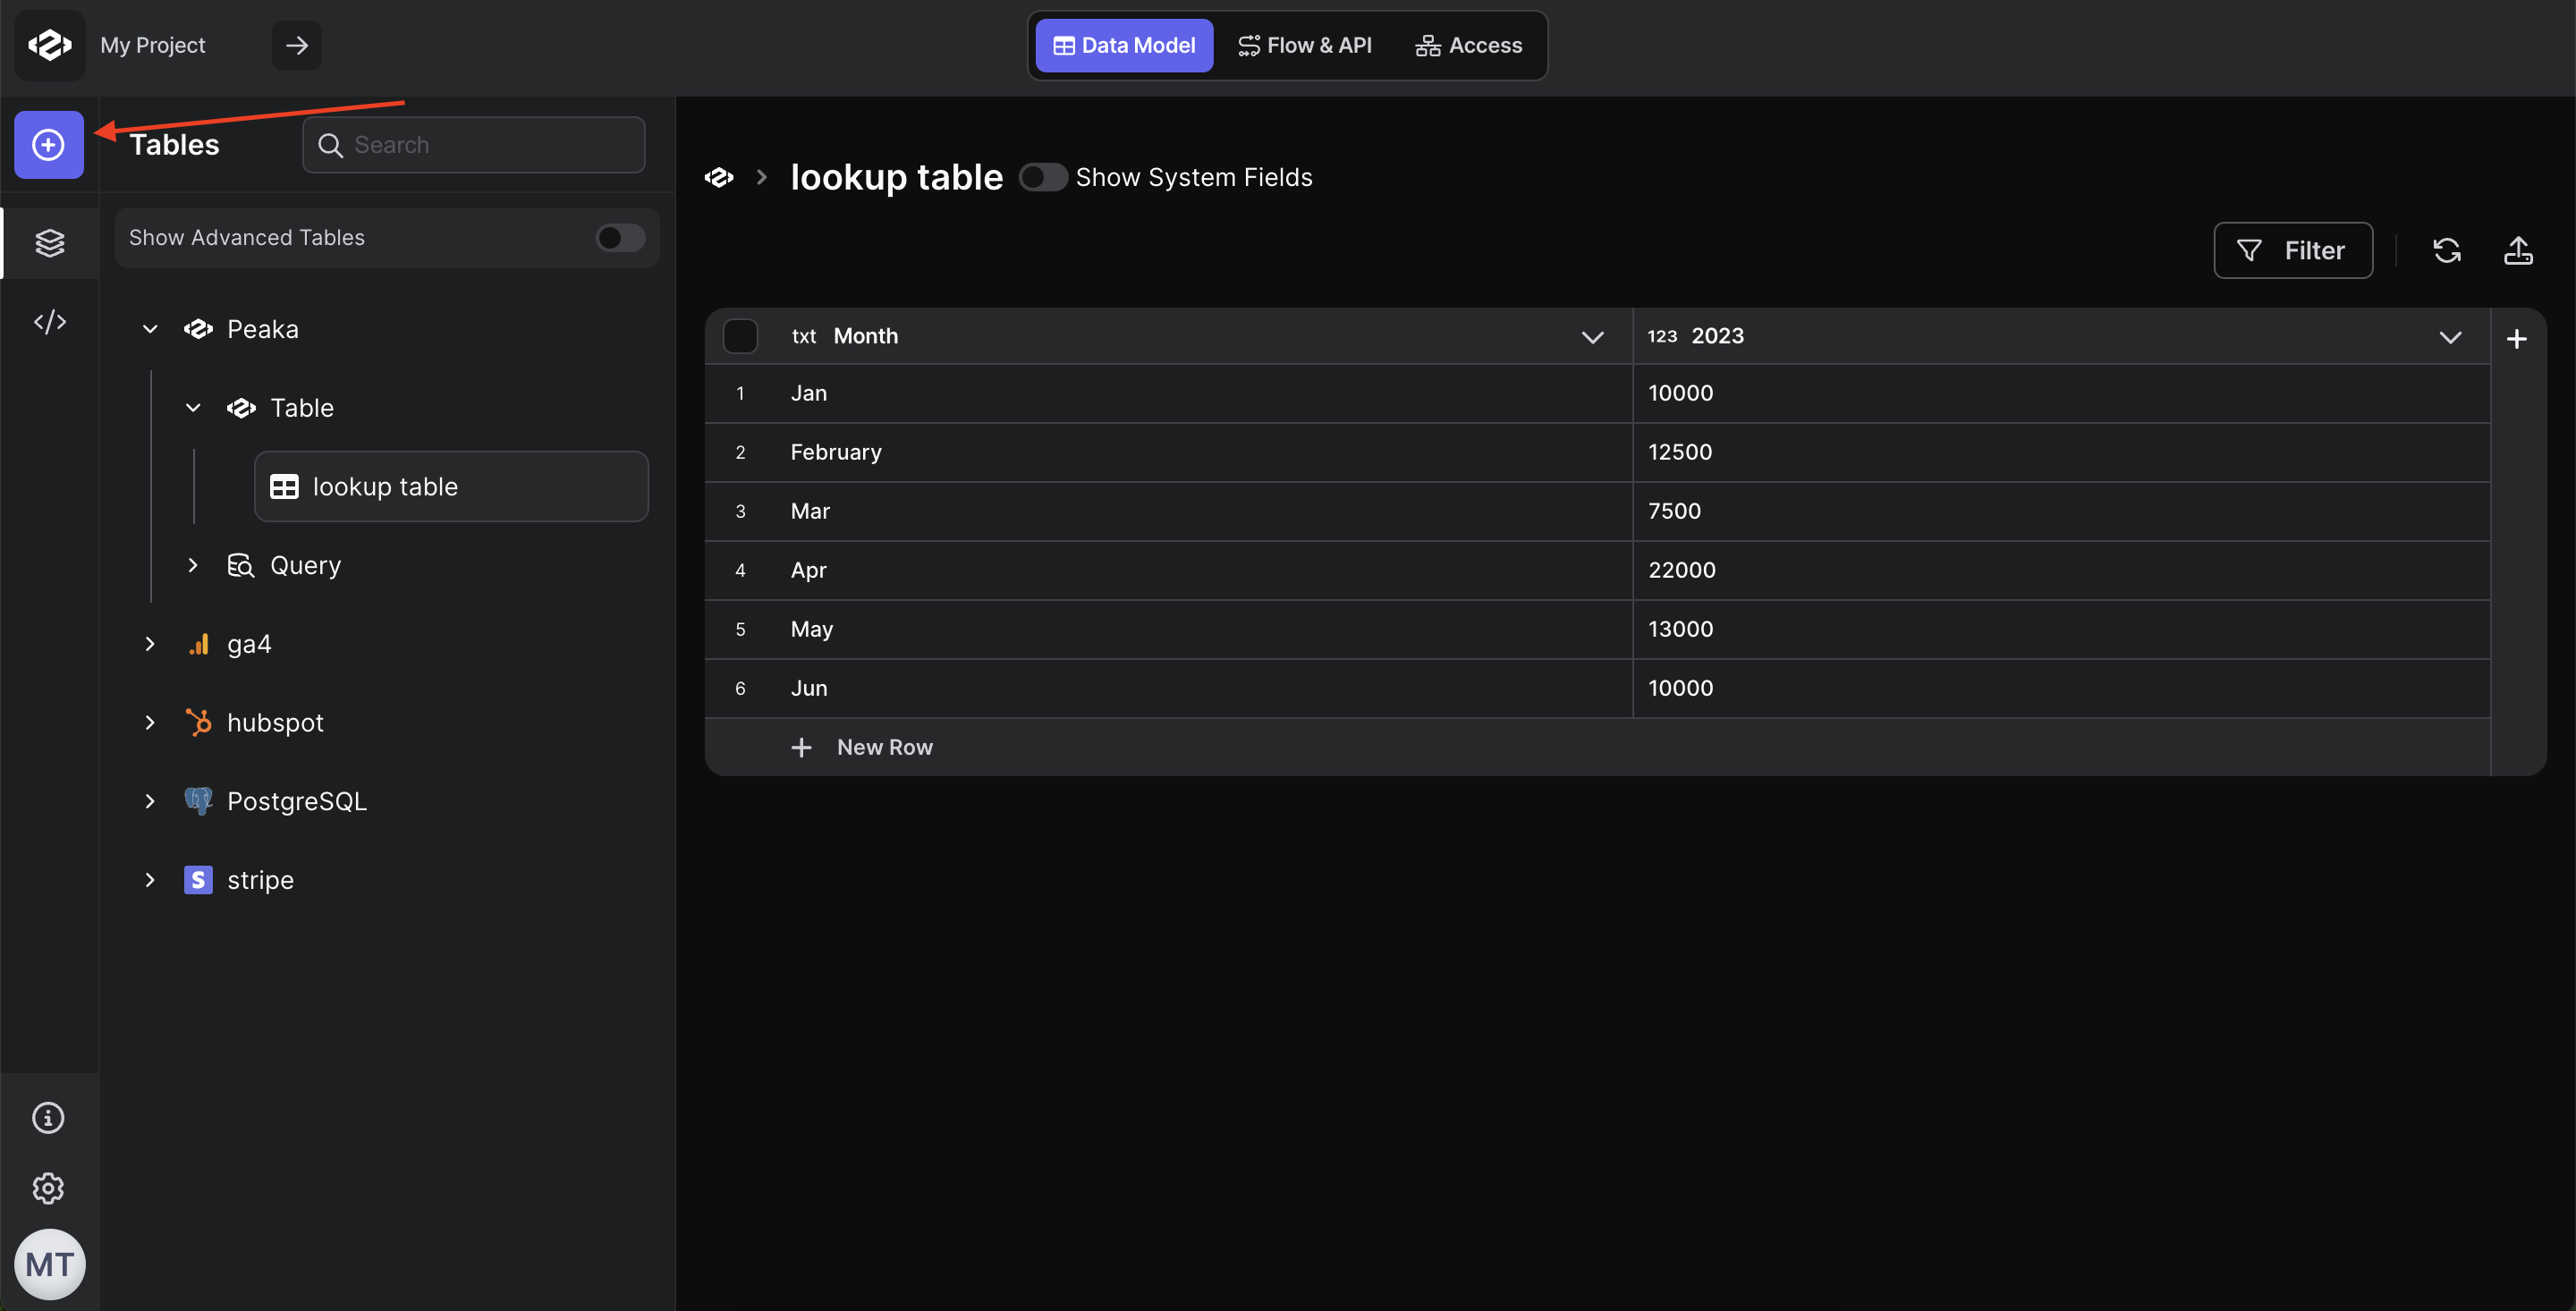
- From the list of available options, select the catalog you wish to connect to.
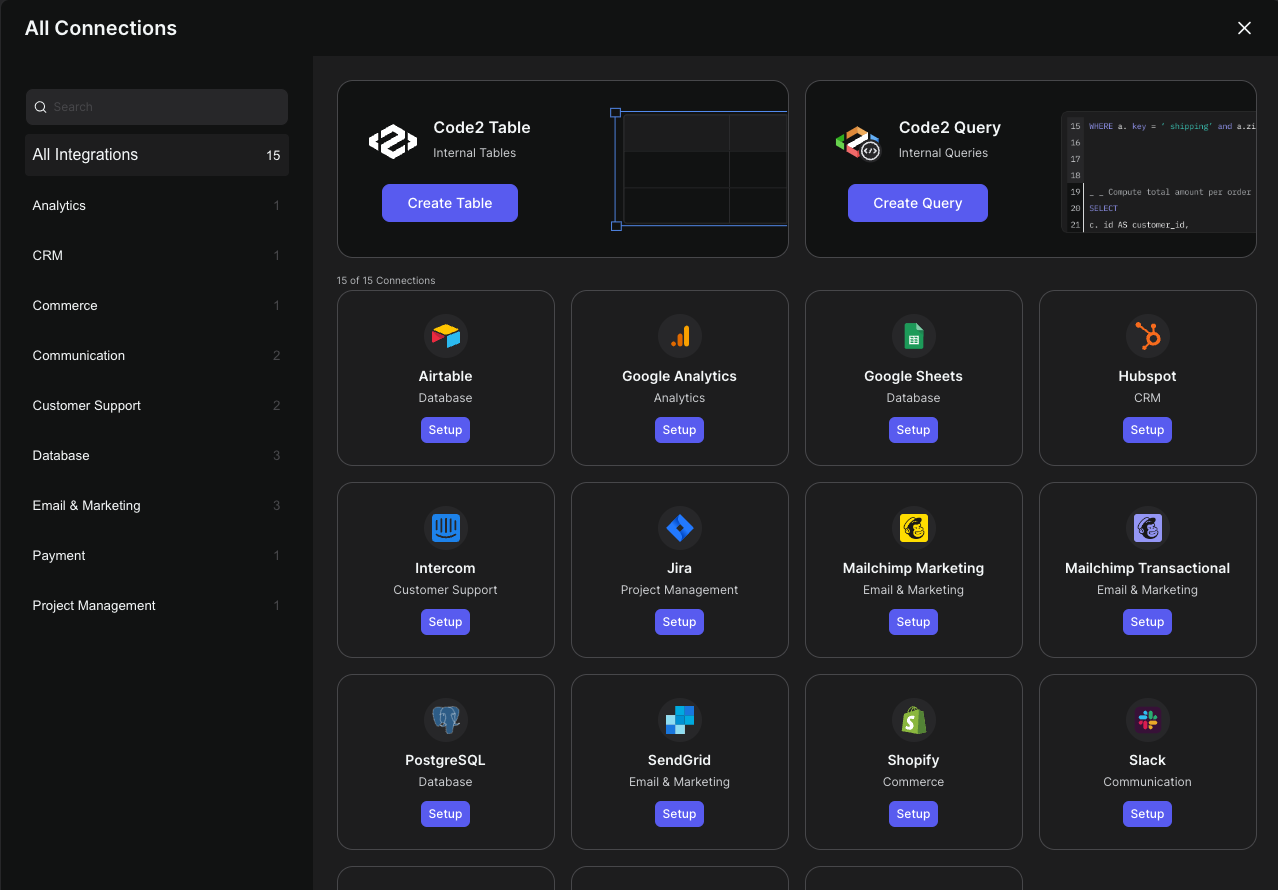
- Fill in the catalog name along with any other required fields to ensure proper configuration.
- After entering the necessary information, click on the “Create” or “Sign In” button to finalize the process.
- Your catalog will be successfully created, and you can start managing your data within it.
3. Caching
Once you have created the catalog, you will find the catalog table displayed in the right side panel under the “Tables” section.- Hover over the catalog item and click on the three dots icon to reveal a dropdown menu. From this menu, select the “Start Cache” option.
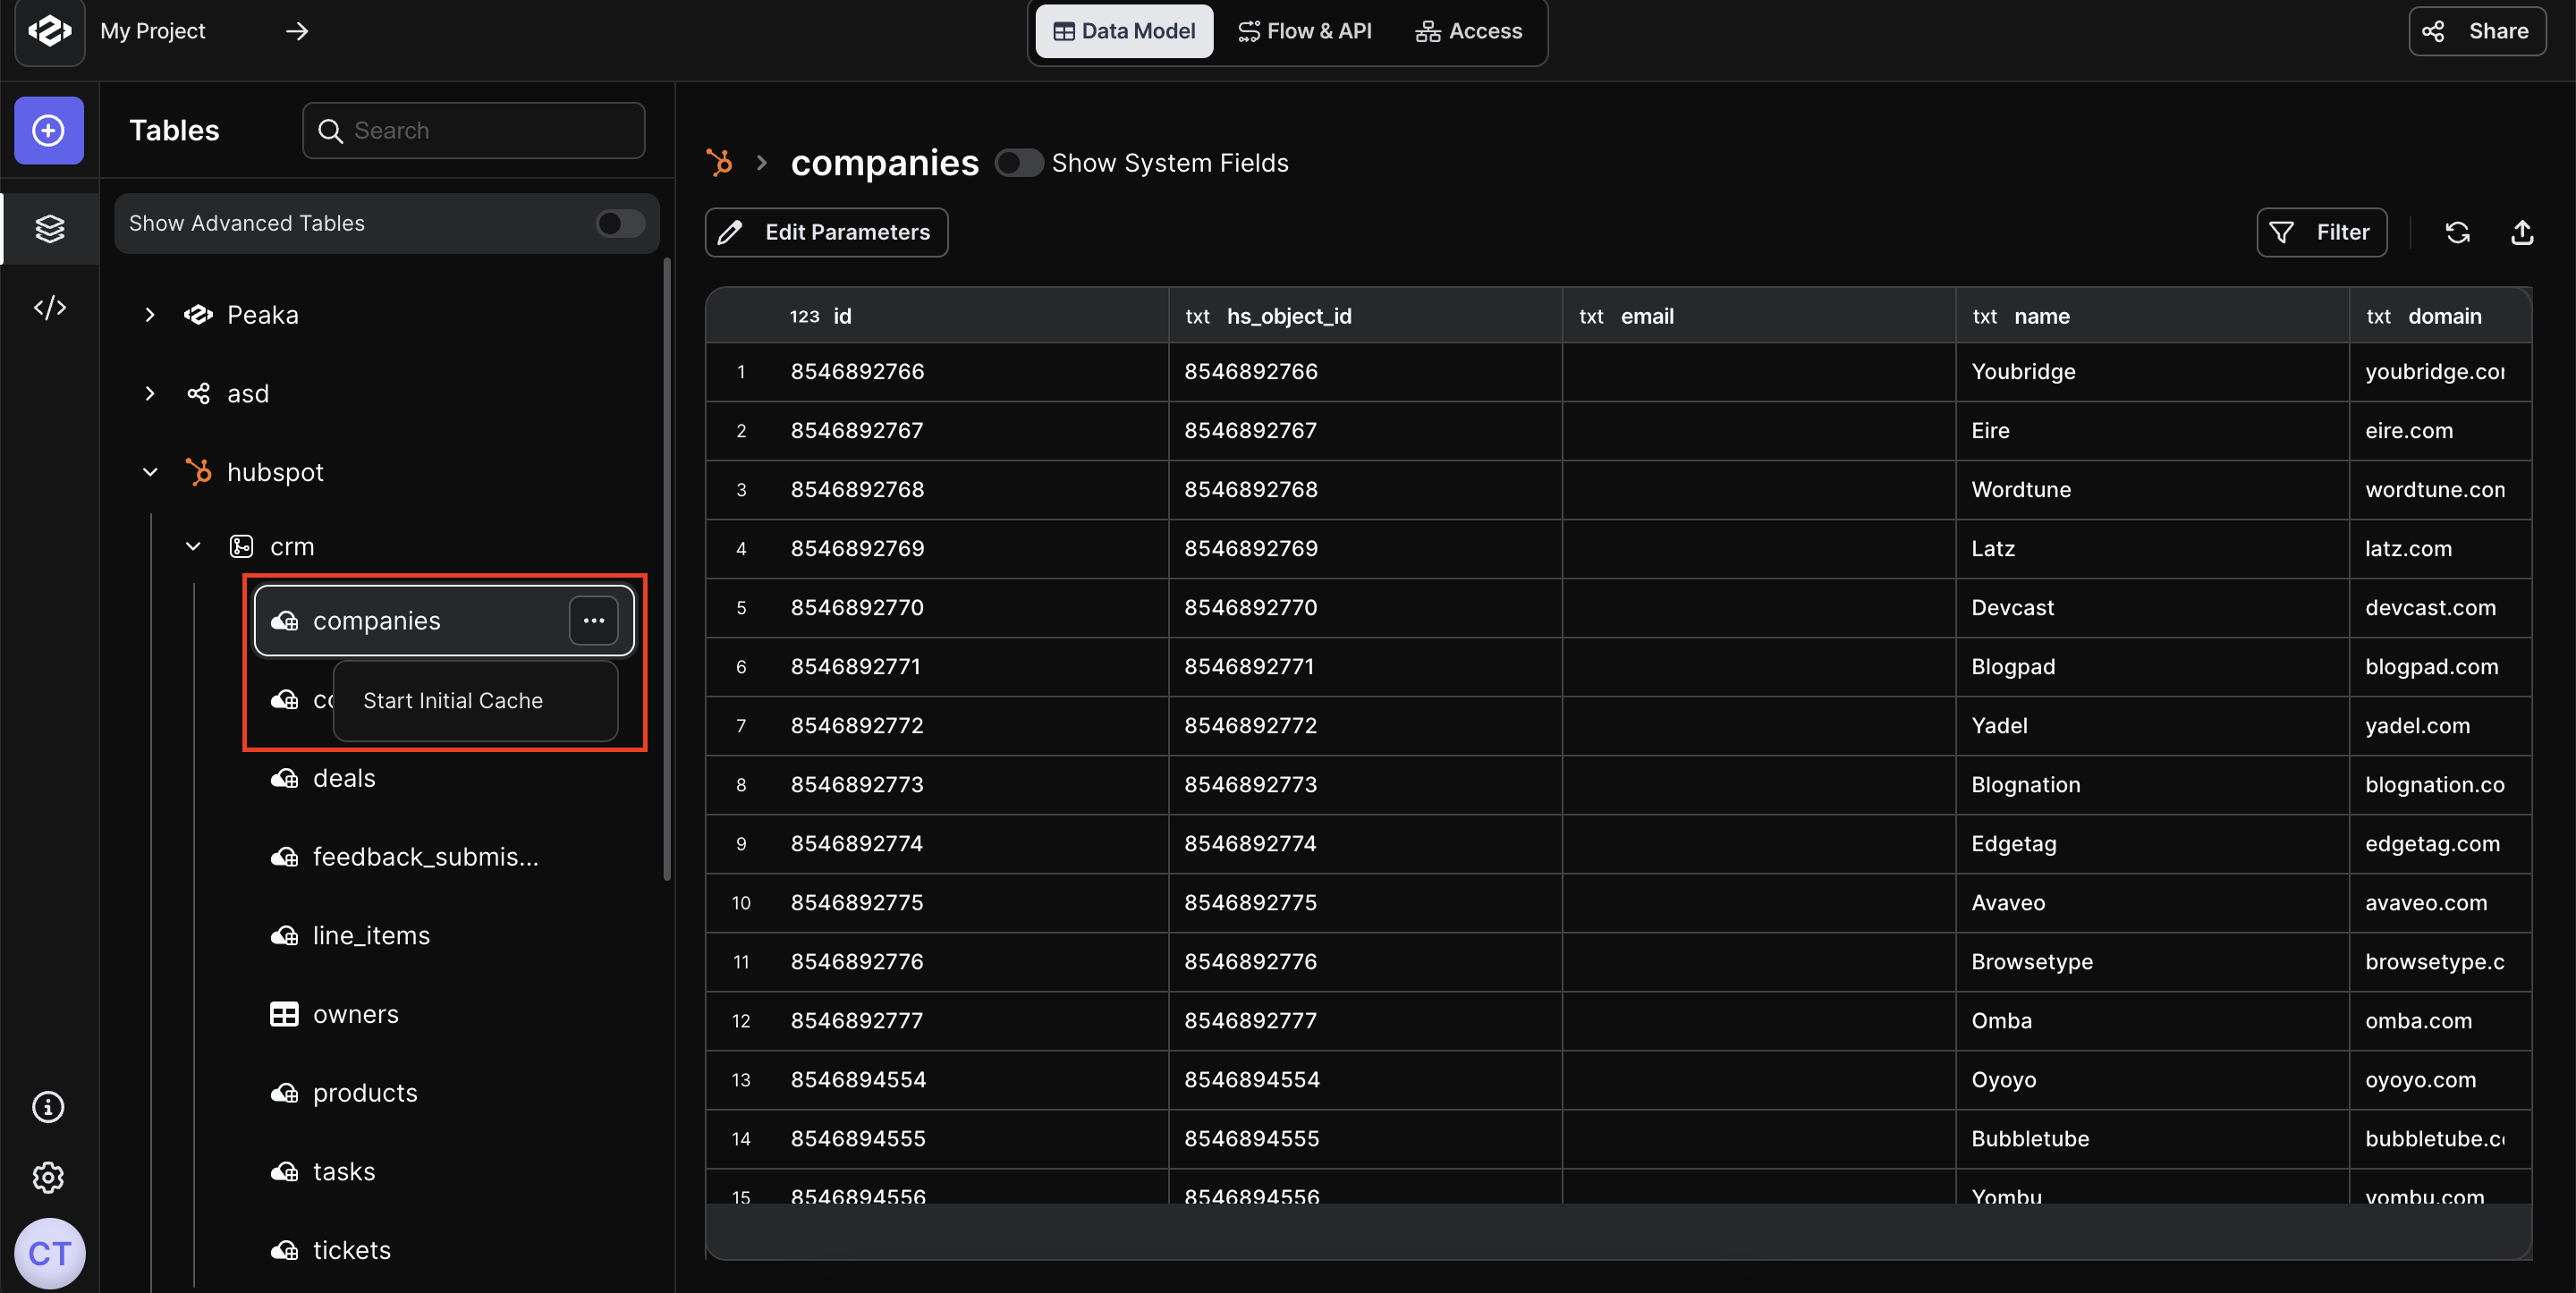
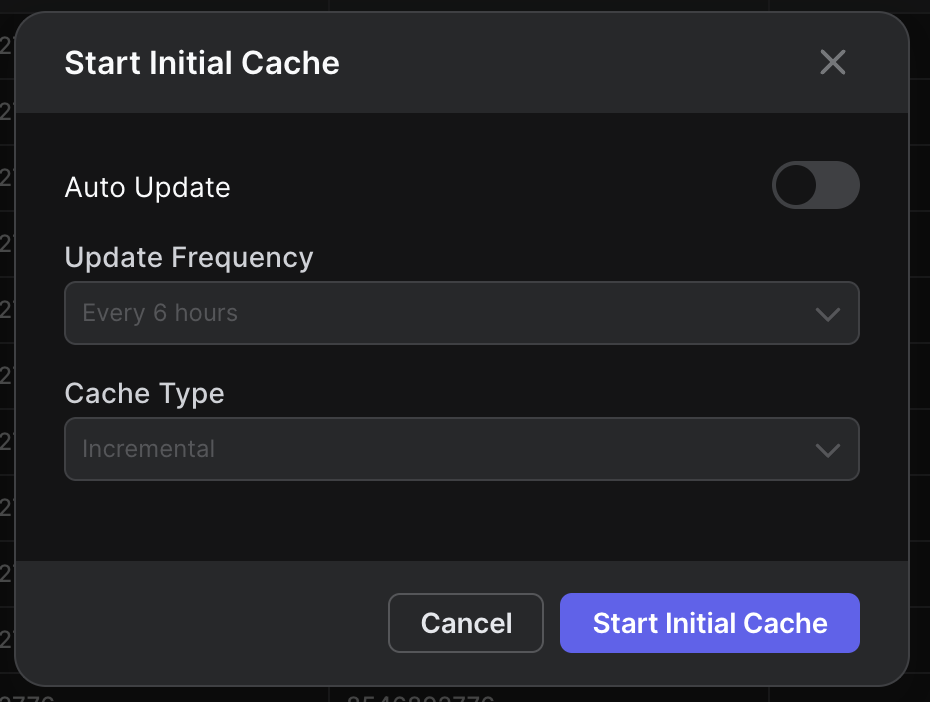
- A modal will appear prompting you to confirm the caching action. Click on the “Start Initial Cache” button within this modal.
Cache Settings
When configuring the cache, you can control how and when your cached data is refreshed using the following settings:- Auto Update: A toggle that enables or disables automatic cache refreshes. When turned on, Peaka periodically refreshes the cache based on the update frequency you select. When turned off, the cache is not refreshed automatically, and both the Update Frequency and Cache Type options are disabled.
-
Update Frequency: Determines how often the cache is automatically refreshed. This option is only available when Auto Update is on. The available intervals are:
- Every 15 minutes
- Every 30 minutes
- Every 1 hour
- Every 2 hours
- Every 6 hours
- Every day
- Every week
-
Cache Type: Determines how the cache is refreshed on each update. This option is only available when Auto Update is on. The available types are:
- Incremental: Updates the cache with only the new or changed data since the last refresh, resulting in faster and more efficient updates.
- Full Refresh: Rebuilds the entire cache from scratch on each refresh, ensuring the cached data fully matches the source.
- This will initiate the caching process for your catalog.
Choosing the Right Autoupdate Settings
Autoupdate keeps your cached data in sync with the source. Picking the wrong combination is the most common setup mistake, so use the scenarios below as a starting point:- Frequently changing data that needs to stay fresh (e.g. orders, events): enable Auto Update, choose a short Update Frequency (Every 15 or 30 minutes), and set Cache Type to Incremental. Incremental updates only pull new or changed rows, so short intervals stay inexpensive.
- Large tables where you mainly need recent data: enable Auto Update with an Incremental refresh at a moderate frequency (Every 1–6 hours). Avoid frequent Full Refresh on large tables — rebuilding the whole cache repeatedly is slow and resource-heavy.
- Data that must exactly match the source, including deletes and updates to old rows: use a Full Refresh. Because incremental updates only add new or changed rows, schedule a less frequent Full Refresh (Every day or Every week) to guarantee the cache fully matches the source.
- Reference or rarely changing data (e.g. lookup tables): a low frequency such as Every day or Every week is usually enough.
- Static data that never changes: turn Auto Update off. The cache is populated once and never refreshed automatically. You can still trigger a manual refresh later if needed.
Incremental and Full Refresh can run on independent schedules. A common pattern is a frequent Incremental update (e.g. hourly) combined with a periodic Full Refresh (e.g. weekly) to catch deletes and corrections. To configure these schedules via the API, see Cache Your Catalog.
4. Creating Partner API Key
- Before starting execution of query, you need to create a Partner API key. You will use this API key to authenticate your requests to the Peaka API.
- Navigate to the Developer section.
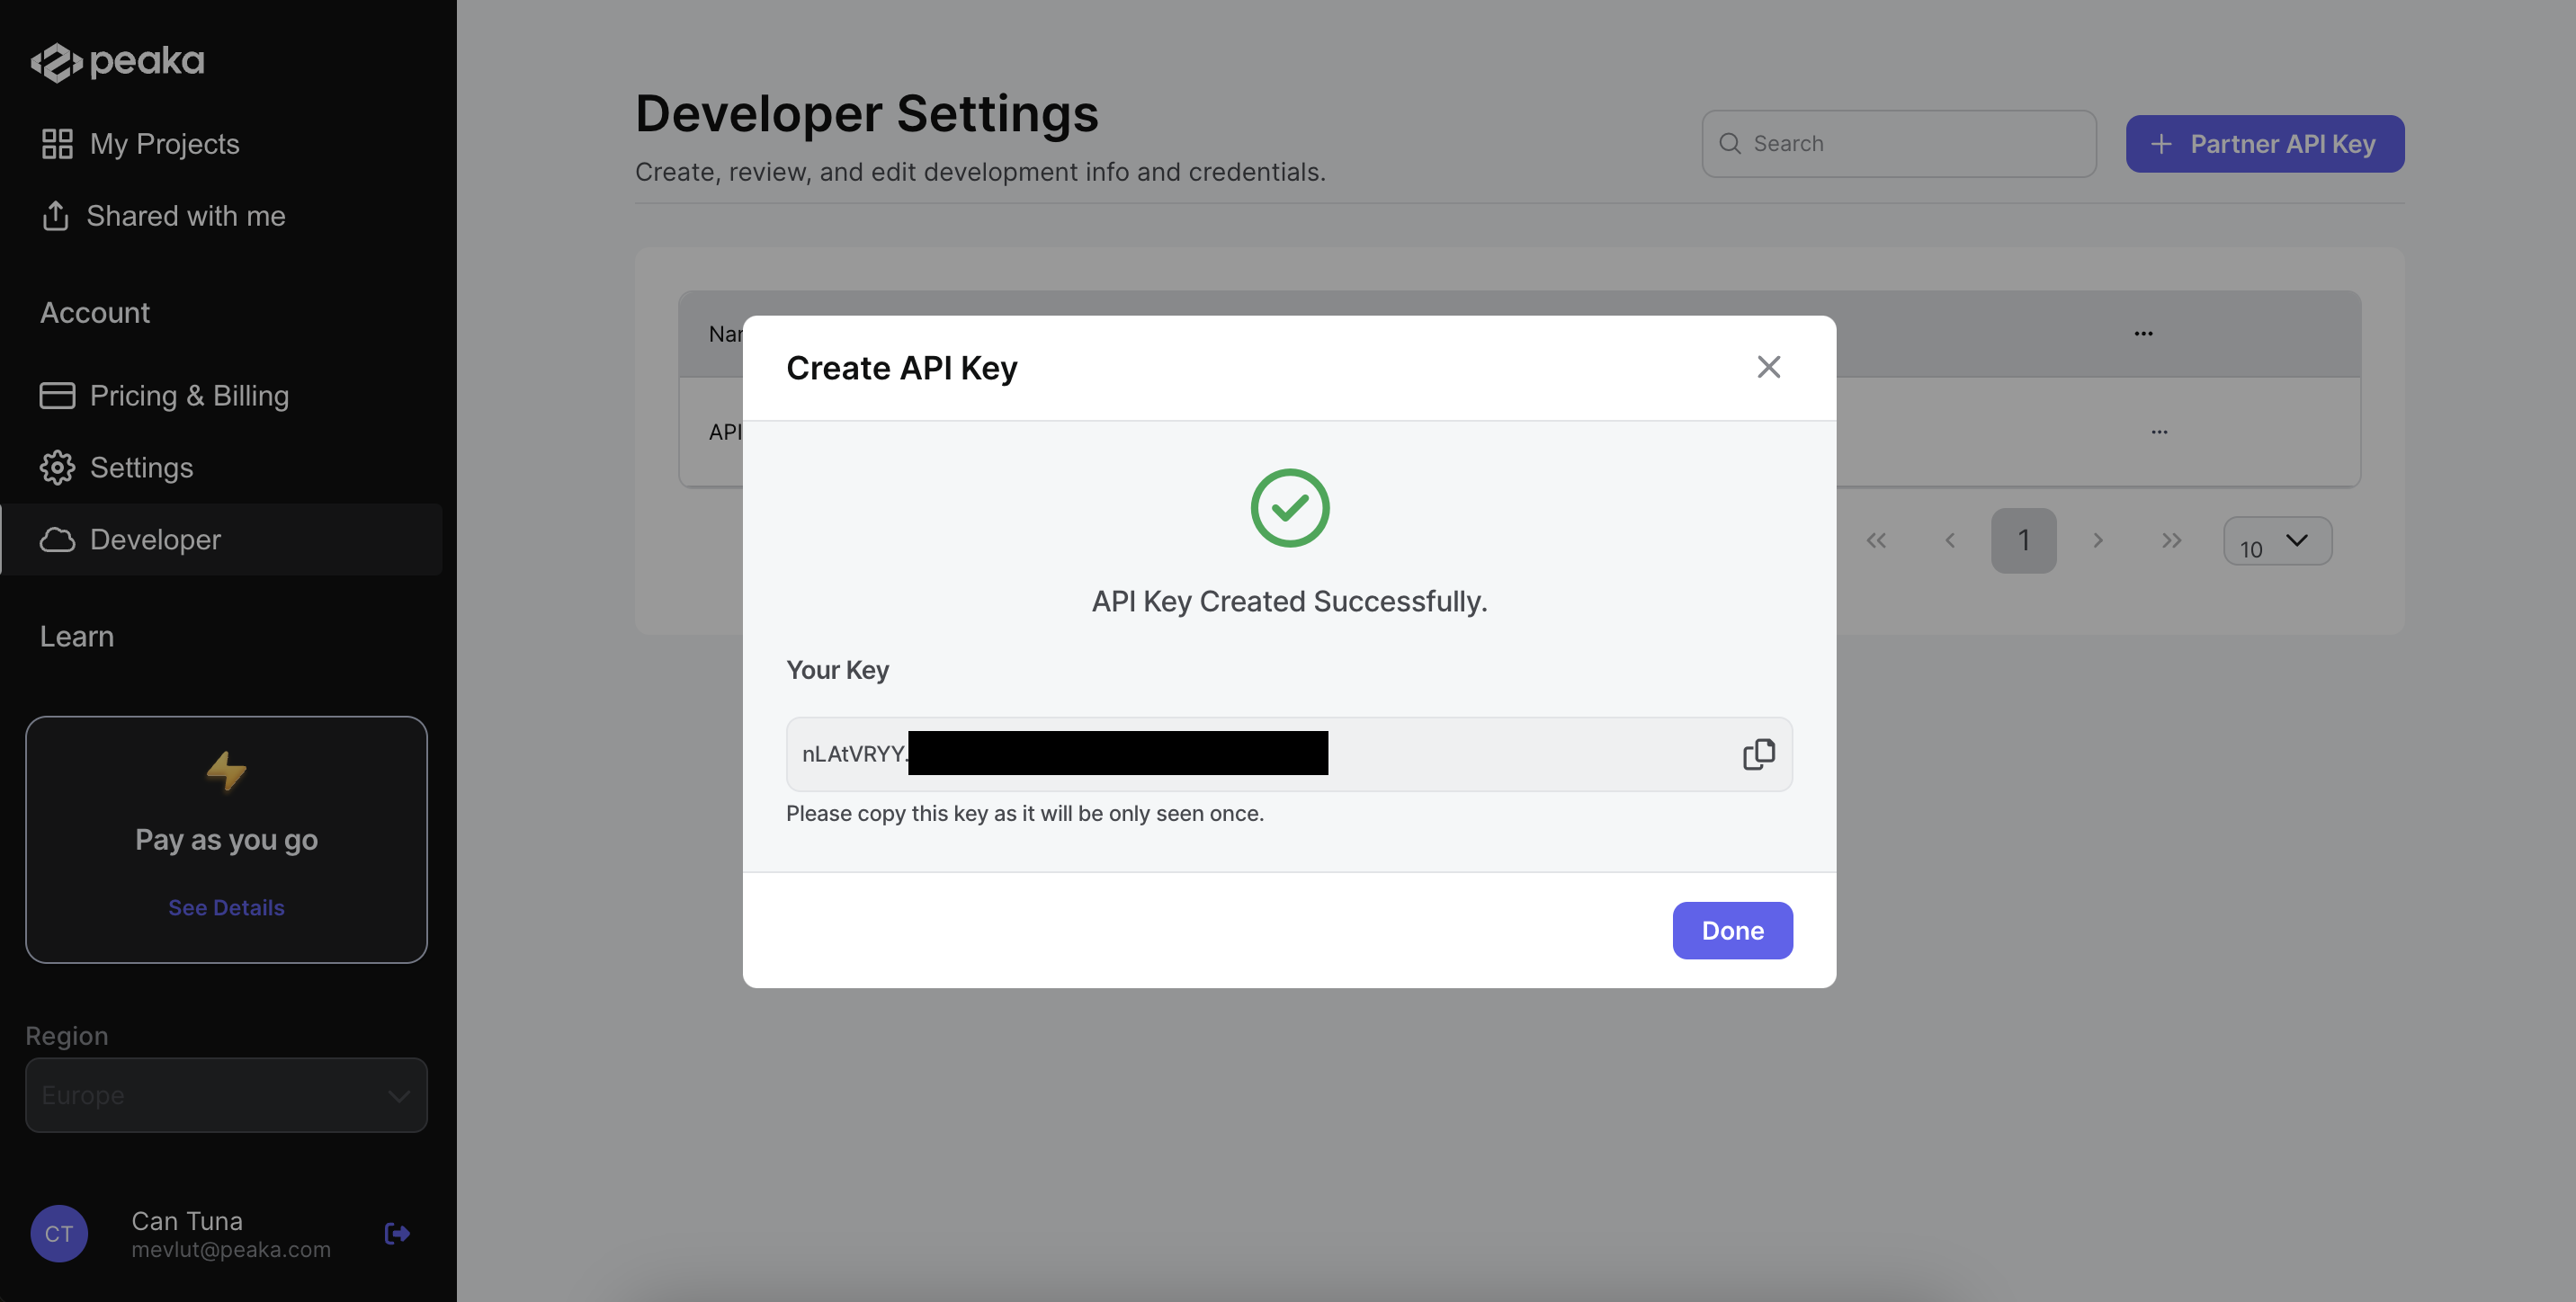
- Click on the Partner API Key button to open a dialog box.
- Fill in the form by entering your desired API Key Name.
- Click on the Create button.
- You can copy the API key from the dialog box.
5. Create Your Query
- Now you have created your project, API key, and catalog. Also cached your catalog.
- You are now ready to create queries that allow you to extract and refine data from your catalog based on your requirements.
6. Run Your Query
- After creating query, you can run your query.
- After running query is completed, you will get the data in response. You can use this data for further processing or analysis as needed.
7. Success
- You have successfully created your project, generated your API key, established your catalog, cached the catalog, and executed your query.
- This data is now ready for advanced processing and insightful analysis.
- You have effectively integrated Peaka as your robust data management backend.