Filtering Data with Visual Filters
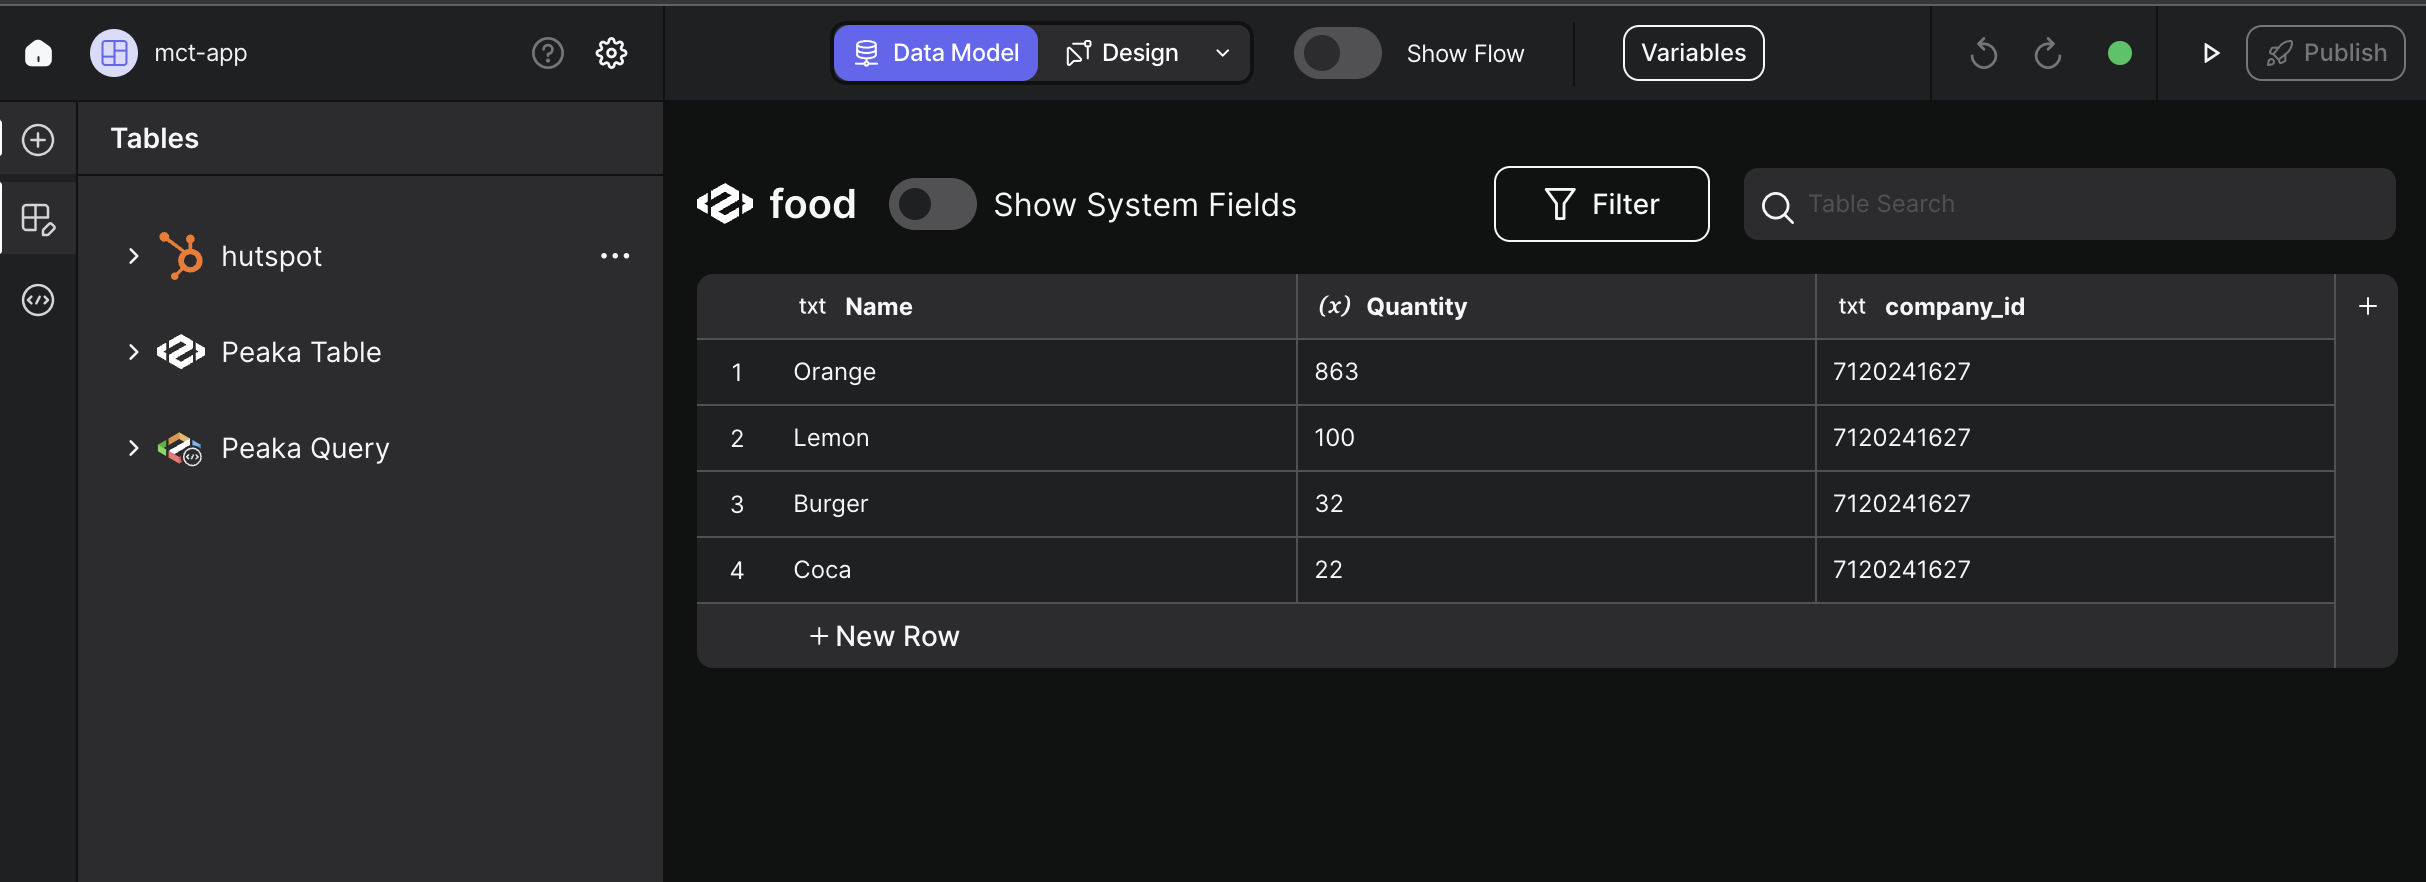
As an example, we’ll filter a Peaka Table named “Food” that contains information about different food items, including their name, quantity, and company ID. Follow these steps to filter your data using visual filters:
- Open the filter modal: Click the “Filter” button above the table. This action opens a modal where you can define your filter criteria.

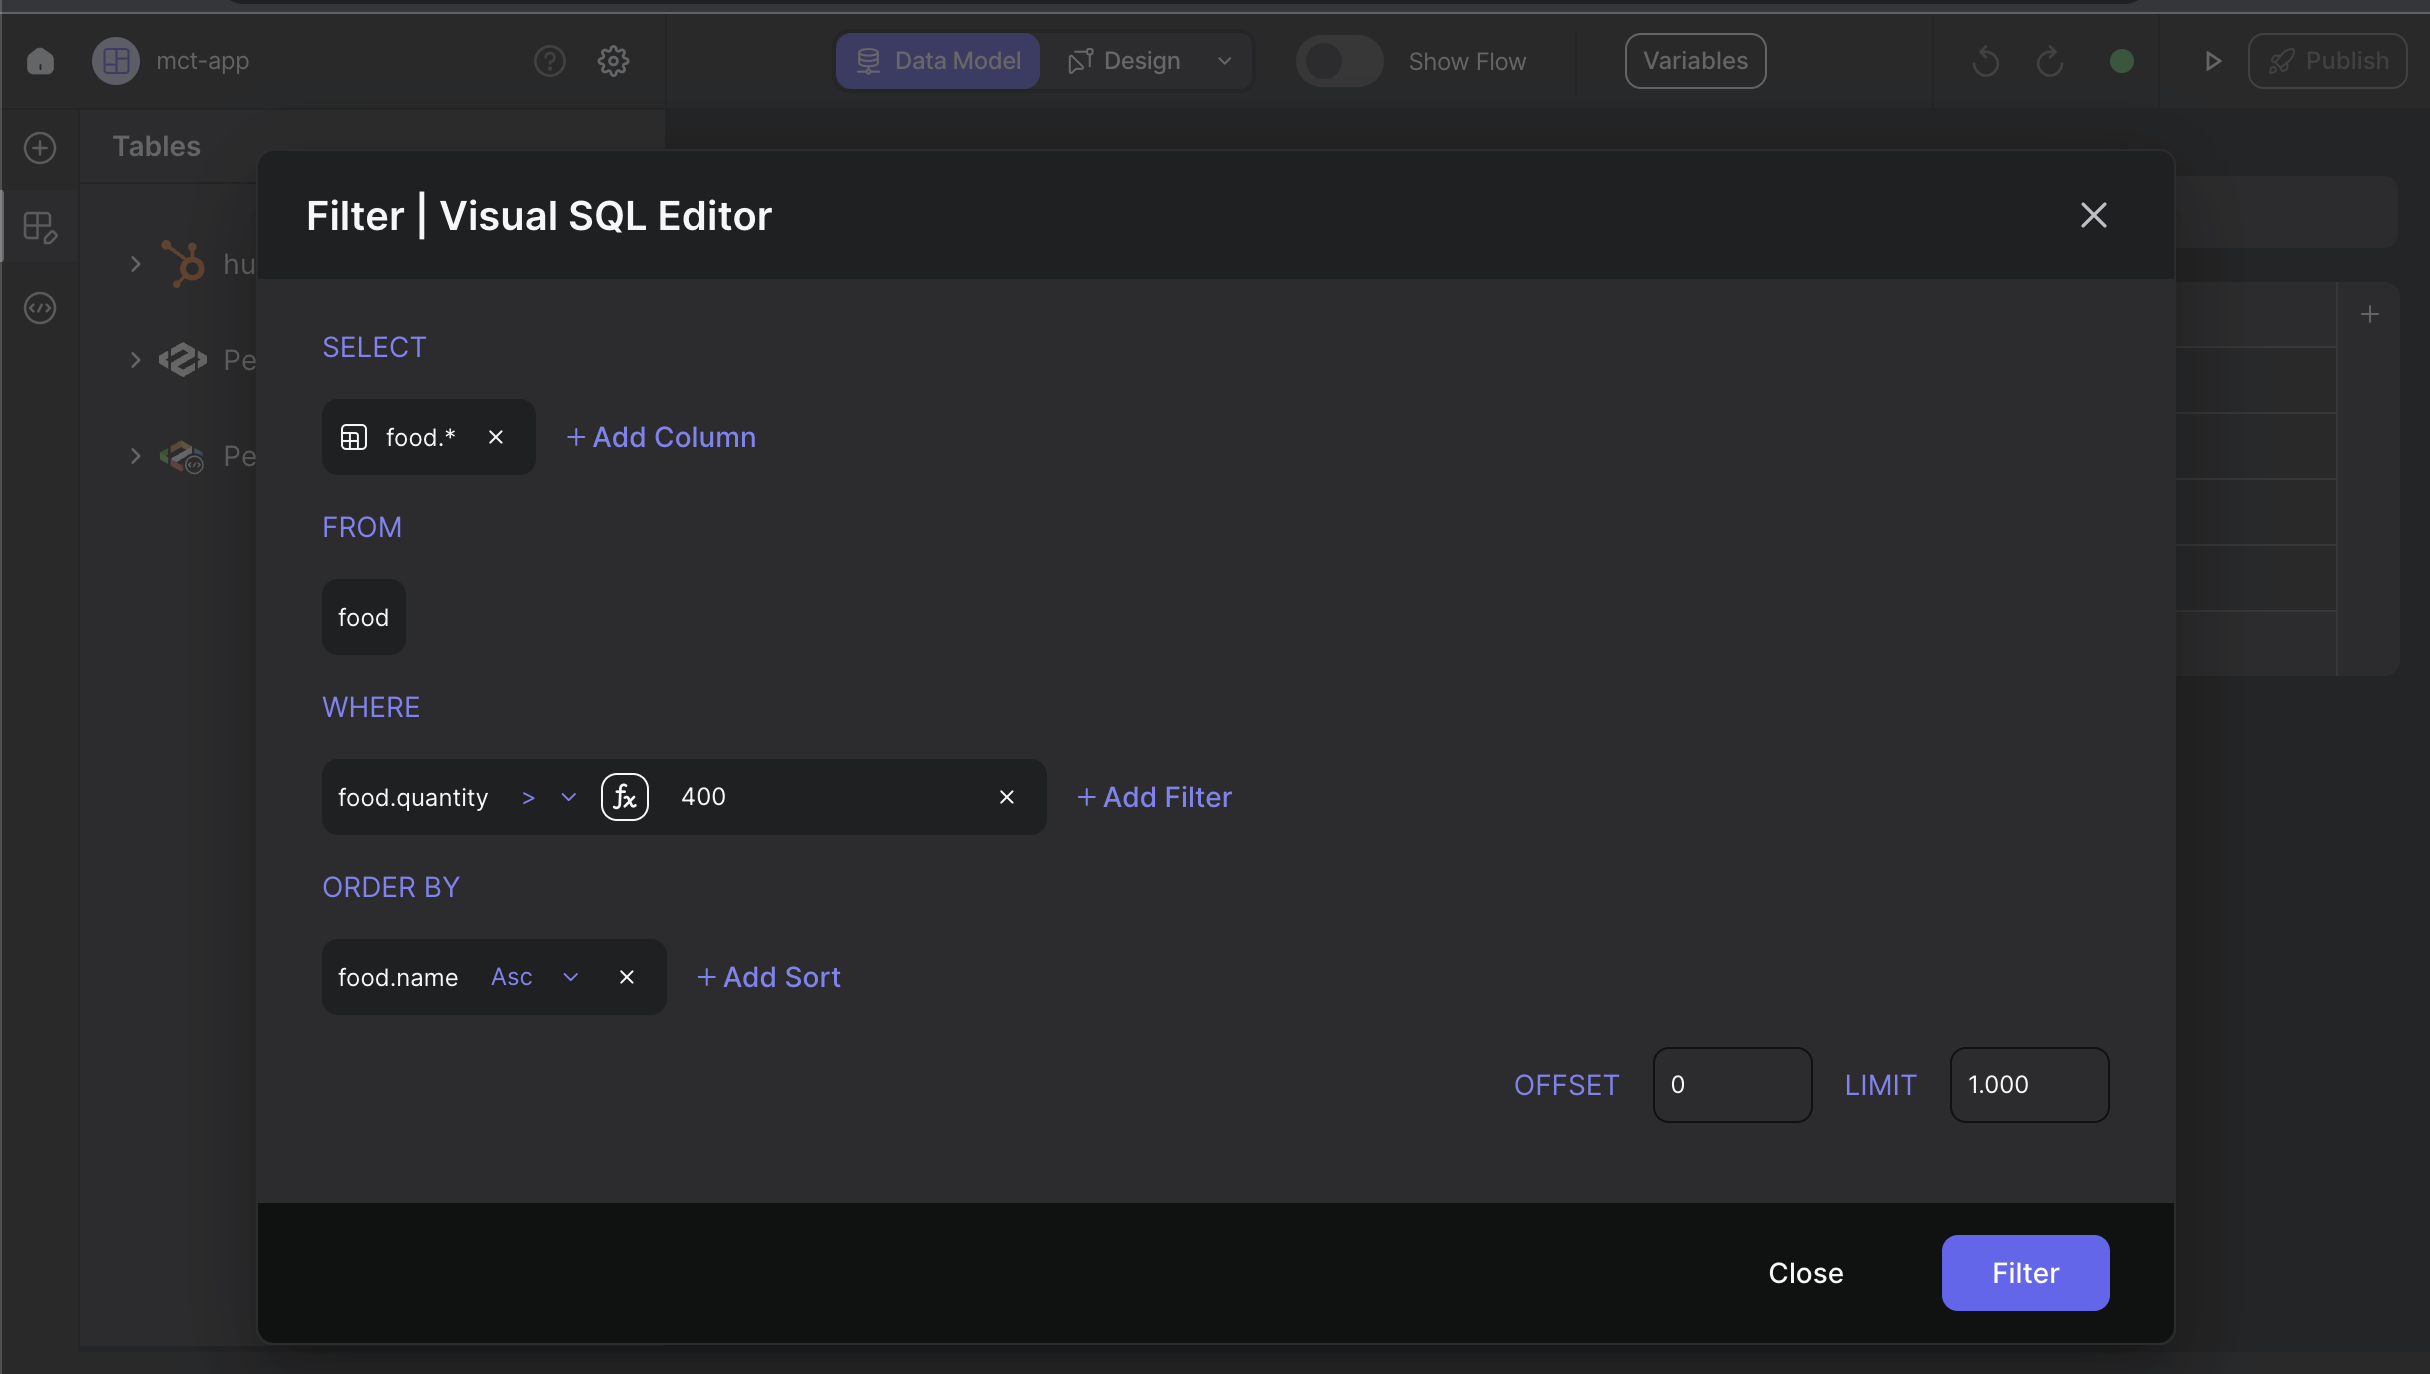
- Define the filter criteria: In the modal, locate the “WHERE” input field. Here, you can define your filtering criteria to narrow down the data as per your requirements. Additionally, you can use the “ORDER BY” option to sort the data.
- Apply the filter: Once you’ve configured your filter criteria, click the “Filter” button at the bottom of the modal. This action applies the filter and sorts your data based on your specified criteria.
 By following these steps, you can effectively filter your data using the visual filters in Peaka. This feature allows you to quickly and intuitively refine your data to access the specific information you need.