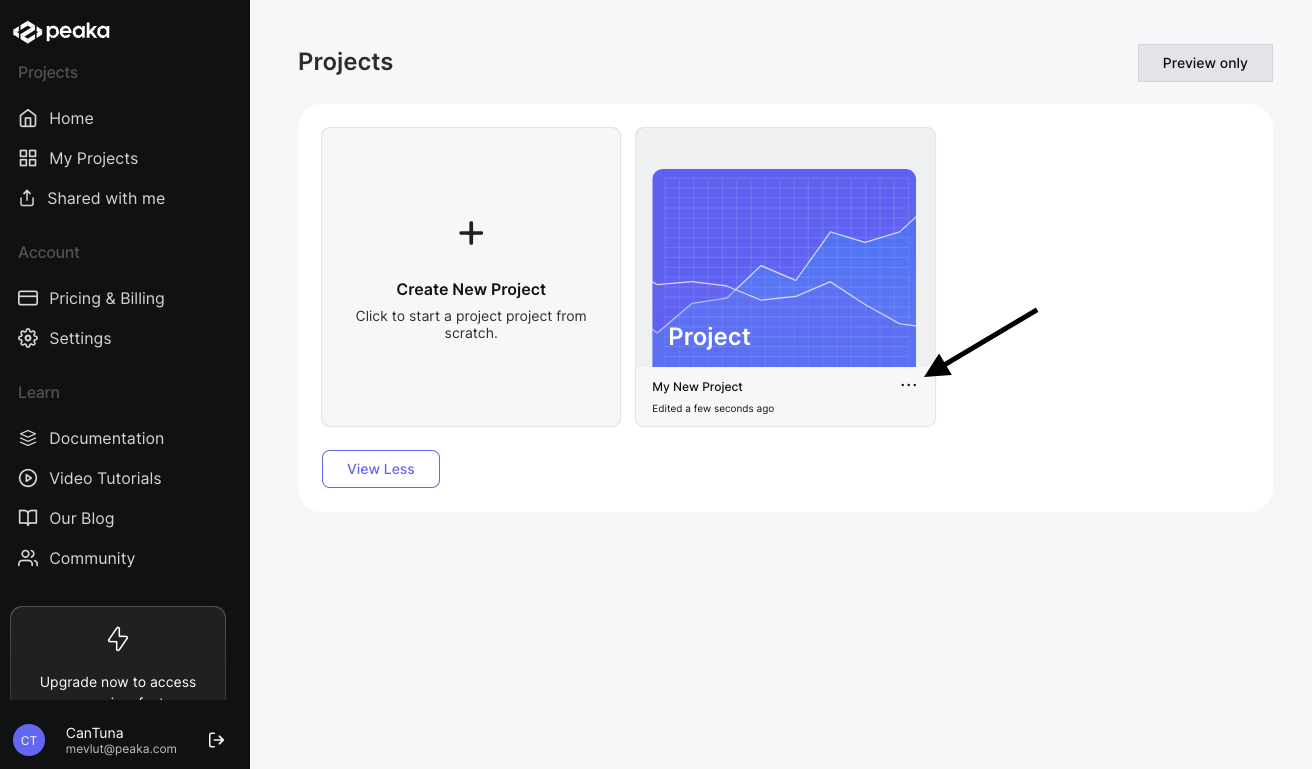
- Access the project menu: Start by identifying the project you want to clone. Locate the project, and you’ll find a three-dots button (ellipsis icon) associated with it. Click on this button to access the project menu.

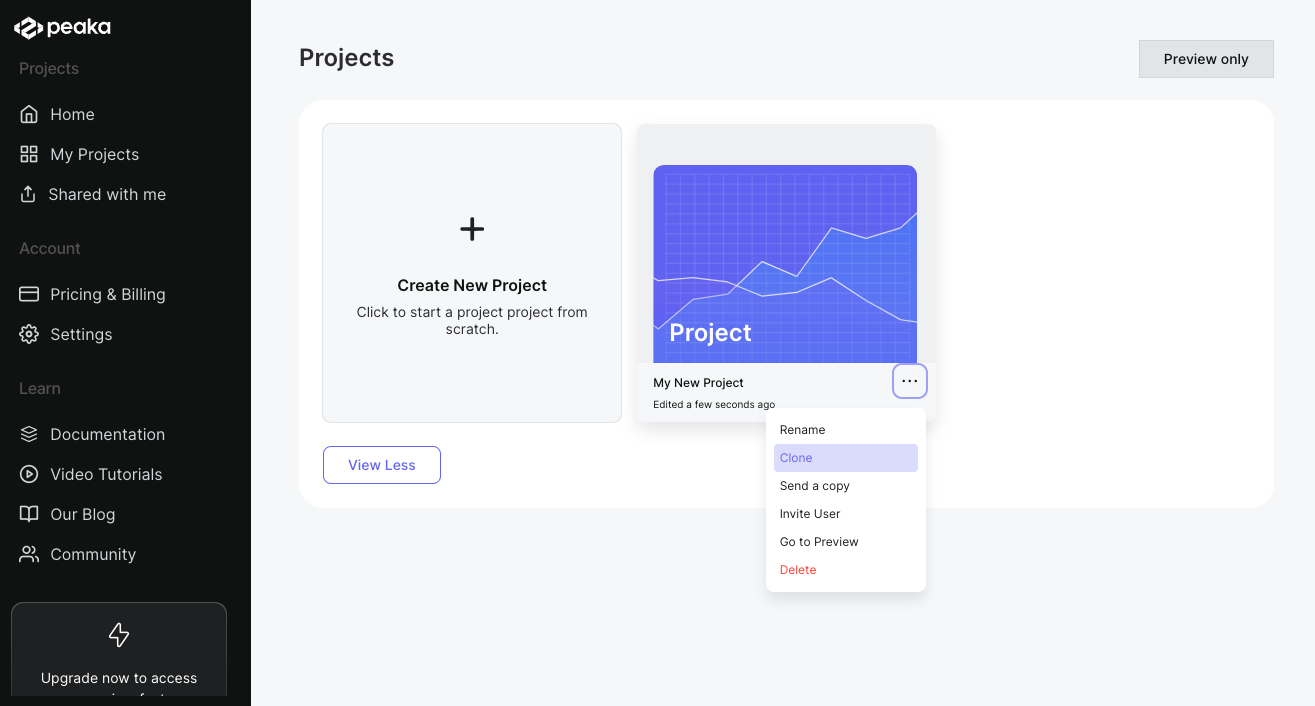
- Select ‘Clone’: After clicking the three-dots button, a list of project actions will appear. From this list, select the ‘Clone’ option.

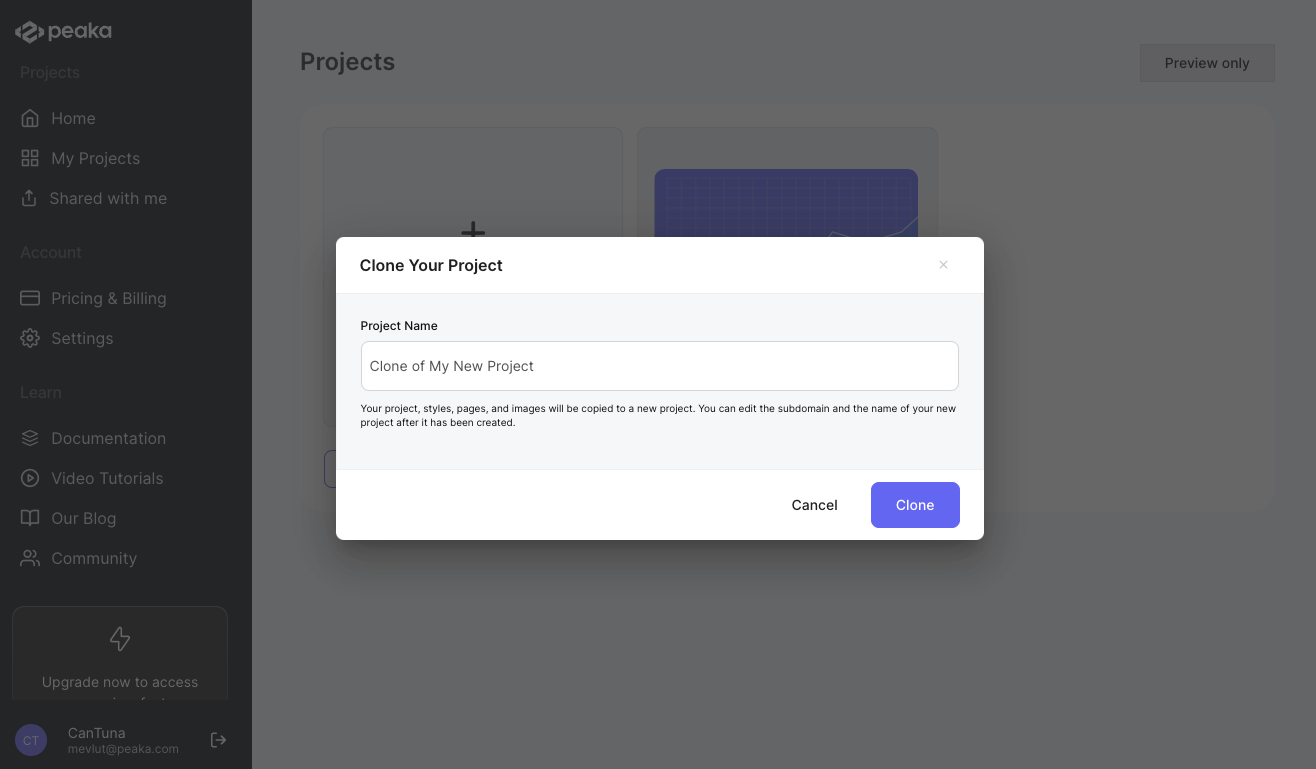
- Adjust the project name (optional): A popup window will appear, and Peaka will automatically assign a name to the cloned project. If you prefer a different name, you can edit it at this stage.

- Clone the project: To initiate the cloning process, simply click the “Clone” button within the popup. Peaka will duplicate the project, and you will be able to access it from your project list.