What is a Materialized Query?
A Materialized Query is a powerful performance optimization technique that stores the results of complex queries physically in your database. Instead of executing expensive computations repeatedly, materialized queries cache precomputed data, dramatically reducing query execution time and system load.Key Benefits
- Performance Boost: Queries that once took minutes can now execute in seconds by accessing pre-calculated results
- Resource Efficiency: Reduces computational overhead by eliminating redundant processing
- Real-time Analytics: Enables faster dashboards and reporting by serving data from materialized views
- Cost Optimization: Lower database resource consumption translates to reduced operational costs
Common Use Cases
- Data Warehousing: Pre-aggregate large datasets for faster reporting
- Dashboard Queries: Cache complex analytical queries that power business intelligence tools
- Cross-database Joins: Materialize results from queries spanning multiple data sources
- Heavy Computations: Store results of resource-intensive calculations like statistical analyses
What is the difference between a Materialized Query and a Semantic Catalog?
In short: use a Materialized Query when you want speed and can accept scheduled updates; use a Semantic Catalog when you want a virtual, always-current view with sharing and governance and no physical copy of the data.
How to create a Materialized Query?
To create a Materialized Query, you can follow these steps:- Navigate to the Query Editor located in the right side panel and then select your query which you want to materialize.
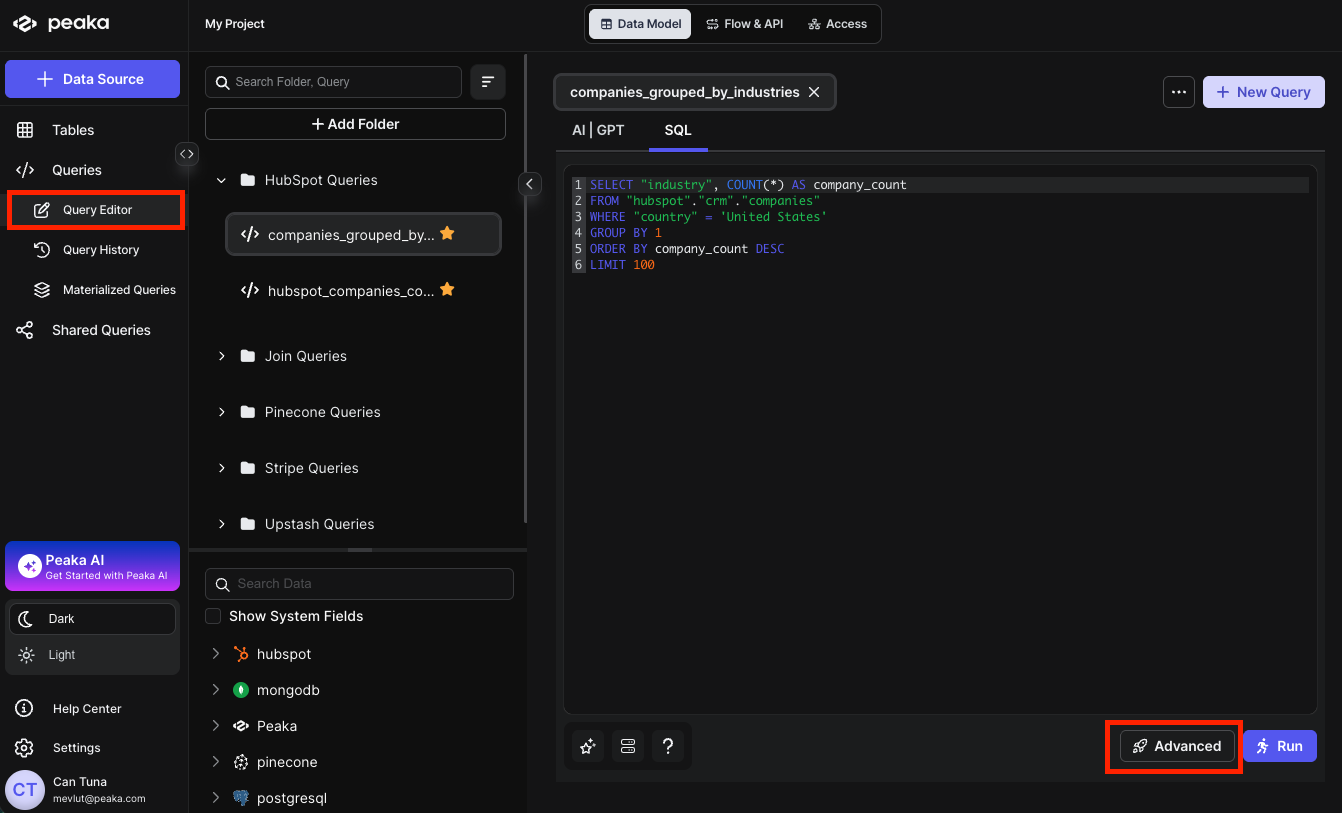
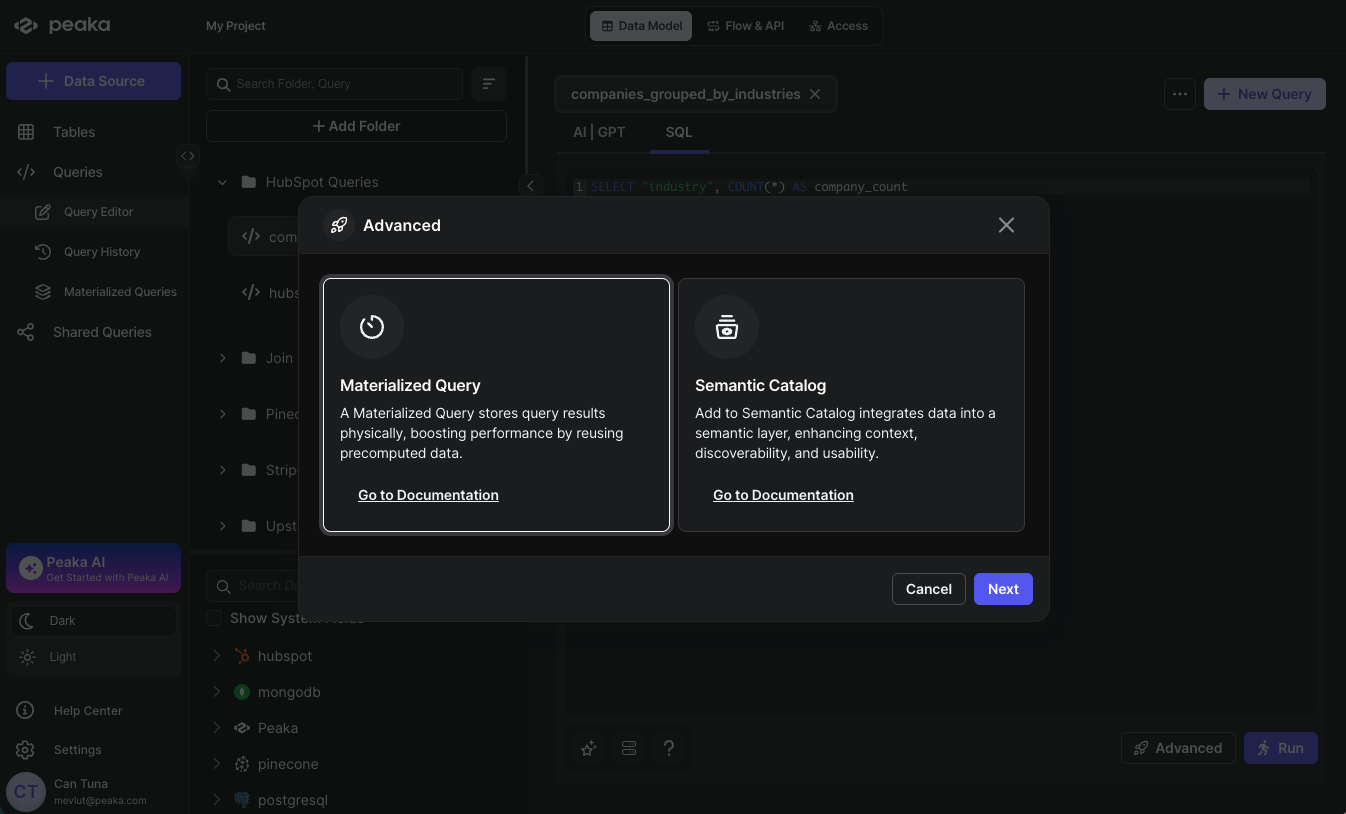
- Click on the Advanced button to open the configuration modal. Select the Materialize option and click on the Next button.
-
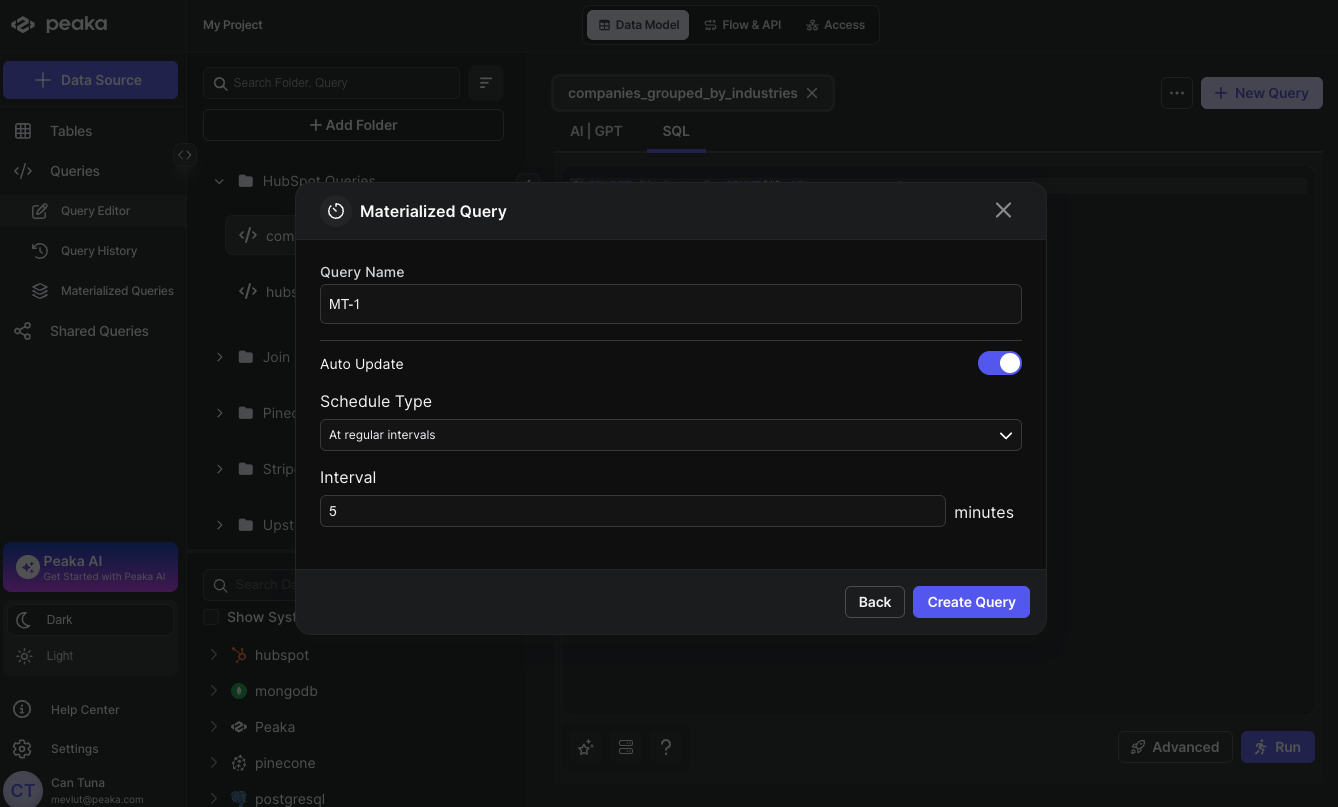
Configure your Materialized Query settings:
- Name: Enter a descriptive name for your Materialized Query
- Auto Update: Toggle this option to enable automatic refresh of your materialized data
- At regular intervals: Updates the materialized query at specified minute intervals (e.g., every 15, 30, or 60 minutes)
- Based on a schedule: Provides flexible scheduling options where you can define:
- Timezone
- Frequency options (daily, weekly, monthly, or specific dates)
- Partitioning: Physically groups rows by one or more columns or transforms so that filtered reads scan less data. Use the format
ARRAY['column1', 'column2']— for exampleARRAY['country', 'day(order_date)']. See How to Update Materialized Query Settings for the full list of supported transforms. - Sorted By: Sorts rows within each file to speed up selective filters on high-cardinality columns. Use the format
ARRAY['column1', 'column2']— for exampleARRAY['order_date DESC'].
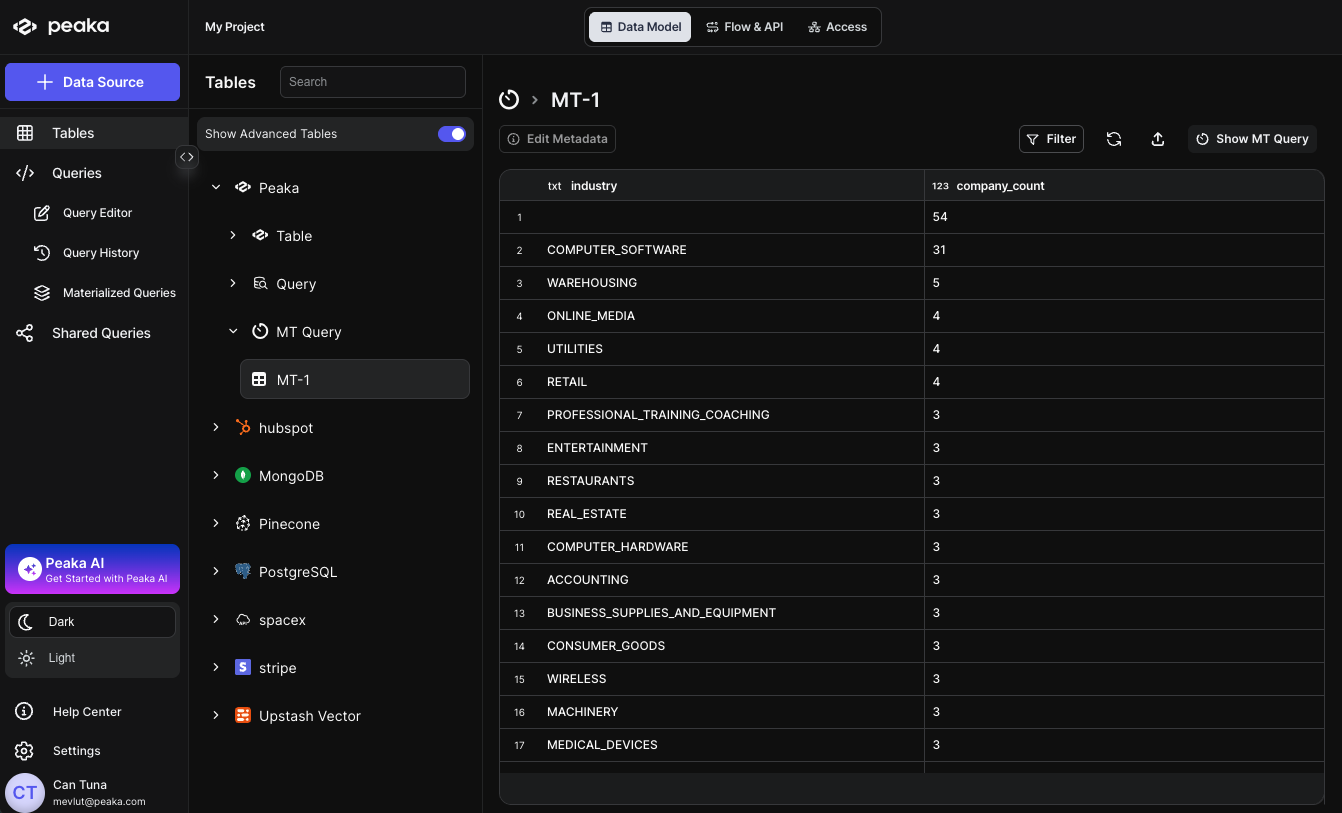
 That’s it, your Materialized Query will be created. You can see the Materialized Query in the right side panel under the “Tables” section.
How to Update Your Materialized Query
You can update your materialized query in two ways: by editing the existing query or by replacing it with a different query entirely.Edit the Existing Query
- Navigate your materialized query in the right side panel under the “Tables” section and click on the Show MT Query button.
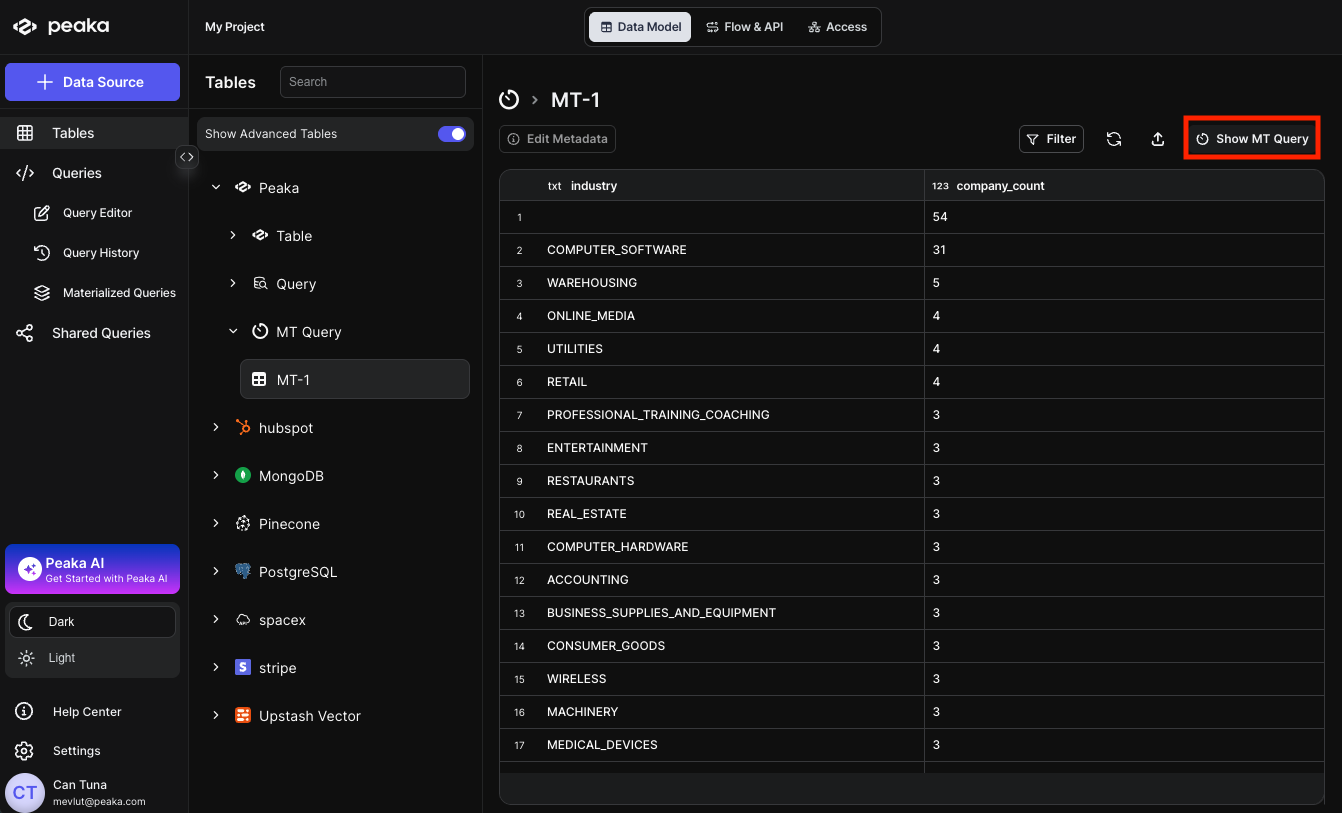
- A modal will open displaying the materialized query details. Click on the Edit button to modify the query.

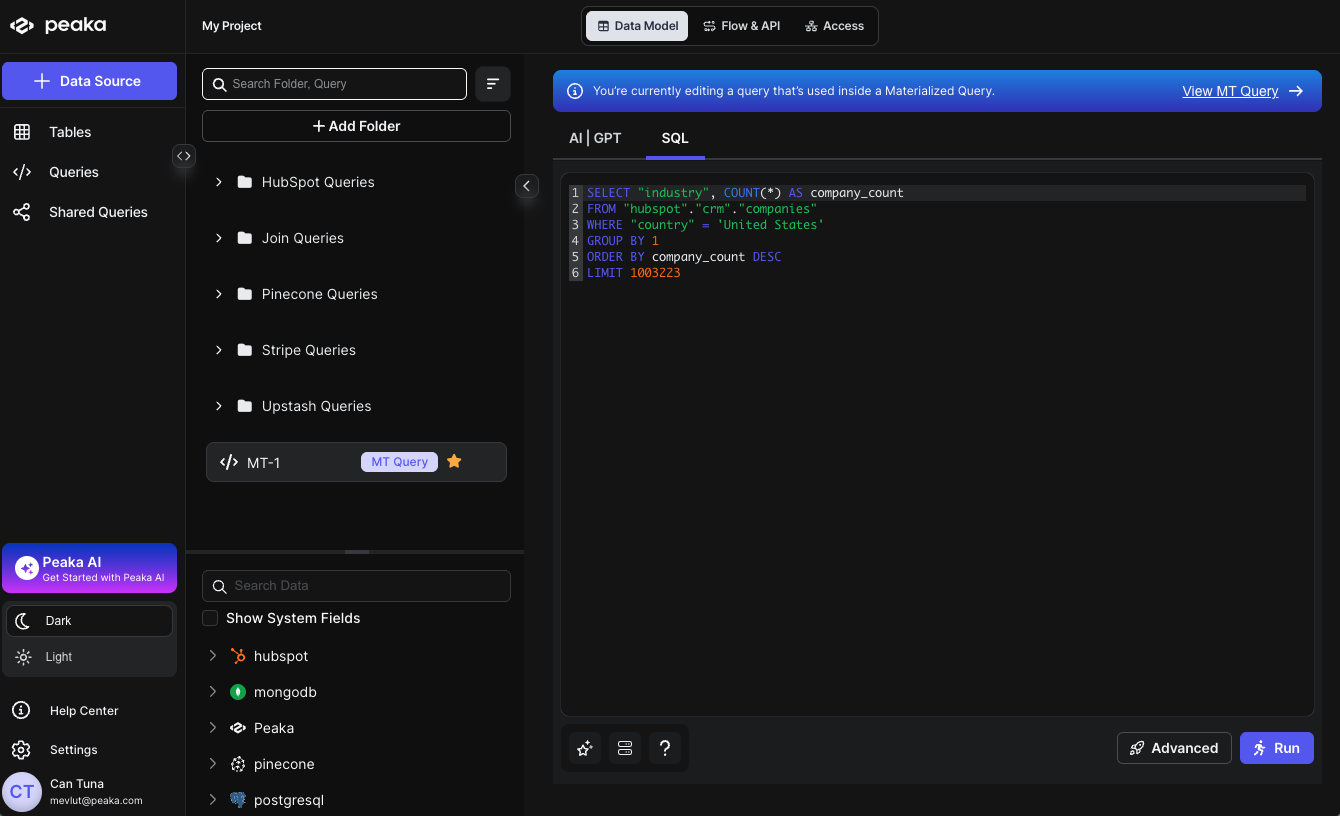
- You will be redirected to the Query Editor where your materialized query will open. Make your desired modifications to the query and run it to see the updated results.
Replace with a Different Query
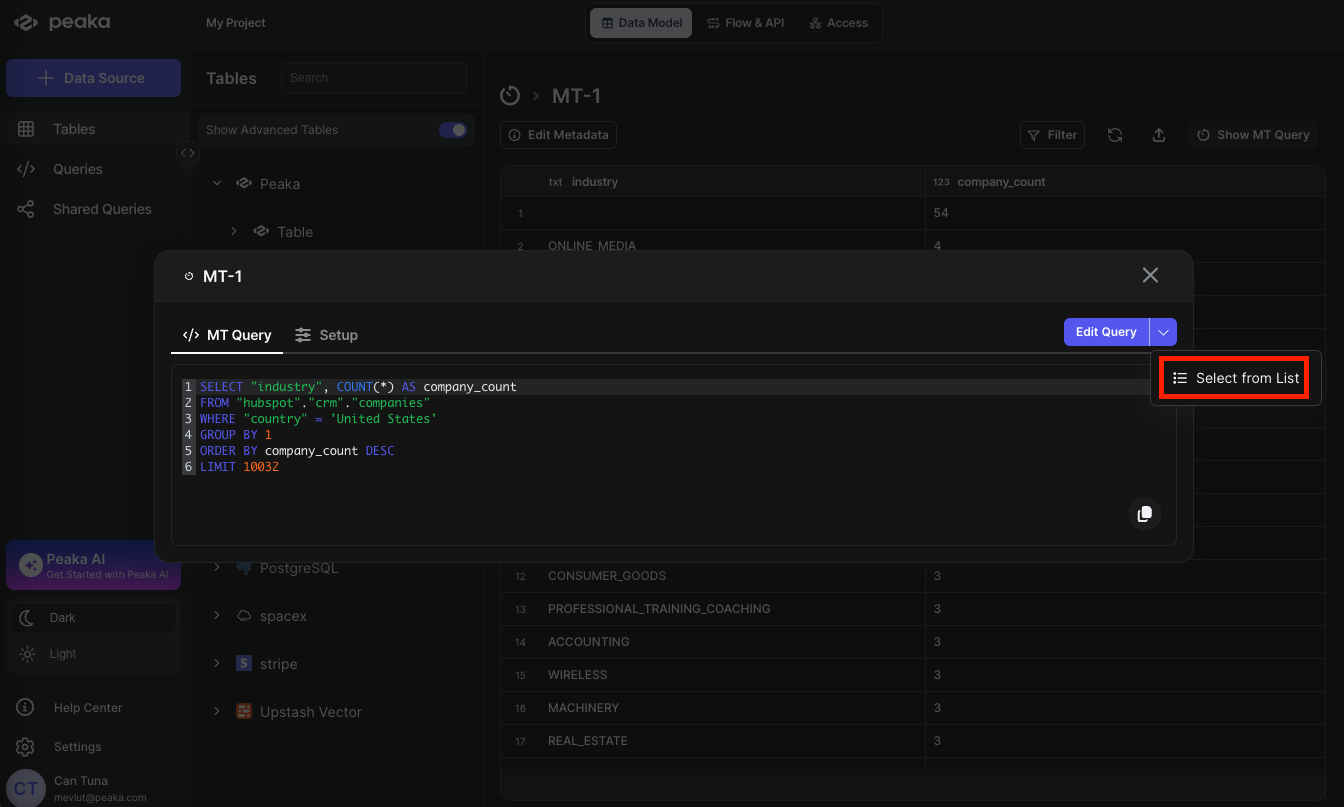
- Navigate your materialized query in the right side panel under the “Tables” section and click on the Show MT Query button.
- A modal will open displaying the materialized query details. Click on the dropdown button next to the Edit option and select “Select from List” from the dropdown menu.
- A modal will open displaying the list of queries. Select the query you want to replace your materialized query with and click on the Update button.
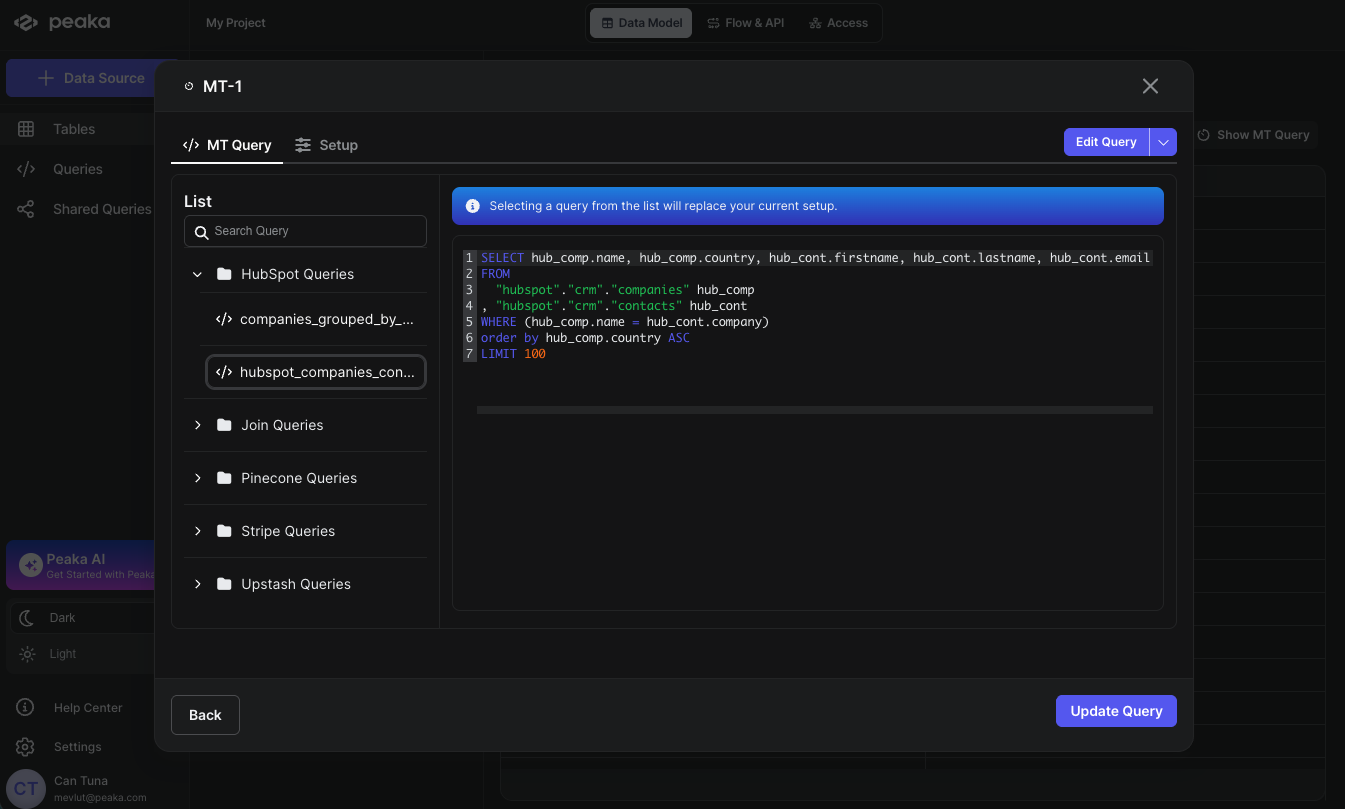
- Your materialized query will be replaced with the new query.
How to Update Materialized Query Settings
You can modify various settings for your materialized queries to optimize performance and control refresh behavior.- Navigate your materialized query in the right side panel under the “Tables” section and click on the Show MT Query button.
- A modal will open displaying the materialized query details. Click on the Setup tab to access configuration options.
- You can modify the following settings:
- Name: Enter a descriptive name for your Materialized Query
-
Auto Update: Toggle this option to enable automatic refresh of your materialized data
When Auto Update is enabled, you can choose from two update strategies:
- At regular intervals: Updates the materialized query at specified minute intervals (e.g., every 15, 30, or 60 minutes)
-
Based on a schedule: Provides flexible scheduling options where you can define:
- Timezone
- Frequency options (daily, weekly, monthly, or specific dates)
-
Partitioning: Optionally configure table partitioning to improve query performance. Materialized queries support partitioning by specifying transforms over the table columns. A partition is created for each unique tuple value produced by the transforms. Identity transforms are simply the column name. Other transforms include:
year(order_date)- Creates a partition for each year. The partition value is the integer difference in years between order_date and January 1 1970.month(order_date)- Creates a partition for each month of each year. The partition value is the integer difference in months between order_date and January 1 1970.day(order_date)- Creates a partition for each day of each year. The partition value is the integer difference in days between order_date and January 1 1970.hour(created_at)- Creates a partition for each hour of each day. The partition value is a timestamp with the minutes and seconds set to zero.bucket(account_number, 10)- Hashes data into 10 buckets. The partition value is an integer hash of account_number, with a value between 0 and 9 inclusive.truncate(country, 2)- The partition value is the first 2 characters of the country field.
partitioning = ARRAY['column1', 'column2']or with transforms likepartitioning = ARRAY['year(order_date)', 'country']. -
Sort by: Configure sorted files as a performance improvement. Data is sorted during writes within each file based on the specified array of one or more columns. Sorting is particularly beneficial when the sorted columns show high cardinality and are used as filters for selective reads. You can specify sort columns using the format
sorted_by = ARRAY['column1', 'column2']. For example, to sort by order_date, usesorted_by = ARRAY['order_date']. You can also explicitly configure sort directions and null ordering likesorted_by = ARRAY['order_date DESC NULLS FIRST', 'order_id ASC NULLS LAST']. Sorting can be combined with partitioning on the same column for optimal performance.
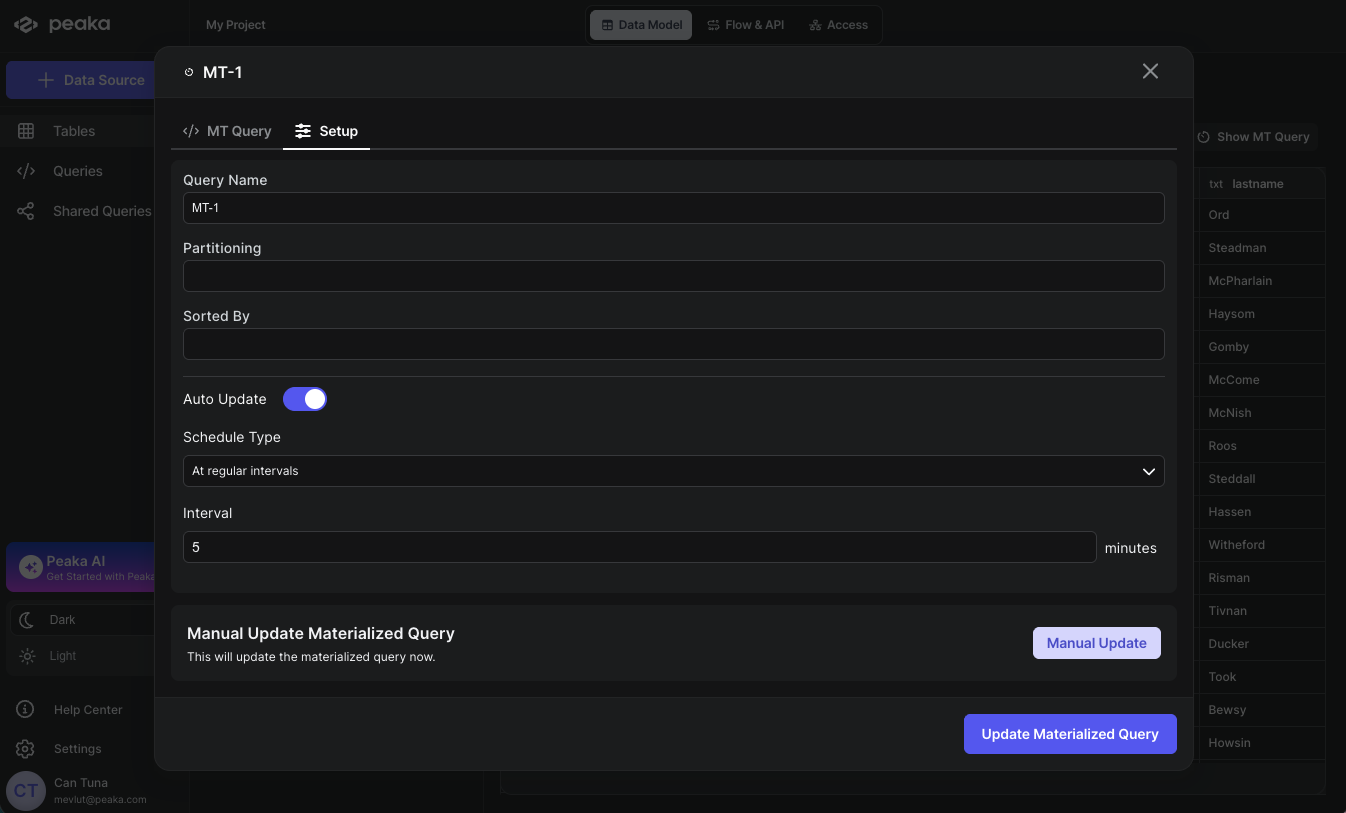
- Then click on the Update Materialized Query button to update the materialized query settings.
How to Update Materialized Query Manually
You can manually refresh your materialized query to get the latest data without waiting for the scheduled update.- Navigate to your materialized query in the right side panel under the “Tables” section and click on the Show MT Query button.
- A modal will open displaying the materialized query details. Click on the Setup tab to access configuration options.
- Click on the Manuel Update button to update the materialized query manually.