Accessing Organization Members
- Log in to your Peaka account.
- Click on the three-dots button (ellipsis icon) associated with the organization and click on the “Settings” option.
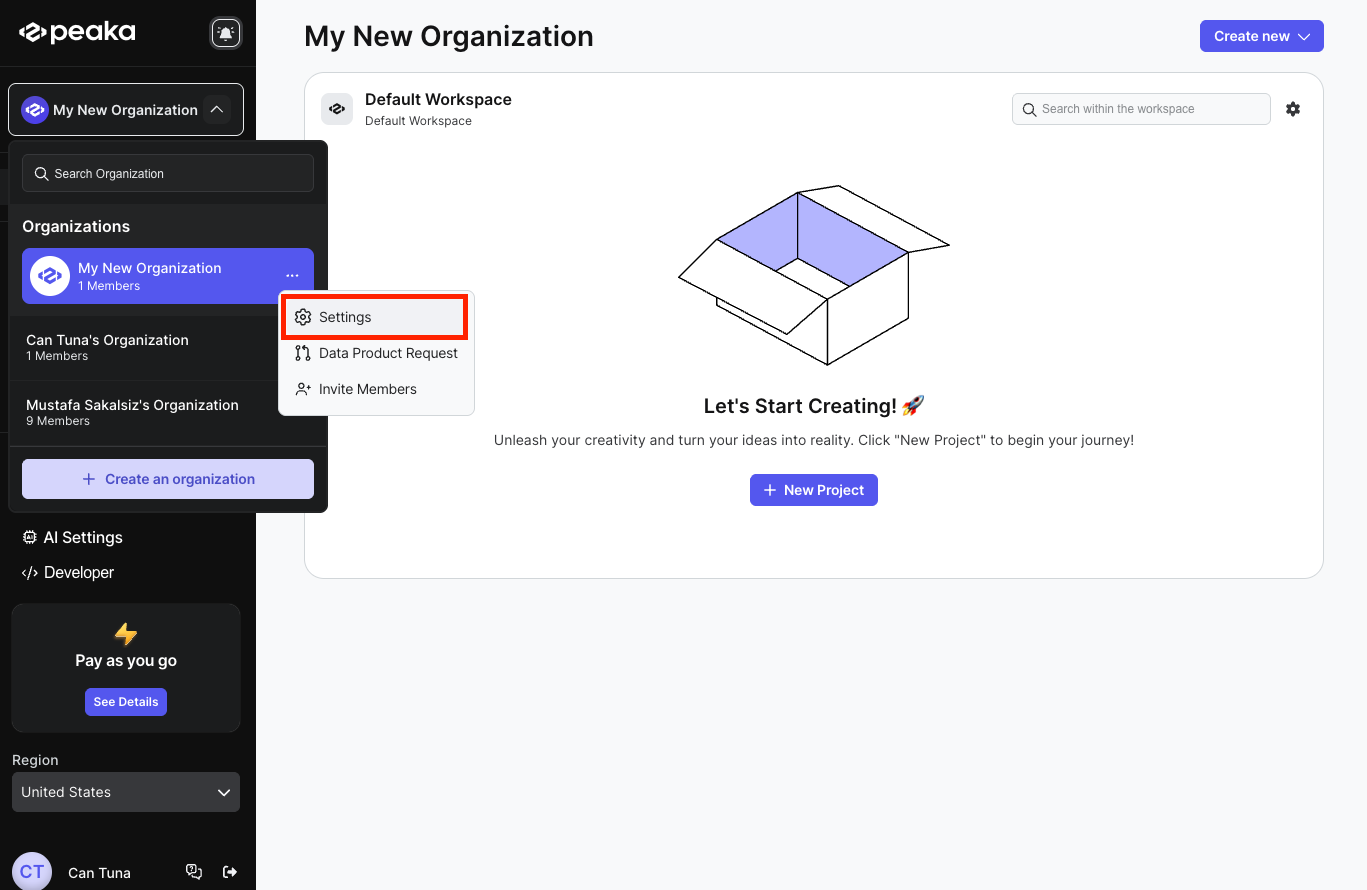
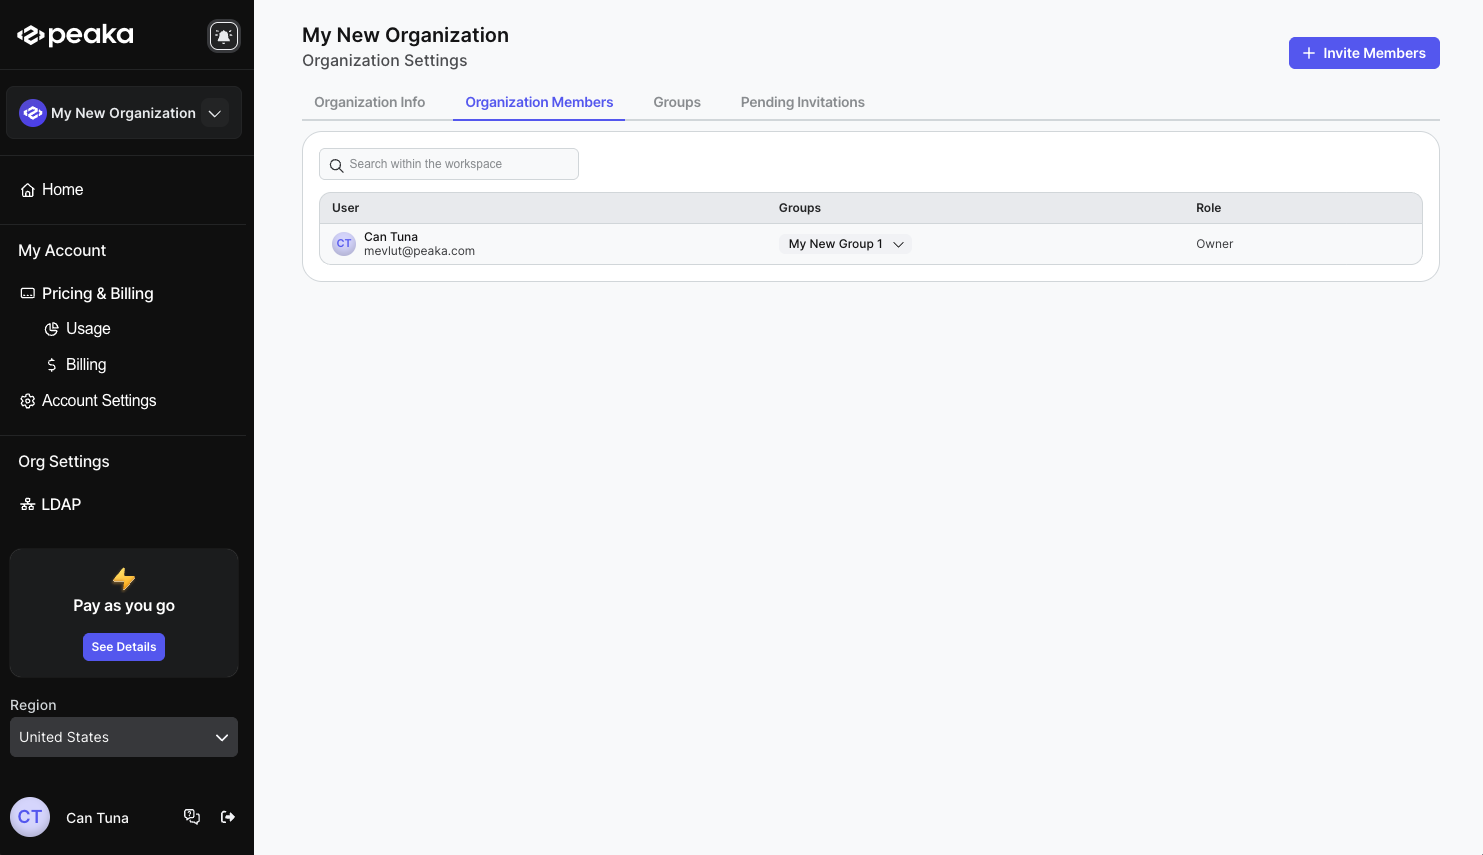
- Click on the “Organization Members” tab on the tabs list.
Inviting a member to the organization
- Click on the “Invite Member” button on the top right corner of the page.
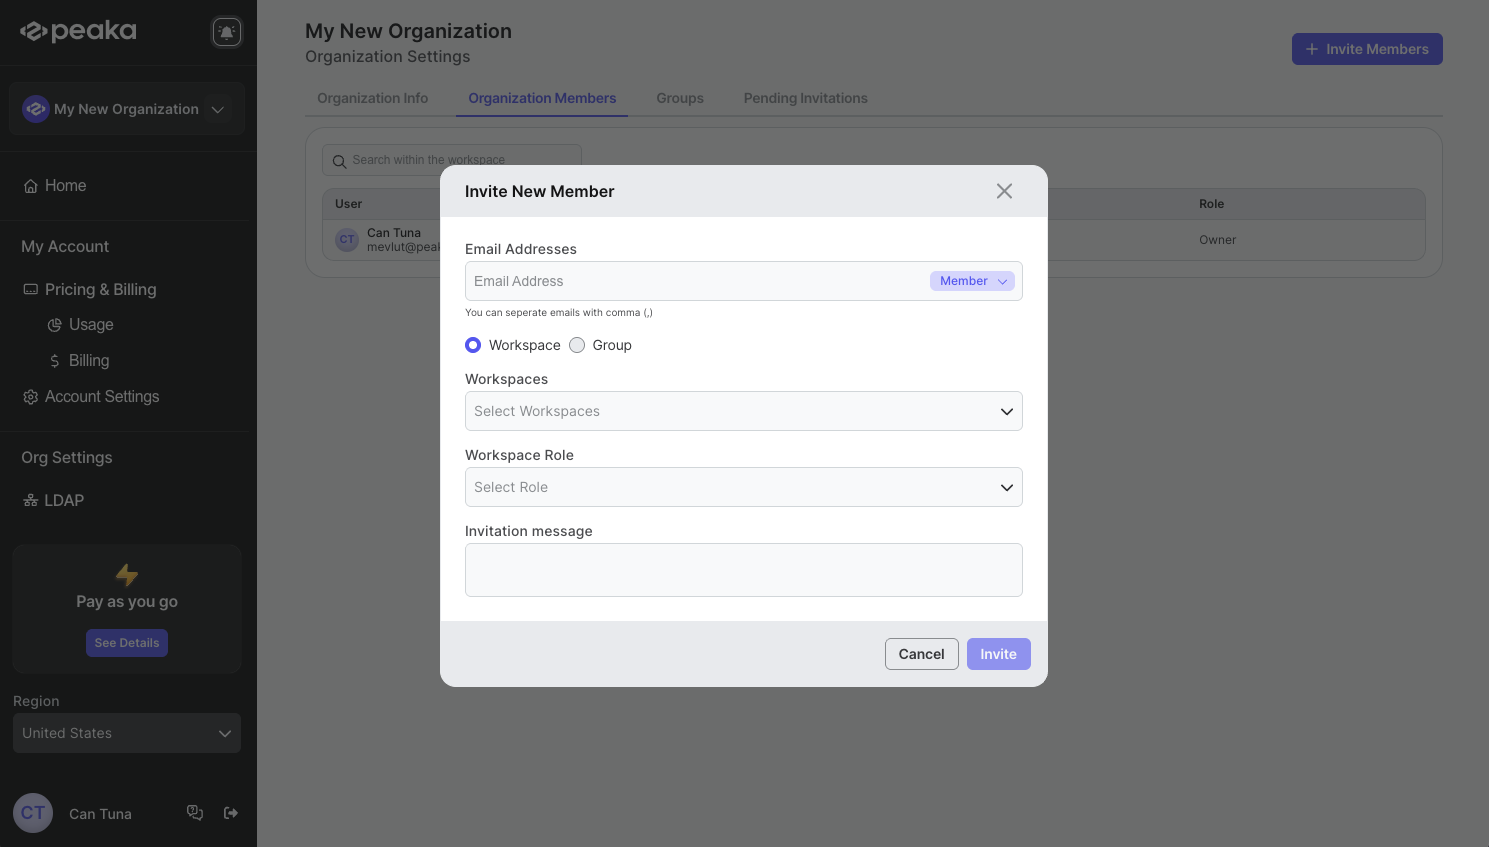
- Enter the email address of the member you want to add and select their adding type (Workspace / Group), select roles and add message if you want to. Then click on the “Invite” button.
 That’s it. After accepting the invitation, the member will be added to the organization.
Cancelling an invitation
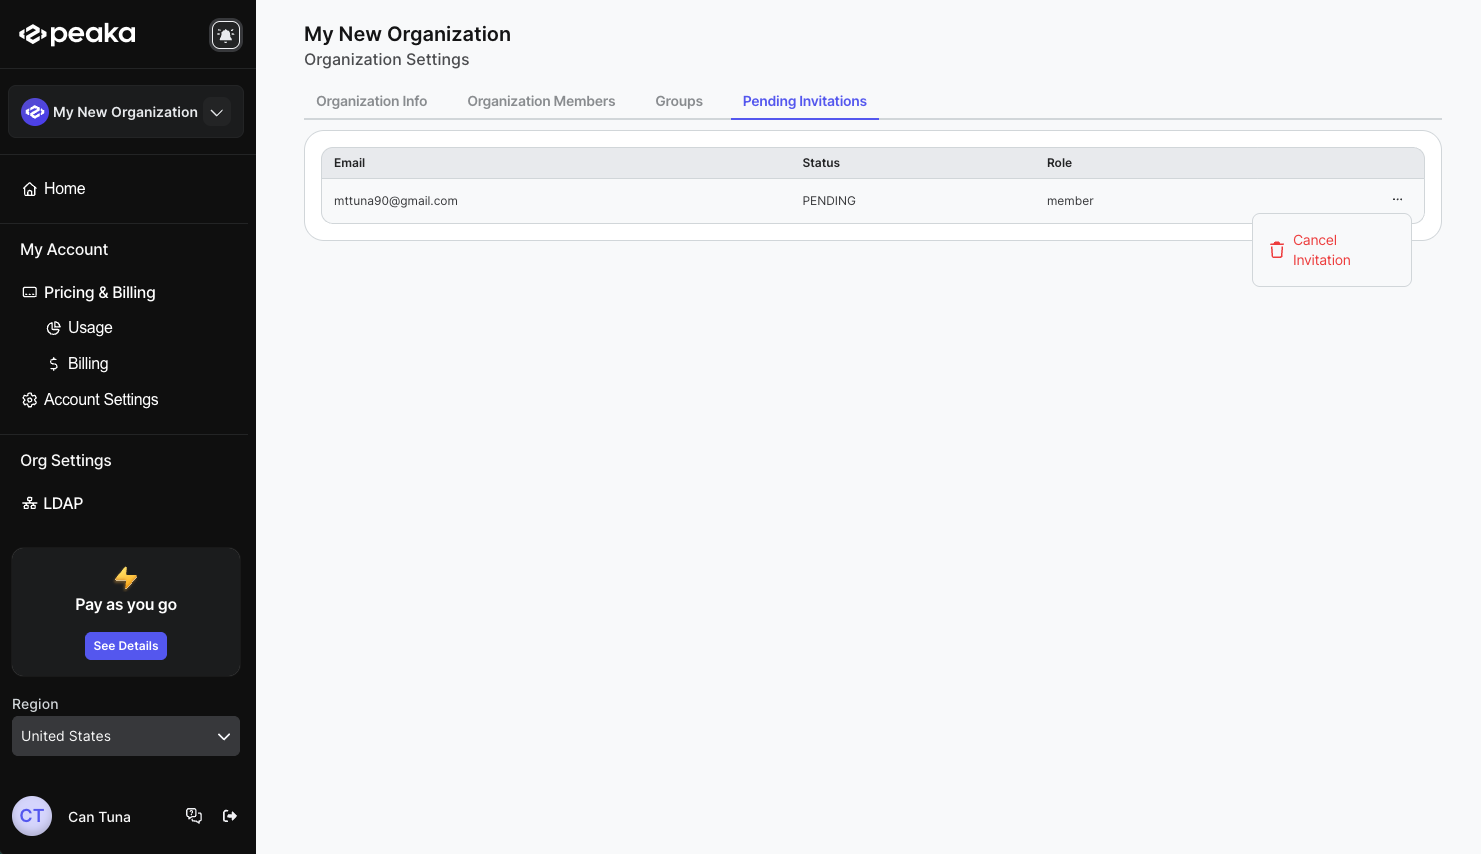
- After inviting a member, you can cancel the invitation. Click on the “Pending Invitations” tab to see the pending invitations.
- Click on the three-dots button (ellipsis icon) associated with the invitation and click on the “Cancel” option.
- Click on the “Cancel” button on the confirmation modal.
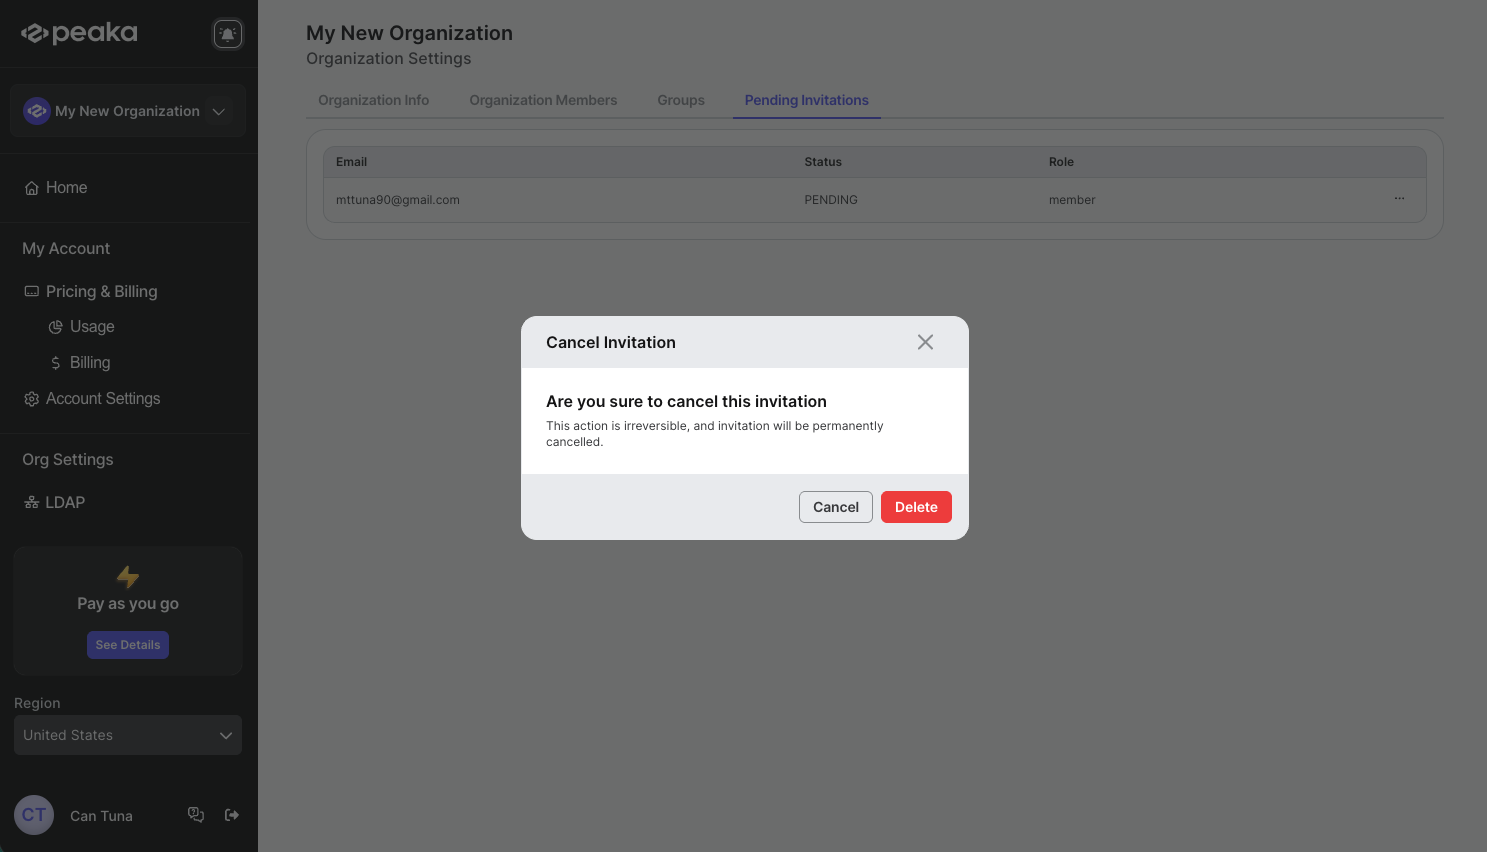 That’s it. The invitation will be cancelled.
Updating a member’s role
- Click on the member’s role to open the role selection dropdown and select the new role.
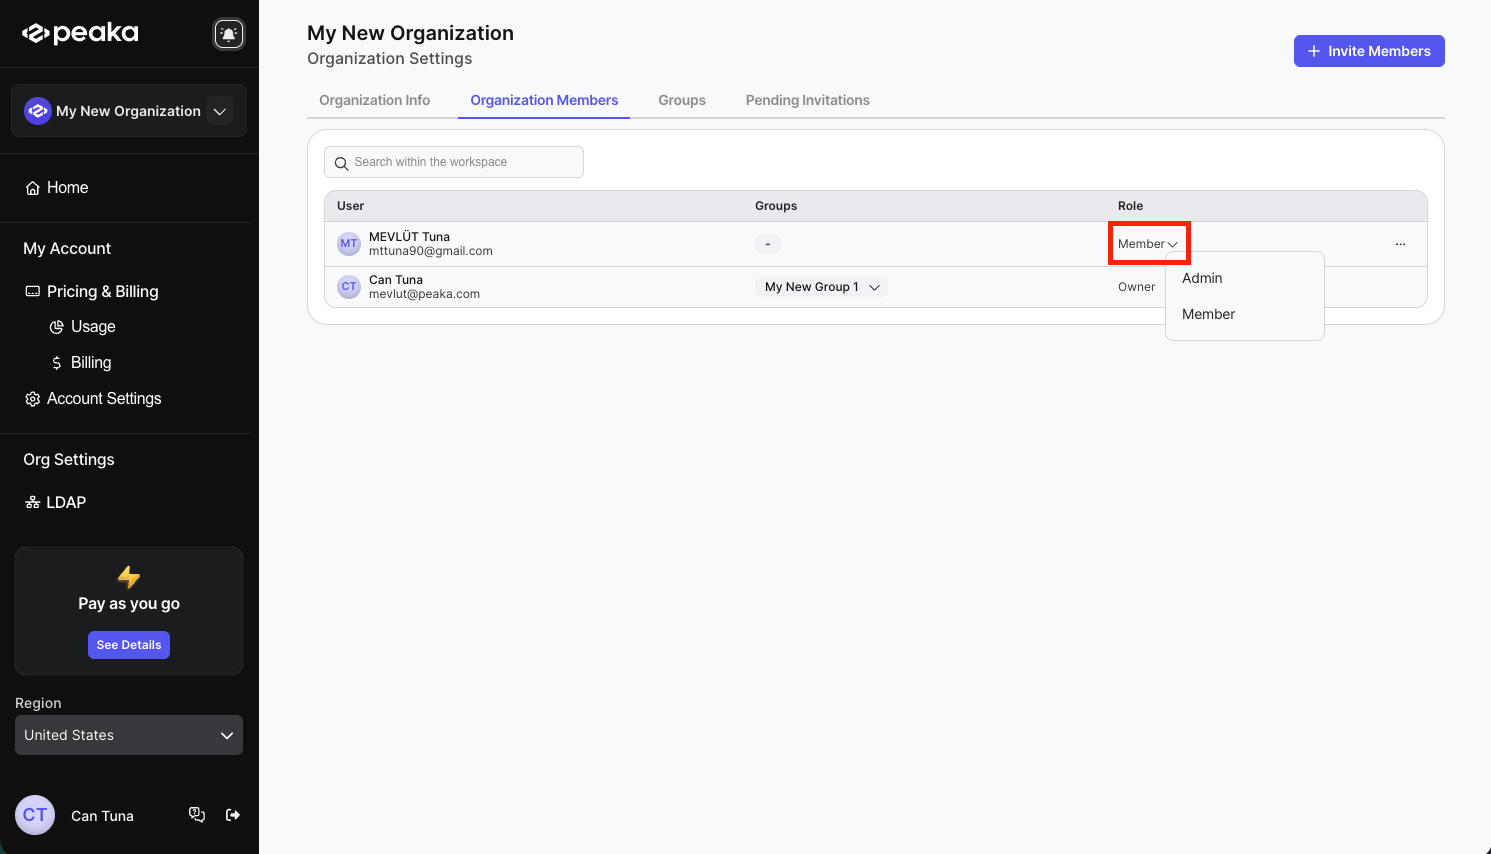 That’s it. The member’s role will be updated.
Updating a member’s Group
Note: If the member is added to a group, you can update the group of the member.- Click on the member’s group to open the group selection dropdown and select the new group.
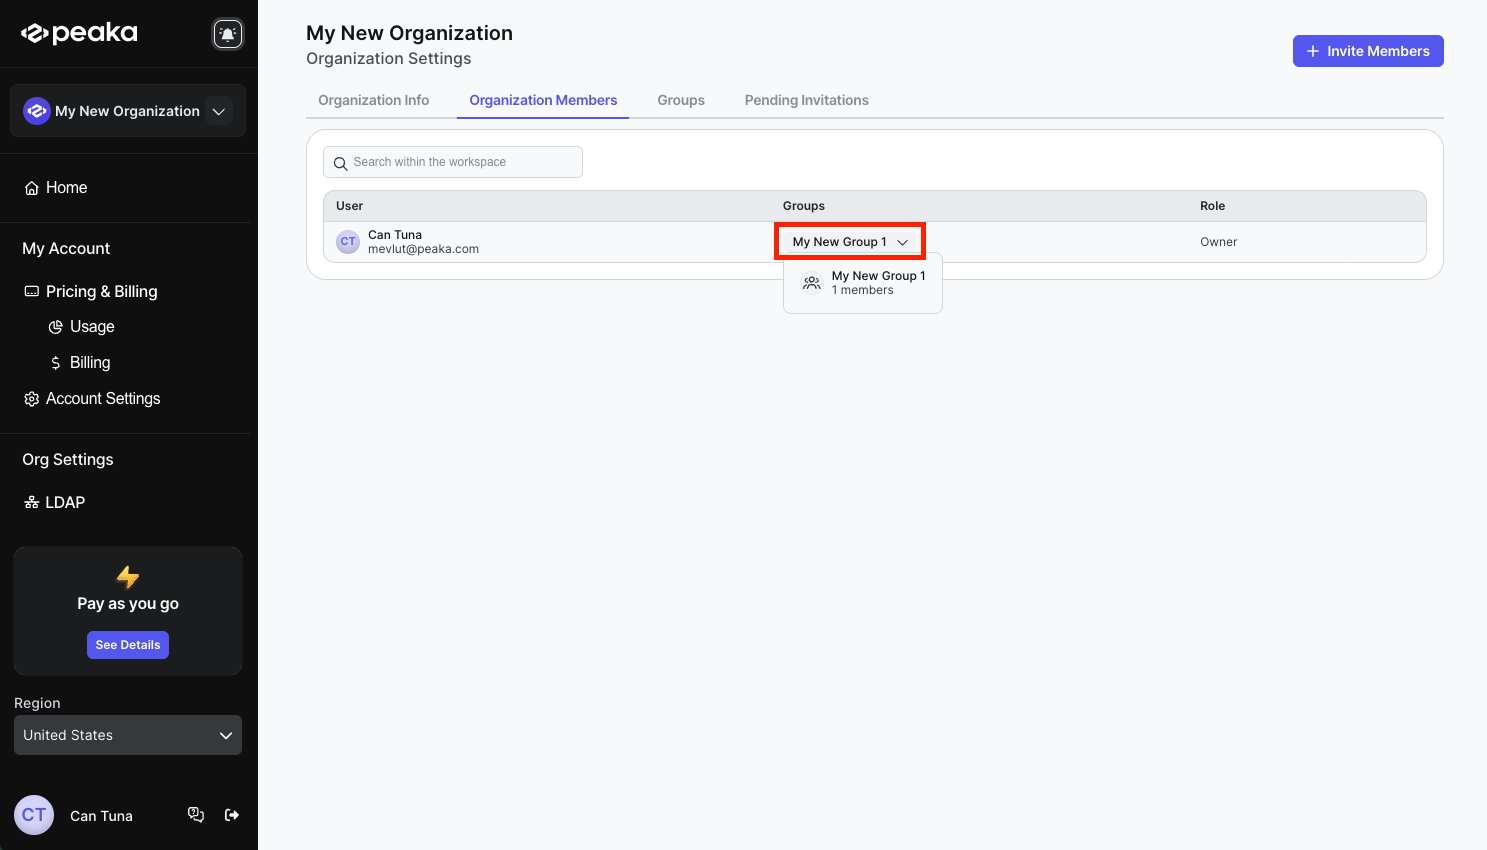 That’s it. The member’s group will be updated.
Removing a member from the organization
- Click on the three-dots button (ellipsis icon) associated with the member and click on the “Remove” option.
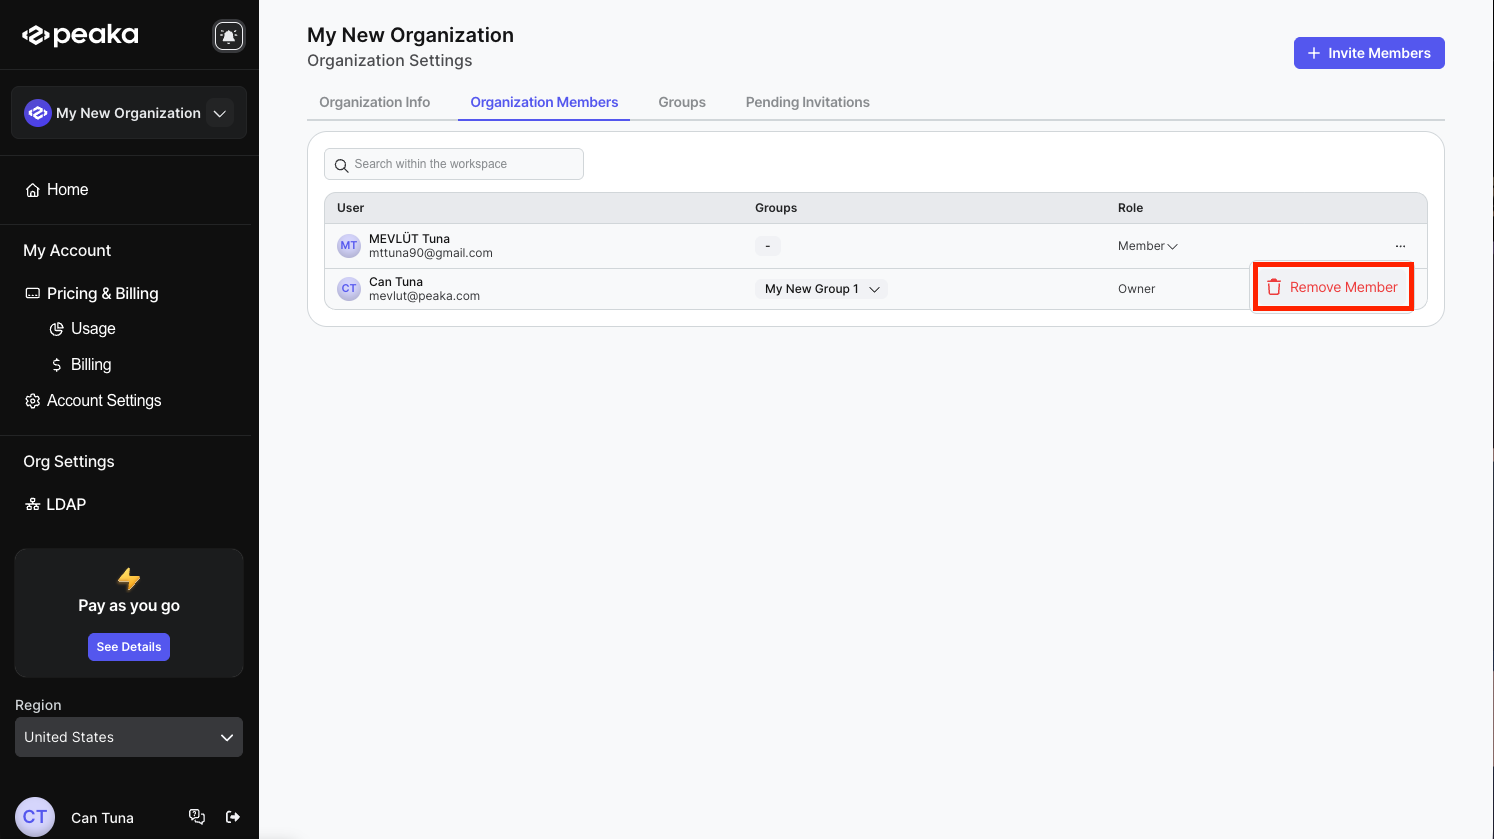
- Click on the “Remove” button on the confirmation modal.
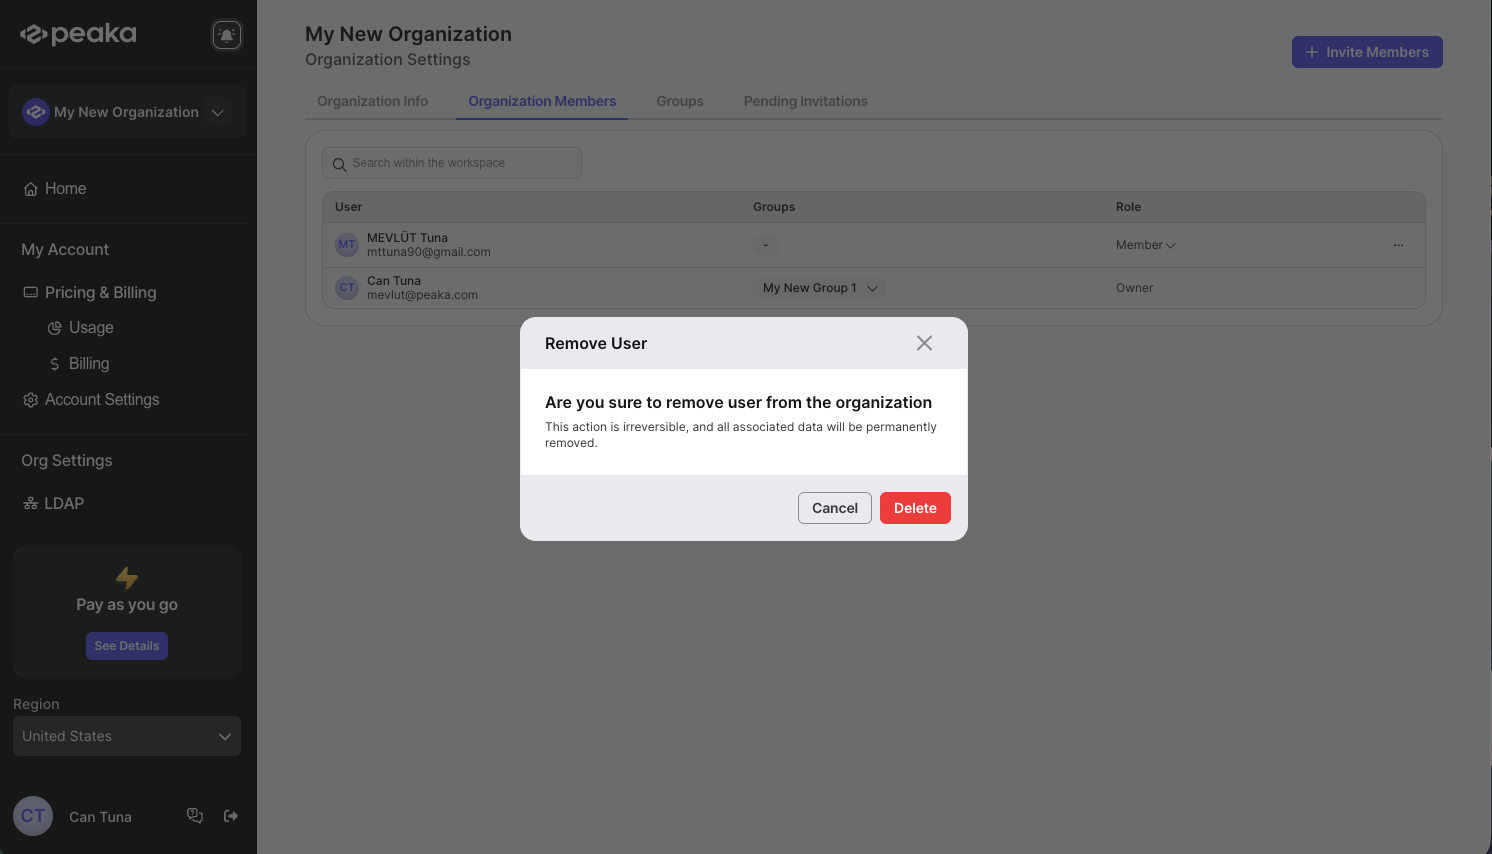 That’s it. The member will be removed from the organization.