Prerequisites
Before you start, you will need the following information from SingleStore.- User
- Password
- Host
- Port
- Database Name
- Go to the SingleStore website and log in to your account if you’re not already logged in.
- Create a new workspace on SingleStore. Please note that this step may take some time.
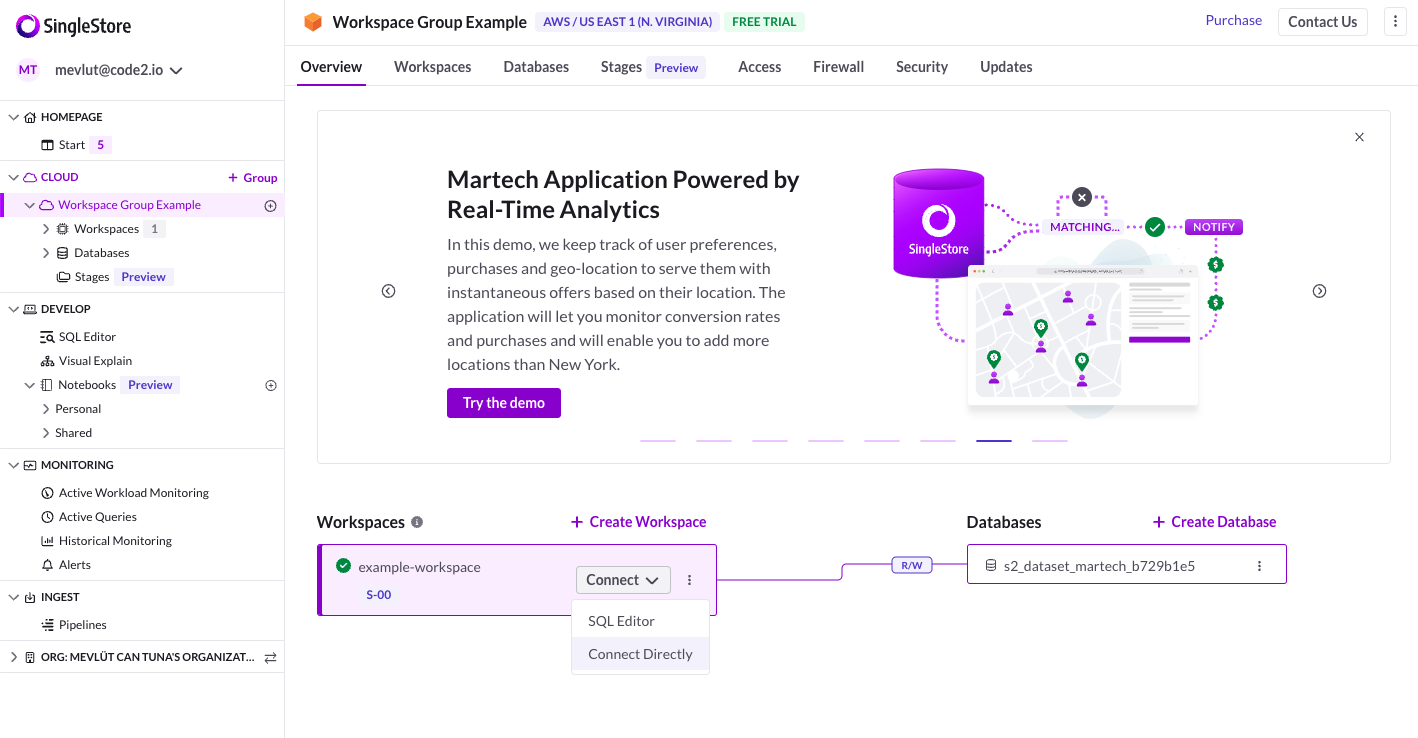
- Click the “Connect” button and select “Connect Directly.” This will take you to the SingleStore dashboard.
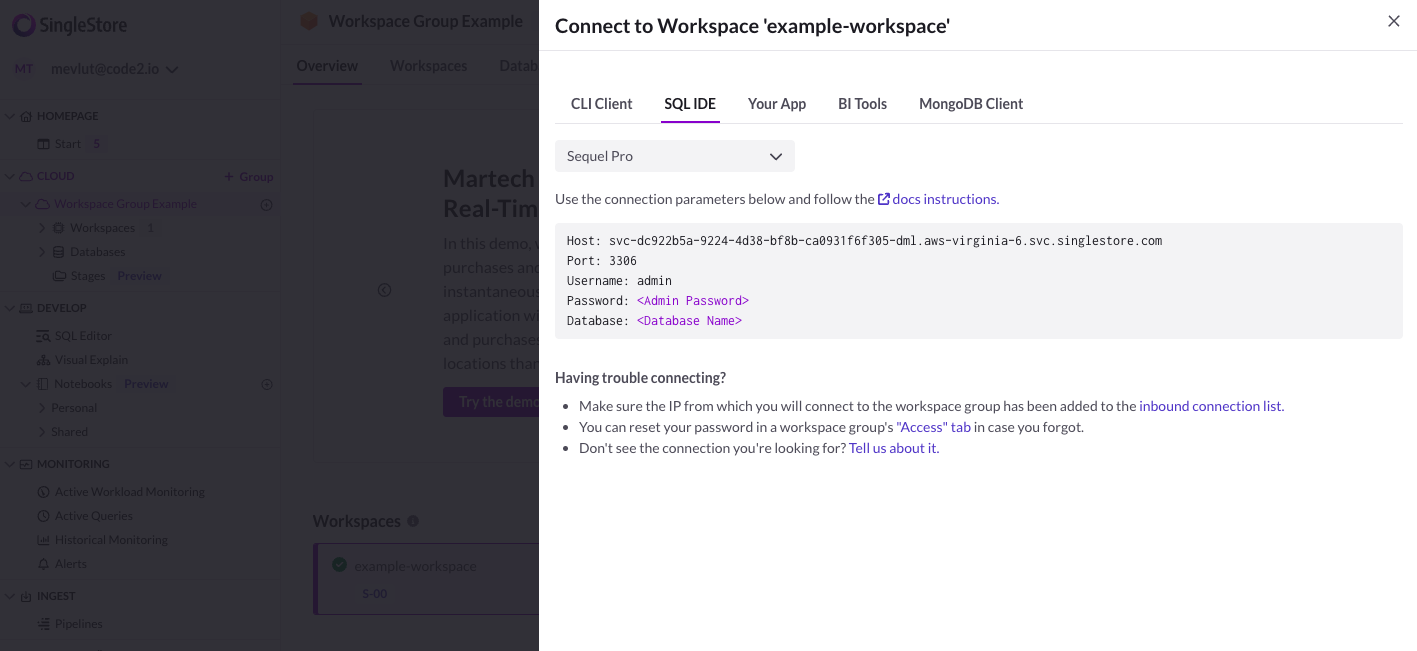
- Click on the “SQL IDE” tab. Here, you will find your user name, port, and host.
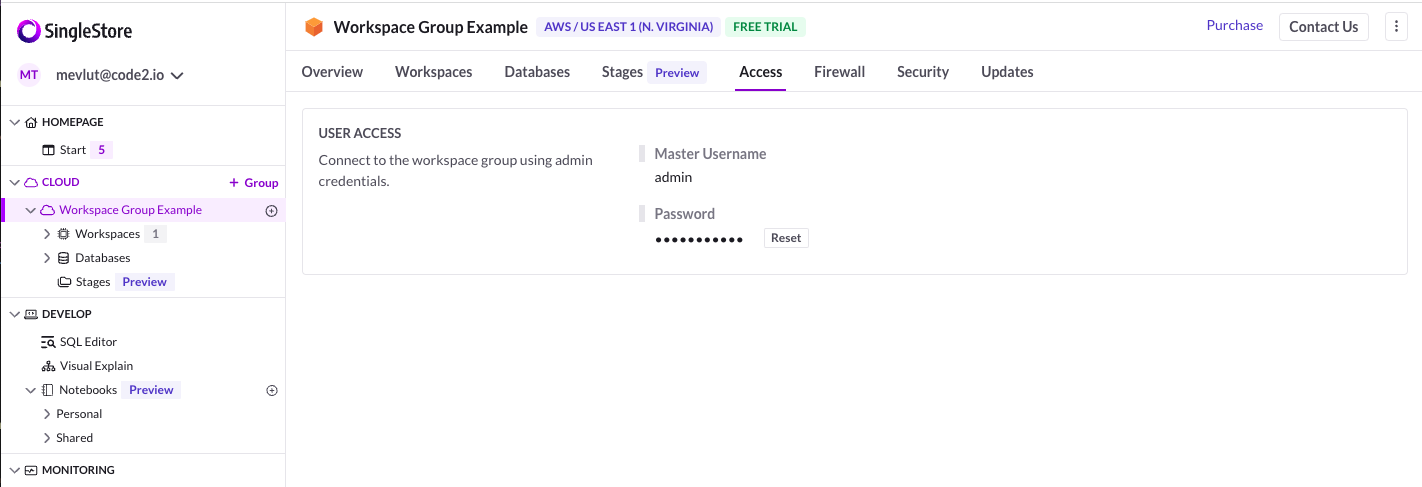
- Select the “Access” tab. Here, you will find your password. You can reset your password if needed.
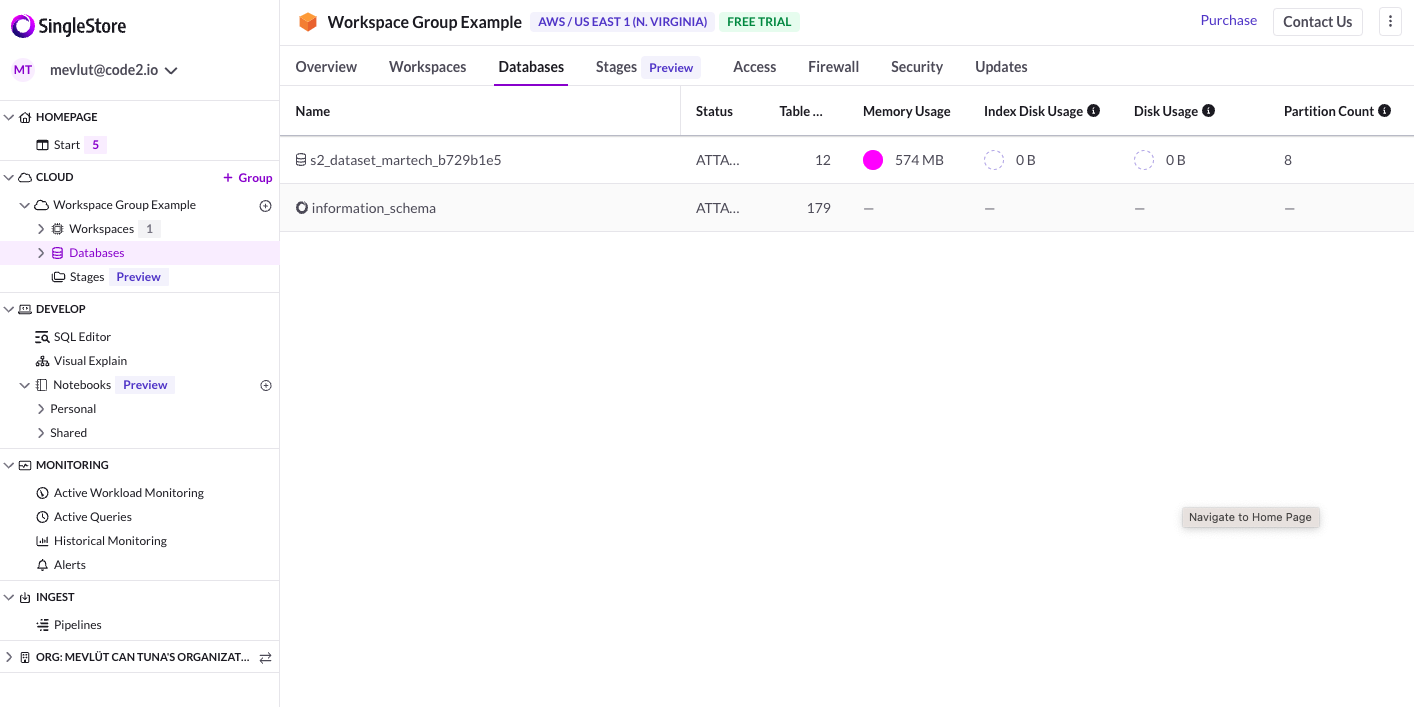
- Select the “Database” tab and copy your database name.
Connecting SingleStore to Peaka
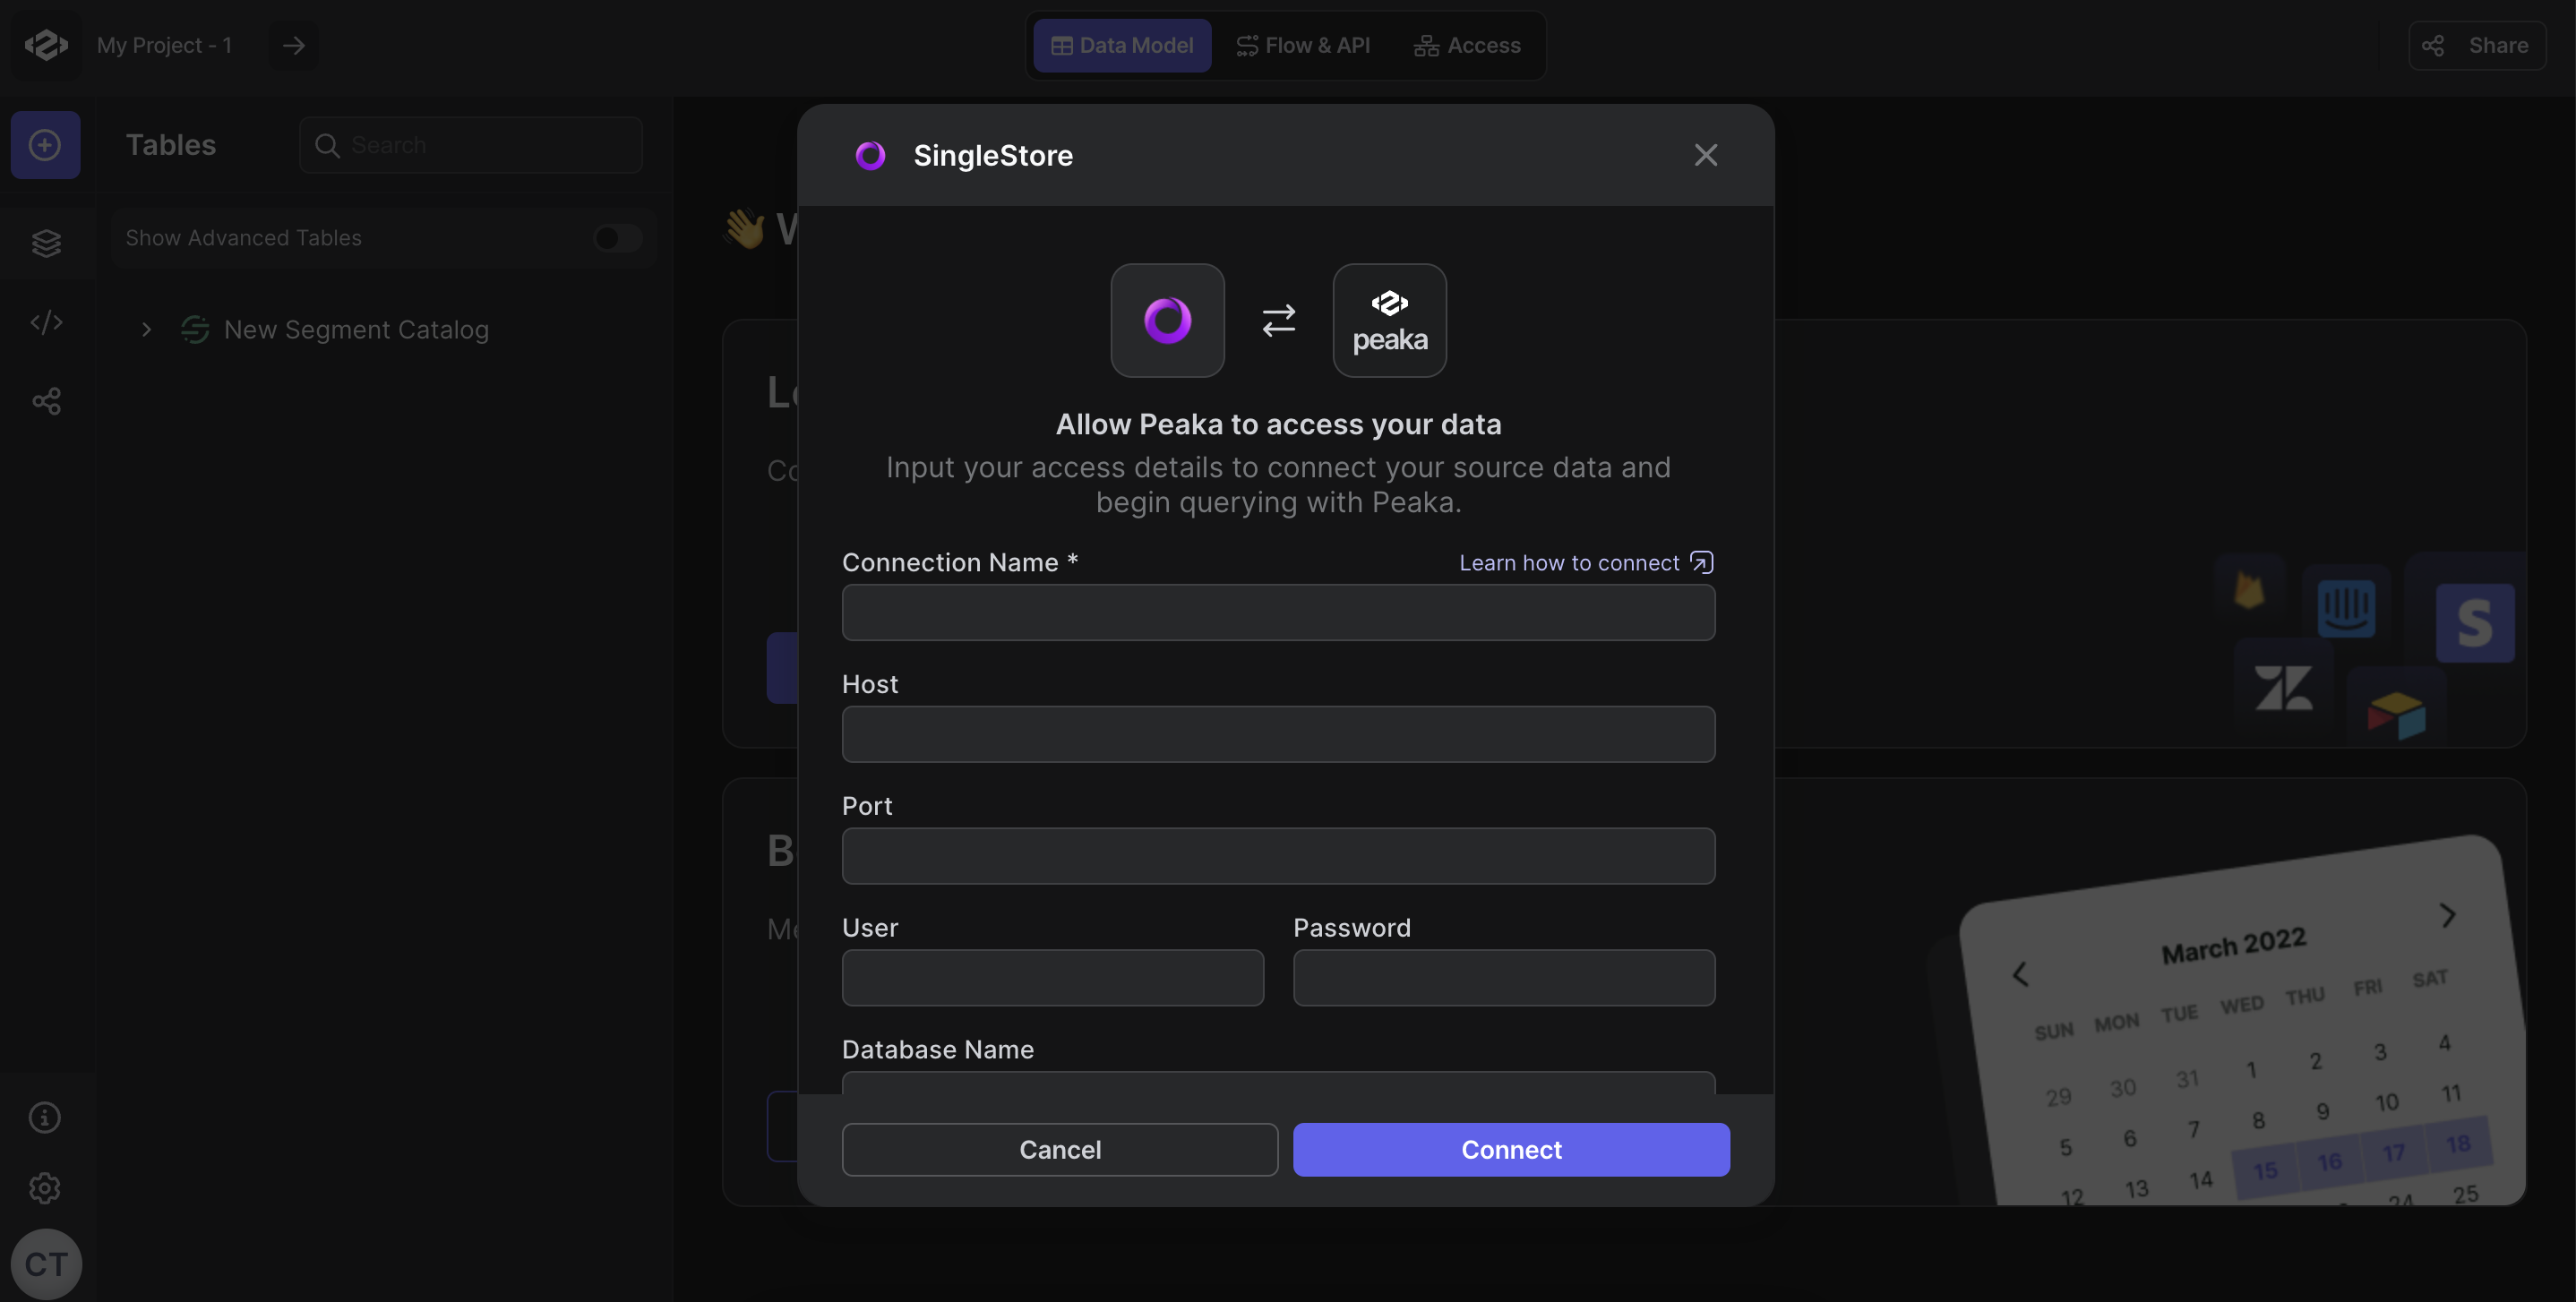
Now that you have your requirements, you can connect it to Peaka using the following steps:- Navigate to the data model page in Peaka.
- In the side menu bar, click the “New Data Source” button to initiate the connection process.
- In the modal that appears, select “SingleStore” as your data source
- Enter your data source name, user, password, host, port, and database name. Optionally, enable the “Connect through TLS” switch if SSL is active.
- Click “Authorize” to create your SingleStore data source.
 Congratulations! You’ve successfully created a data source between SingleStore and Peaka. You can now access and manage your SingleStore data seamlessly within the Peaka platform.