Prerequisites
Before you start, you will need the following information from Zendesk.- Domain
- Unique Identifier
- Secret
- Go to Zendesk website and sign in to your Zendesk account.
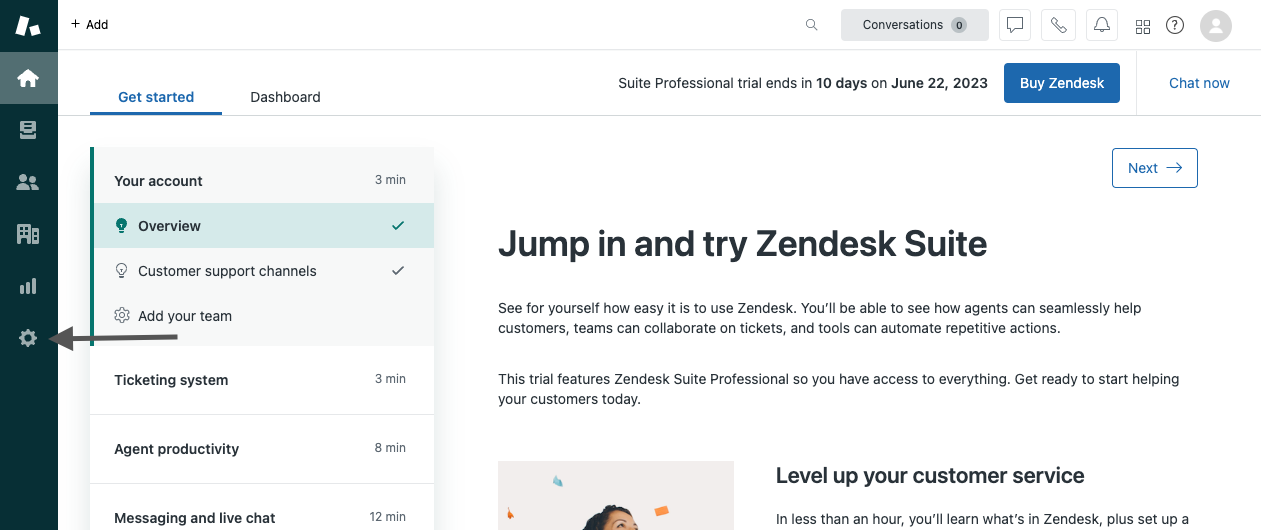
- Click on the settings icon, as shown in the image below, to access your account settings.
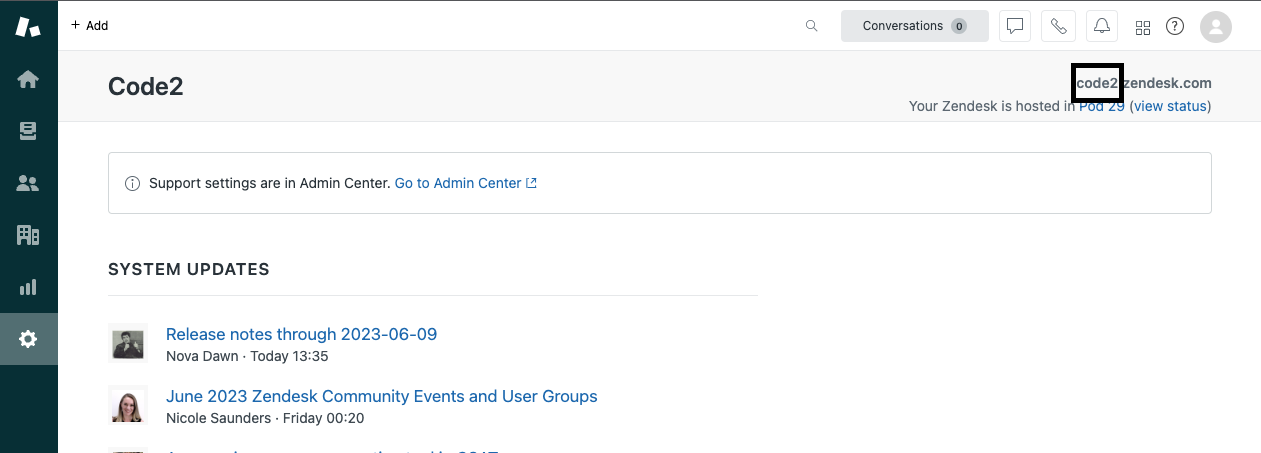
- On the Settings page, you will find your Zendesk domain. Make a note of it.
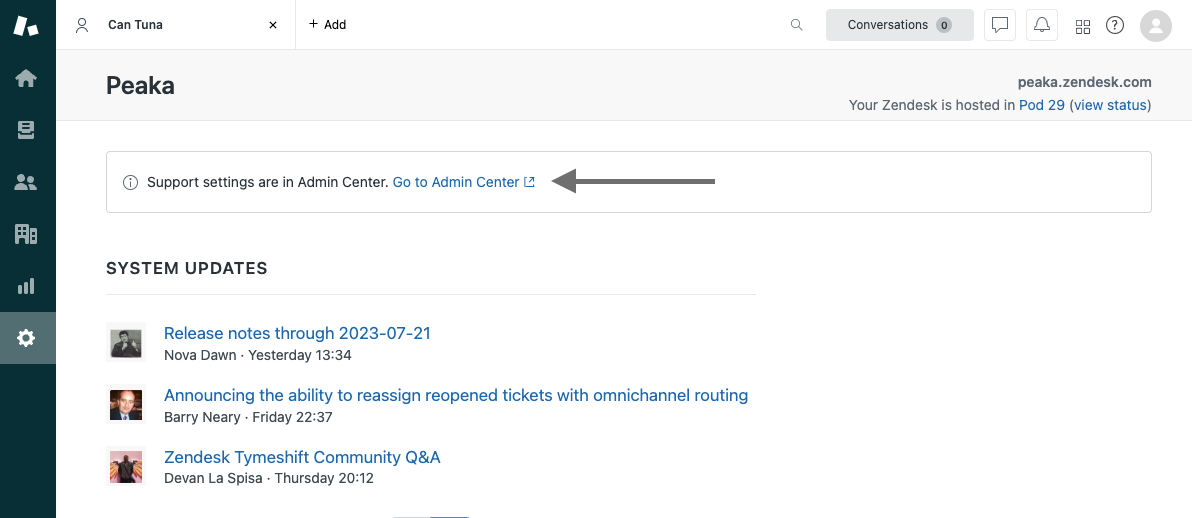
- Navigate to the Admin Center by clicking on it, as shown in the image below.
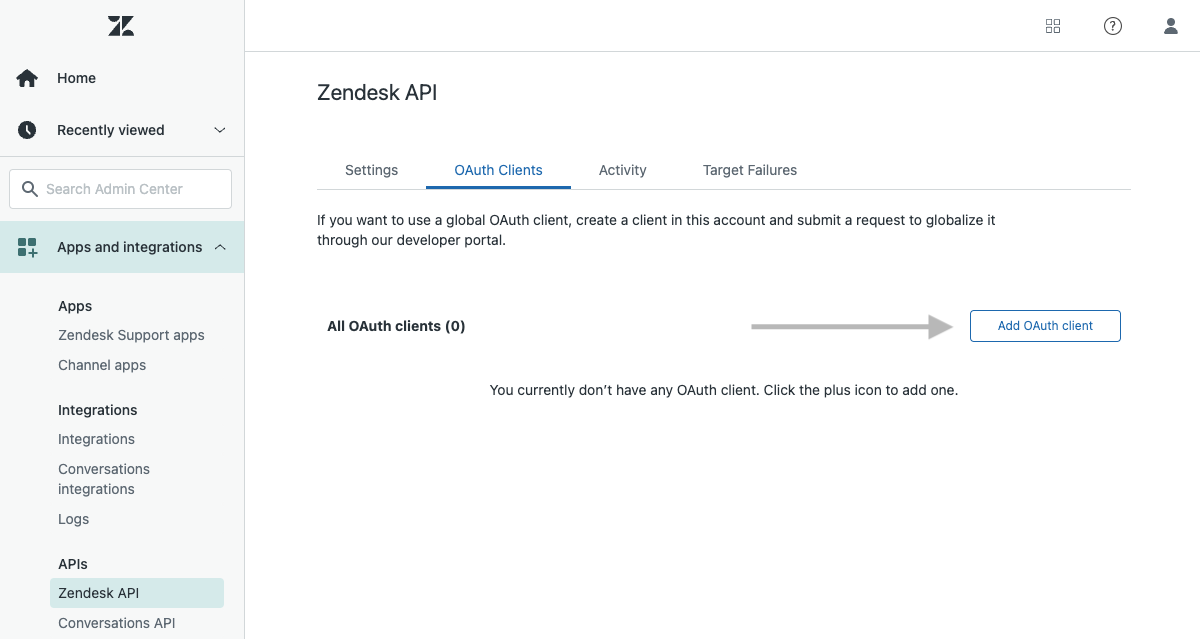
- Inside the Admin Center, go to the “Zendesk API” tab from the left menu and click the “Add OAuth Client” button.
- Begin by entering a distinct name and identifier for your integration. Following that, choose “Confidential” as the Client type. Proceed by inserting the following URL for the Redirect URLs parameter:
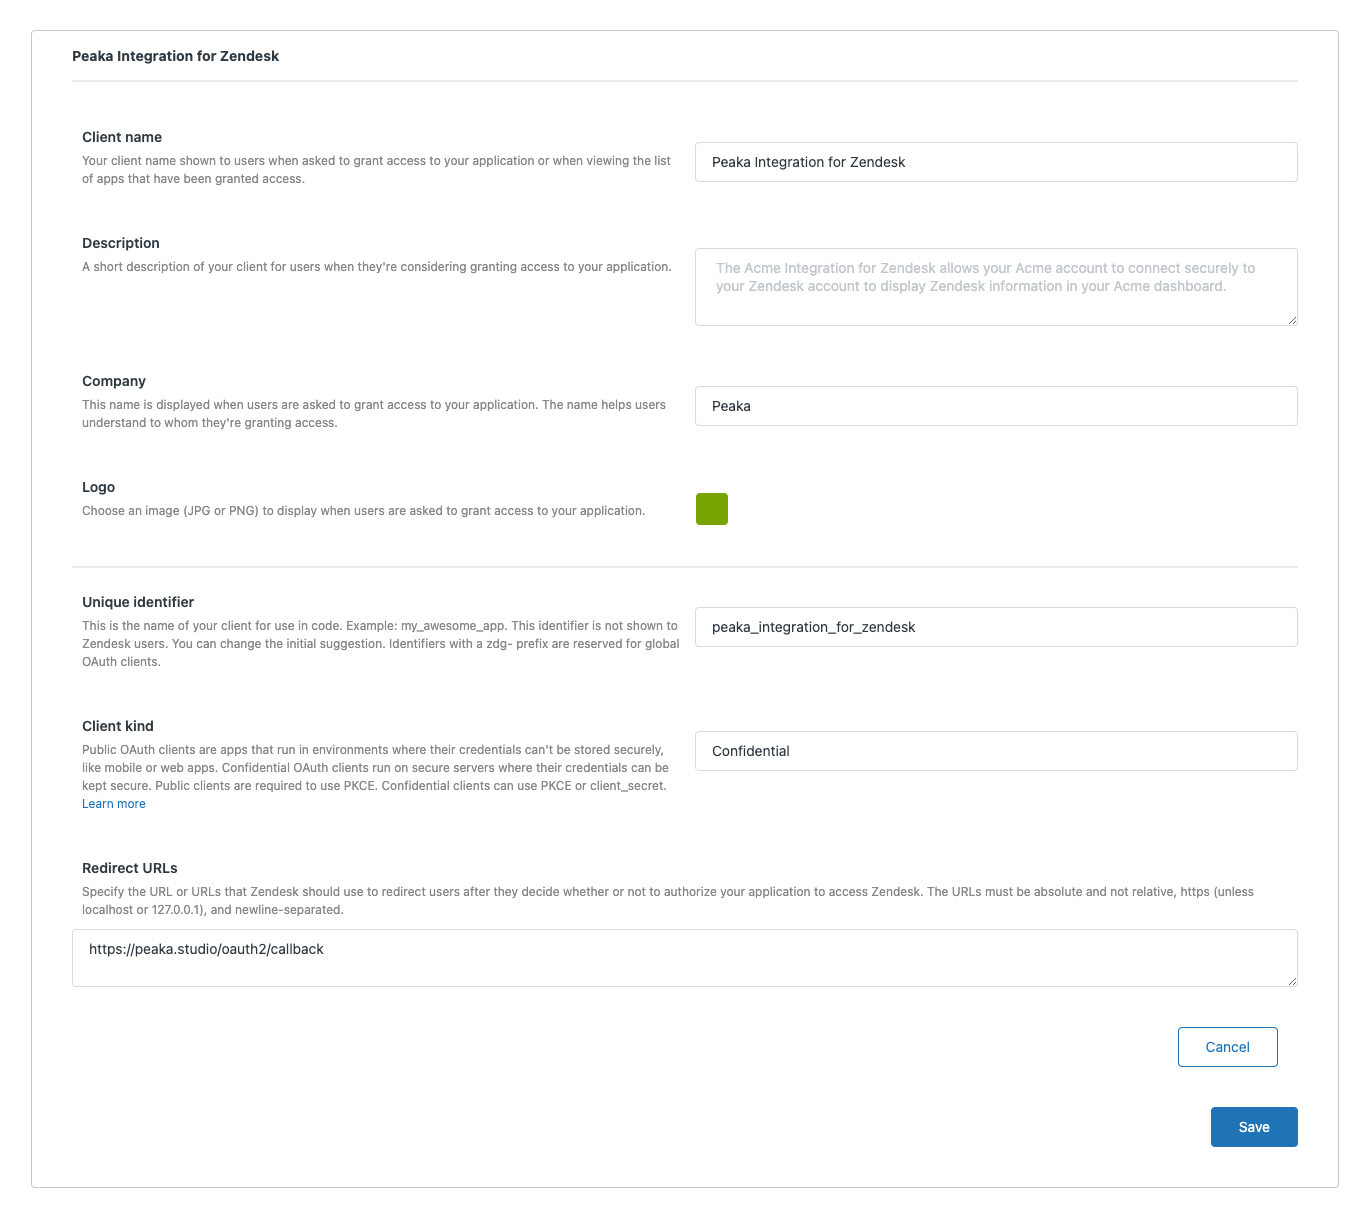
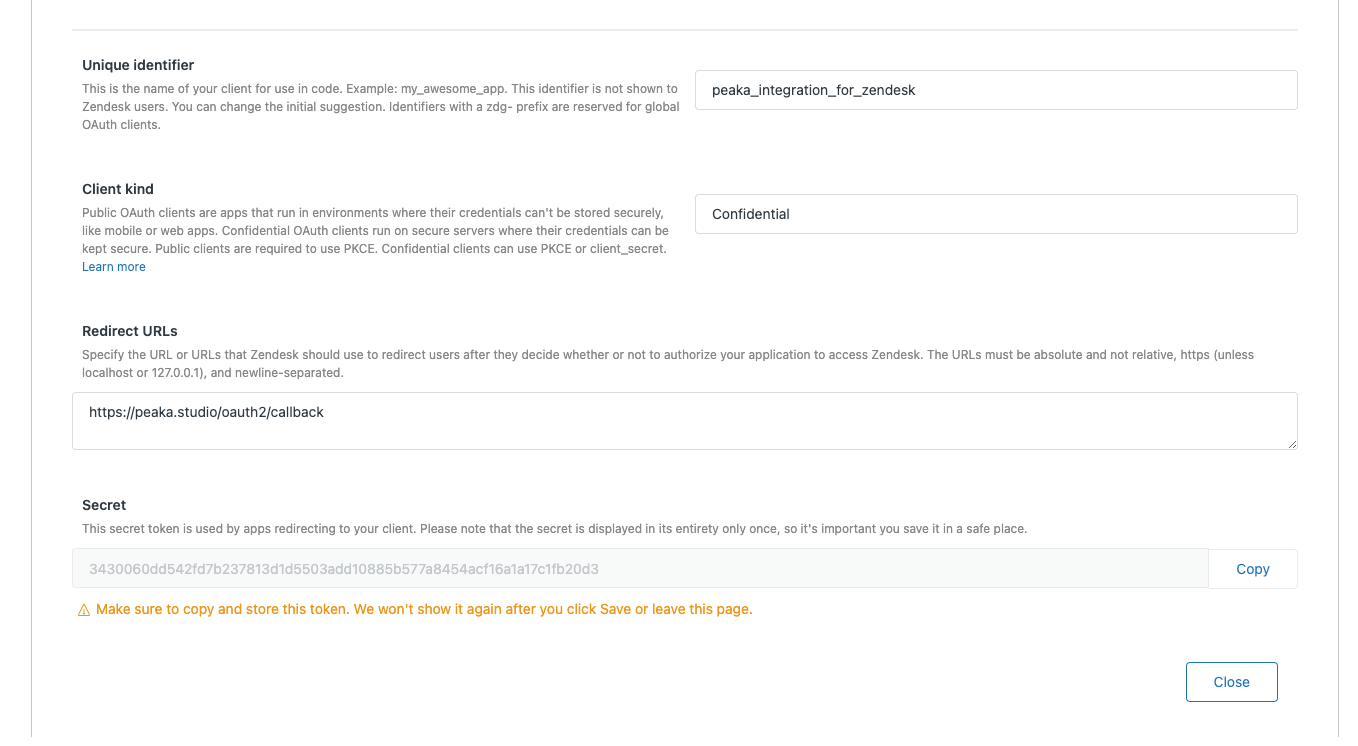
- Next, click the save button to establish your OAuth client. Upon creation, Zendesk will produce a Secret token for you. It’s crucial to record this for future reference.
Connecting Zendesk to Peaka
Now that you have your requirements, you can connect it to Peaka using the following steps:- Navigate to the data model page in Peaka.
- In the side menu bar, click the “New Data Source” button to initiate the connection process.
- In the modal that appears, select “Zendesk” as your data source.
- Enter a name for your data source and paste values that you got before.
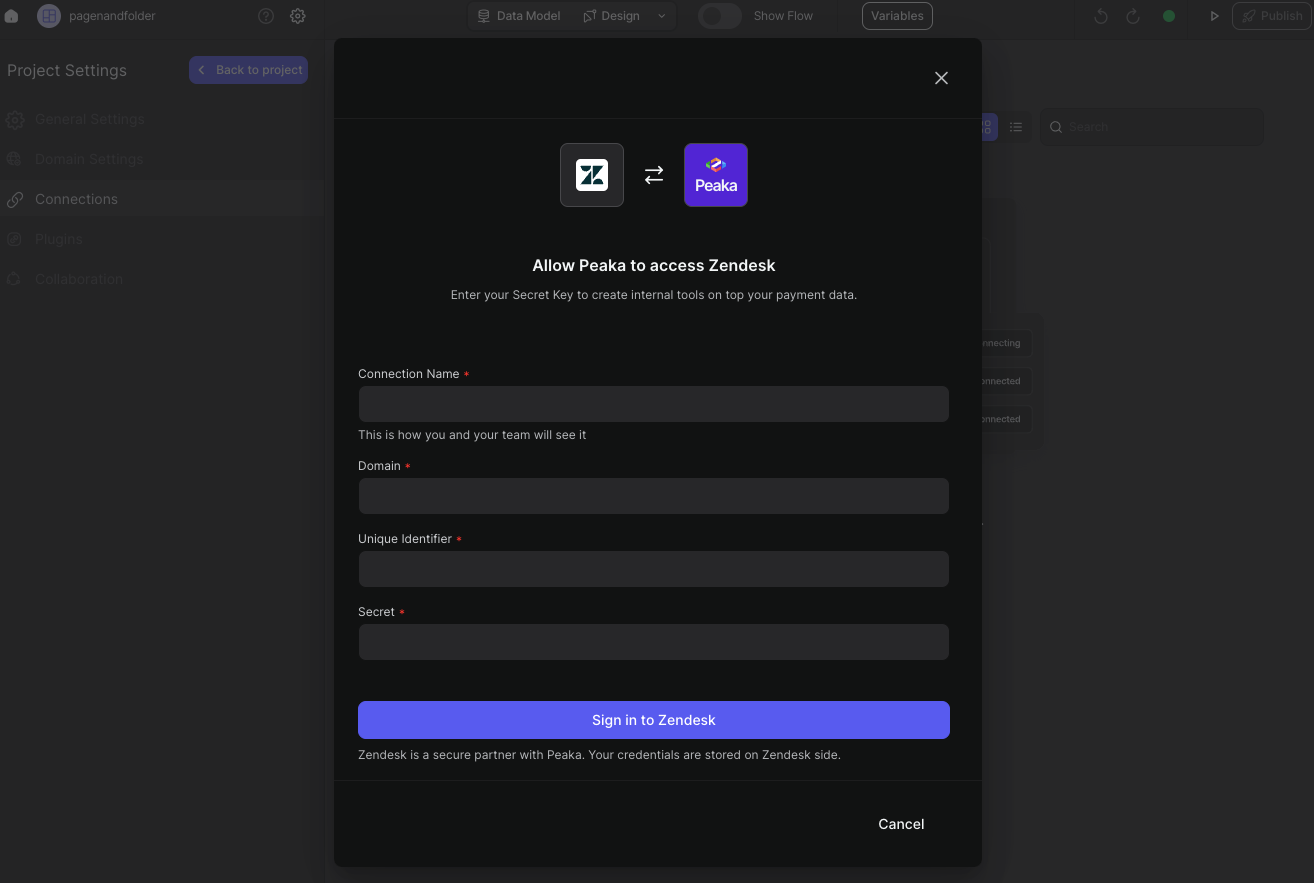
- Click “Authorize” to create your Zendesk data source.